What’s the most boring part of Open Source Intelligence? Most OSINT practitioners (including me) usually enjoy the research phase of an assignment the most. Collecting data and finding new lines of enquiry is fun, but writing it all up at the end is usually dull. Well-written reports are a vital part of the OSINT process, but no one gets very excited about putting them together.
You might make use of some of the many Python tools that help to automate common OSINT collection tasks, but you may not know that it’s also possible to use Python to automate large parts of the reporting process. If something is boring and repetitive, it’s much better to learn how to automate it! To that end, this article will show how to build a Python script that can be used to automate a large part of the reporting process.
Python & Microsoft Word
Python-docx-template is a Python library that takes data from a Python dictionary and neatly publishes it into a Microsoft Word document using a pre-made template populated with Jinja tags. This means that any data we want to use in our report can be converted to a Python dictionary and then used to populate a report template. Python-docx-template matches the keys from our dictionary to the tags in the Word document so we don’t need to type it all out.
To start using Python to automate your reporting, you’ll need access to a Python IDE to write your code (like Pycharm, VSCode, or Atom etc) and access to Microsoft Word. (Unfortunately Google Docs doesn’t support this method yet.)
A Simple Example
To produce an MS Word document with Python we need a Python dictionary containing our data, and then an MS word template with Jinja tags that correspond the keys from the dictionary. Here’s a simple dictionary to begin with:
subject = {
    'first_name': 'Steven',
    'second_name': 'Harris',
    }
This basic dictionary subjectfirst_namesecond_name
Next we need to create an MS Word template for our report. We will add in Jinja tags with names that match the keys from the dictionary. To insert Jinja tags, we just need to use the dictionary keys and wrap them with double curly braces like this:
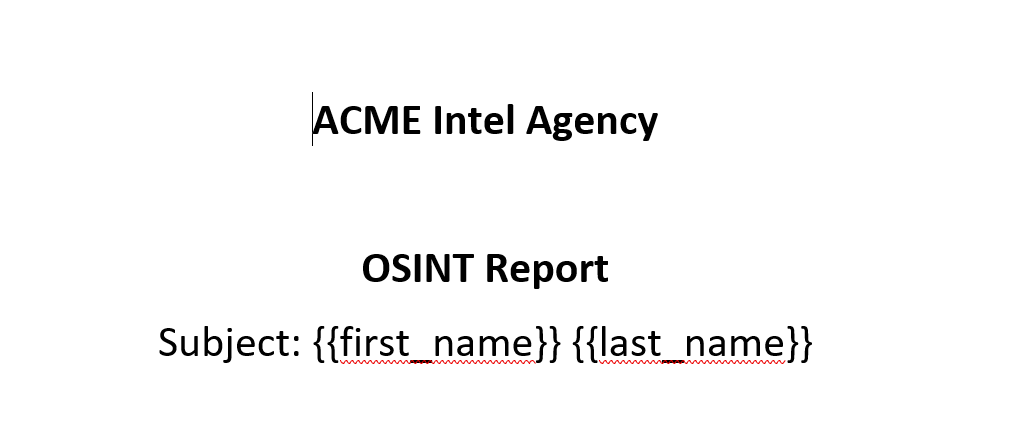
This template is called report_template.docx and needs to be saved in the same folder as the Python script. Before creating the report, we need to write a few extra lines of code so that Python-docx-template will know what to do with our data. It only takes a few lines of code that will look something like the code below in main.py.
# Import Python-docx-template

from docxtpl import DocxTemplate

# First create the docx template object. This points to the MS Word template we created.

doc = DocxTemplate('report_template.docx')

# This is the dictionary of data we want to put in the report

subject = {
    'first_name': 'Steven',
    'last_name': 'Harris'
    }

# Next we render the dictionary in the Word template

doc.render(subject)

# Finally, save the report with our chosen filename

doc.save('intel_report.docx')
If you haven’t installed it already, you’ll need to make sure that Python-docx-template is installed by running:
pip install docxtpl
Now run main.py. After a couple of seconds we will have a saved report intel_report.docx in the project folder. When we open the file it will look something like this:

Awesome, we have our first automated report! Our short script took our dictionary of data and matched the keys from the dictionary to the corresponding Jinja tags in the Word template.
There’s no limit on how many times we can use the same data, or the amount of data we can pass to the report. Let’s try again with a slightly more complex dictionary.
from docxtpl import DocxTemplate

# Create the doc object

doc = DocxTemplate('report_template.docx')

# This is the dictionary of data we want to put in the report

subject = {
    'first_name': 'Steven',
    'last_name': 'Harris',
    'alias': 'nixintel',
    'url': 'https://nixintel.info',
    'twitter': '@nixintel',
    'location': 'UK'
    }

# Next we render the dictionary in the Word template

doc.render(subject)

# Finally, save the report with our chosen filename

doc.save('intel_report.docx')
Then we need to update the template with some extra tags. All the formatting of the tags is handled by Word, we don’t need to do anything in Python. In this case we can highlight the report subject’s name in red. Remember to save the Word template after making any changes or the Python script will ignore them.
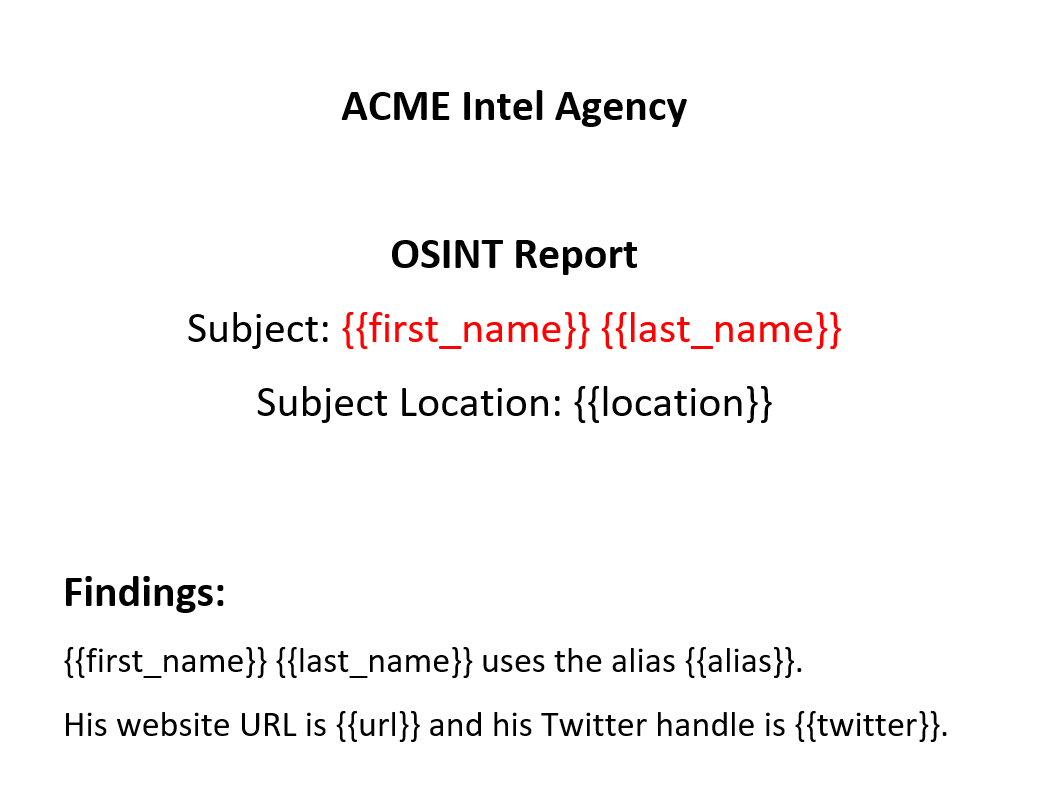
Then we just need to run main.py again to produce a new report with all the extra data we added:

So far this has been a fun experiment but it probably hasn’t been a huge timesaver because it takes just a long to write the code as it would have done to type out the report manually, sp why bother? The main reason is that manual effort doesn’t allow for increased speed and scale when it comes to handling increasingly large amounts of data. One of the main advantages of using Python for OSINT is that it can automate repetitive tasks and process the results far more quickly than any human can.
One of the main ways Python does this is through the use of for loops. If you have a large data set, Python can loop through it and interact with the data to do whatever you want very quickly. We can apply that to our automated reporting script too because Jinja allows us to use for loops in the Word templates directly.
Let’s try the script again but with a more complex dictionary. This dictionary has some extra data that we want to automatically publish in the report such as the client’s name or data classification levels, but this time it also contains data about four people, not just one. We could type the four lots of target data out manually, but this takes much longer and it doesn’t scale very easily. We need to be able to handle 10, 100, or even 1000 lines of data just as easily as a single line but working at this scale becomes impossible without at least some simple automation.
Here’s the new dictionary in the code. We don’t need to modify anything else in the script for it to work.
from docxtpl import DocxTemplate

# First create the docx template. This points to the MS Word template we created.

doc = DocxTemplate('report_template.docx')

# This is the dictionary of data we want to put in the report

subject = {
        'client': 'Mega Corp',
        'date': 'Thursday 6th October 2022',
        'classification': 'CONFIDENTIAL',
        'scope': 'The OSINT Curious Project',
        'targets': [
                    {'first_name': 'Steven',
                        'last_name': 'Harris',
                        'alias': 'nixintel',
                        'url': 'https://nixintel.info',
                        'twitter': '@nixintel',
                        'location': 'UK'},
                    {'first_name': 'Micah',
                        'last_name': 'Hoffman',
                        'alias': 'Webbreacher',
                        'url': 'https://webbreacher.com',
                        'twitter': '@webbreacher',
                        'location': 'US'},
                    {'first_name': 'Rae',
                        'last_name': 'Baker',
                         'alias': 'Wondersmith Rae',
                         'url': 'https://raebaker.net',
                         'twitter': '@wondersmith_rae',
                         'location': 'US'},
                    {'first_name': 'Nico',
                         'last_name': 'Dekens',
                         'alias': 'Dutch Osint Guy',
                         'url': 'https://dutchosintguy.com',
                         'twitter': '@dutch_osintguy',
                         'location': 'NL'}
                   ]}


# Next we render the dictionary in the Word template

doc.render(subject)

# Finally, save the report with our chosen filename

doc.save('intel_report.docx')
Next we need to modify the template to reflect our new dictionary. We’ve added in some extra tags to add some extra data to the report, but we’ve also added a for loop with Jinja tags. Jinja for loops start with {% for x in y %} and end with {% endfor %}.
This structure is slightly different to for loops Python but the principle is the same. In our template we are telling the script to loop through the targets part of the dictionary and print every occurrence of the keys that match the tags in the templates.
(It isn’t necessary to change the colour of the tags for them to work, I’ve just changed them for clarity.)

When we run the script again, we get the following output:
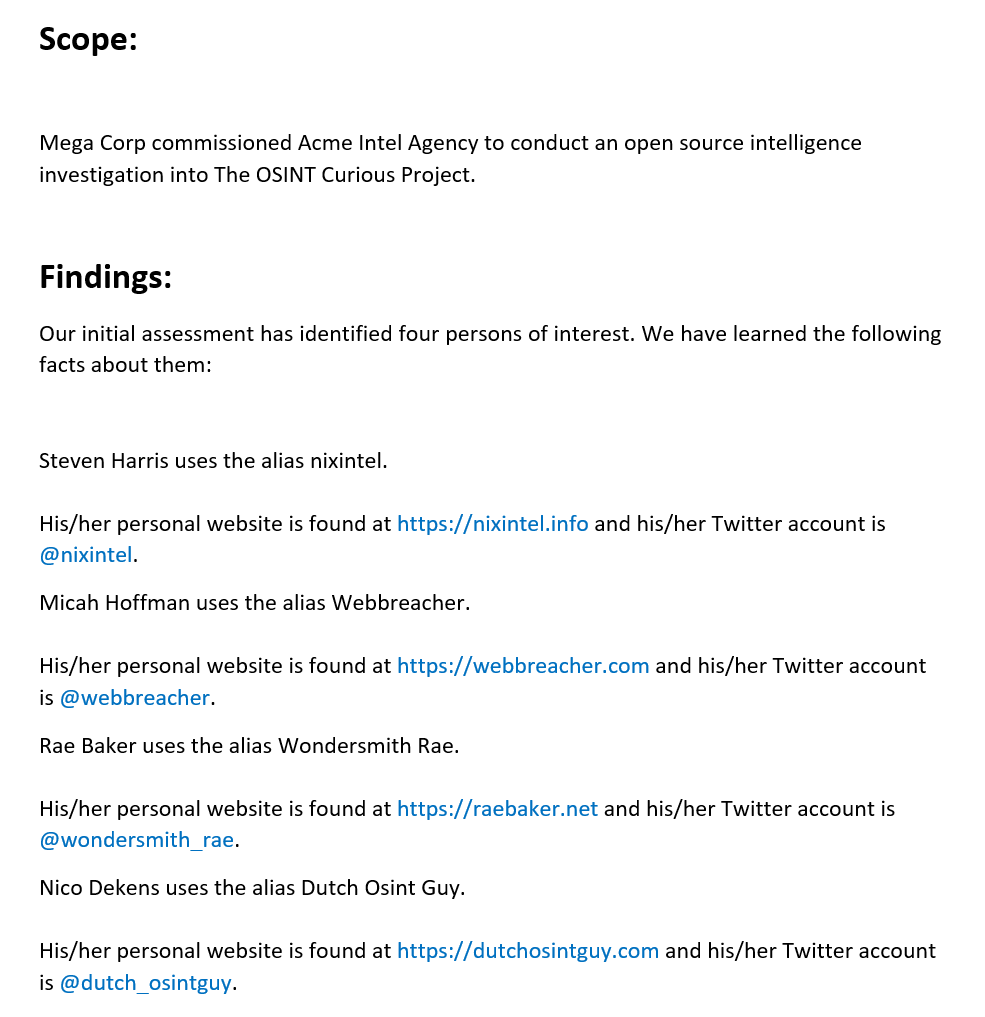
You can see how the script has automatically completed some parts of the report by copying some data directly from the dictionary, but you can also see how the for loop printed all the data we selected from the targets part of the dictionary. That’s much quicker than typing it out manually and if we can employ this technique correctly then we need not be limited by the amount of data or the time limits we have to work in.
Working With Tables
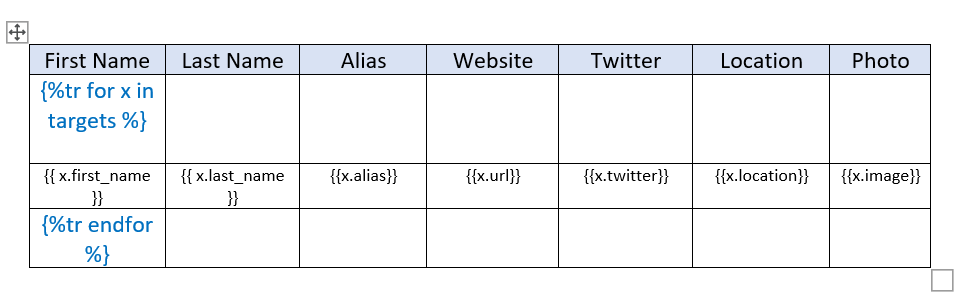
The structure of the data probably isn’t presented in the clearest format. This kind of repeated data is probably easier to read in a table rather than in a paragraphs. Since Jinja also supports the creation of tables in Word, we can modify the template to automatically generate a table for us. By placing the for loop inside a table the script will automatically create a table based on the values we specify. The for loop needs to be modified with an opening and closing tr tag to indicate that this will be a table row. The template will look like this:
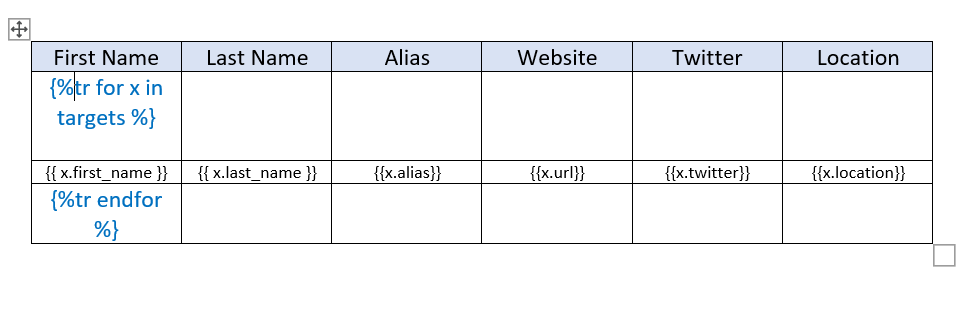
(Be sure not to leave a space between the % symbol and tr or the code won’t run correctly.)
Now when we run the script, the data is rendered in a table instead:
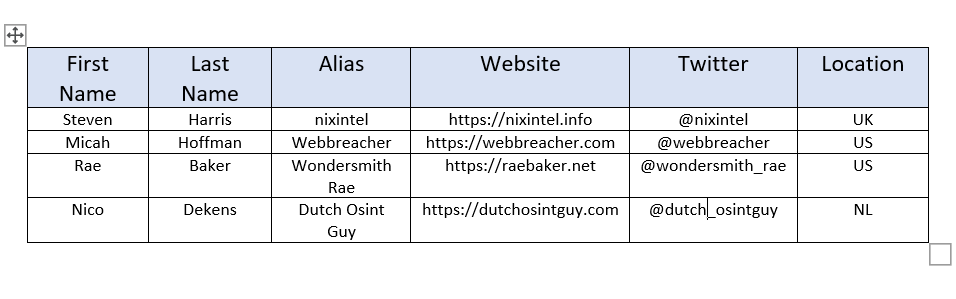
The table is rendered automatically, and makes this type of data much easier to read.
Working With Images
Images and charts can make intelligence reports much easier to read, and with a little modification it’s easy to automate adding them to a report. With Python we can’t just pass the filename to the dictionary we use to create the document. We just need to add a few extra lines of code to convert the image into an object that Python-docx-template recognises before it will work.
First we need to import InlineImage from docxtpl and then convert the images to InlineImage objects. We also need to import Mm from docx.shared so we can specify the size of the image as it appears in the final report. Each converted image is assigned its own variable name and then added to the dictionary.
from docxtpl import DocxTemplate, InlineImage
from docx.shared import Mm

# First create the docx template. This points to the MS Word template we created. This has to be created before the InlineImages.

doc = DocxTemplate('report_template.docx')

# Convert the images in the project folder to InlineImage objects, and specify their dimensions.

steven = InlineImage(doc, 'steven.jpg', width=Mm(30), height=Mm(30))
nico = InlineImage(doc, 'nico.jpg', width=Mm(30), height=Mm(30))
micah = InlineImage(doc, 'micah.png', width=Mm(30), height=Mm(30))
rae = InlineImage(doc, 'rae.jpg', width=Mm(30), height=Mm(30))

# Then add them to the dictionary.

subject = {
        'client': 'Mega Corp',
        'date': 'Thursday 6th October 2022',
        'classification': 'CONFIDENTIAL',
        'scope': 'The OSINT Curious Project',
        'targets': [
                    {'first_name': 'Steven',
                        'last_name': 'Harris',
                        'alias': 'nixintel',
                        'url': 'https://nixintel.info',
                        'twitter': '@nixintel',
                        'location': 'UK',
                        'image': steven},
                    {'first_name': 'Micah',
                        'last_name': 'Hoffman',
                        'alias': 'Webbreacher',
                        'url': 'https://webbreacher.com',
                        'twitter': '@webbreacher',
                        'location': 'US',
                        'image': micah},
                    {'first_name': 'Rae',
                        'last_name': 'Baker',
                         'alias': 'Wondersmith Rae',
                         'url': 'https://raebaker.net',
                         'twitter': '@wondersmith_rae',
                         'location': 'US',
                         'image': rae},
                    {'first_name': 'Nico',
                         'last_name': 'Dekens',
                         'alias': 'Dutch Osint Guy',
                         'url': 'https://dutchosintguy.com',
                         'twitter': '@dutch_osintguy',
                         'location': 'NL',
                        'image': nico}]}

# Next we render the dictionary in the Word template

doc.render(subject)

# Finally, save the report with our chosen filename

doc.save('intel_report.docx')
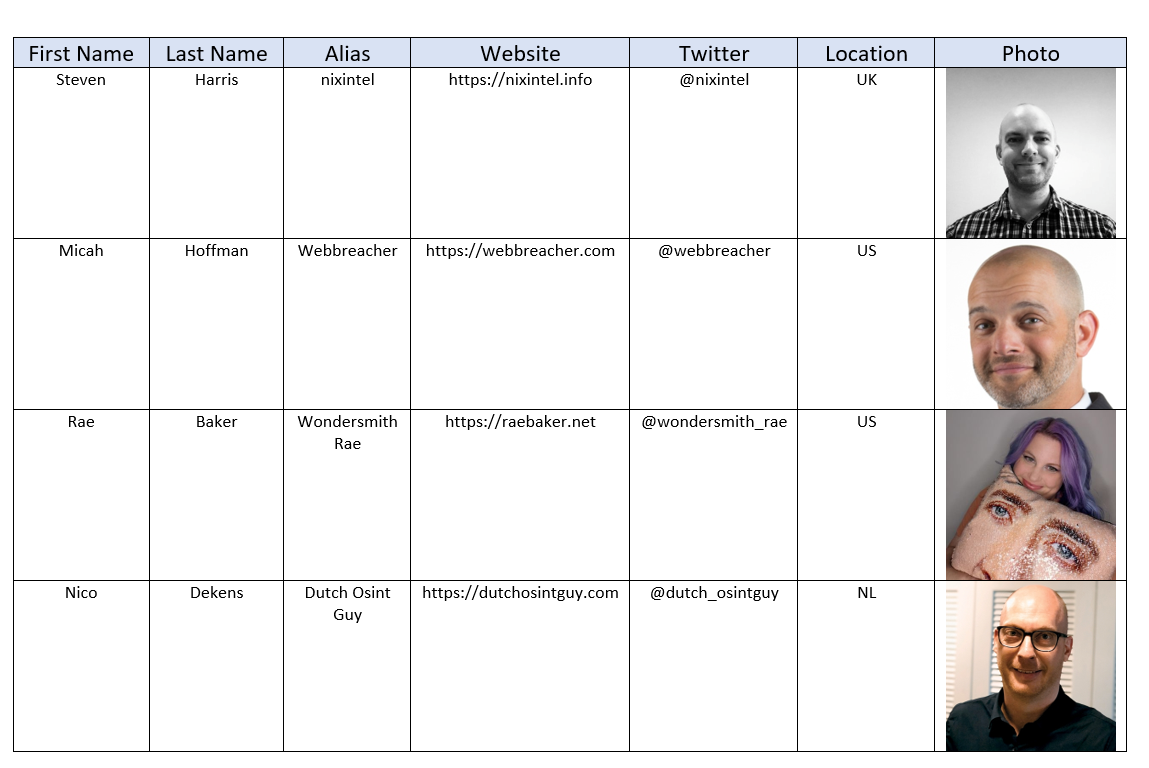
Now the images are in the dictionary we can add an extra column with an {{image}} Jinja tag in the template. Remember you don’t have to use {{image}} as a tag just because it’s an image, the Jinja tag just has to match the corresponding key in your Python dictionary.
The script now renders our data correctly, including with the images we added.
Producing reports in this way takes only a few seconds and frees up time to focus on things that are harder to do automatically. By using Python to automate repetitive tasks we are also able to handle larger amounts of data in a shorter time.