Part of the huge upheaval brought about by the Coronavirus outbreak has meant that many of us have suddenly had to work from home. The challenge of staying connected with colleagues and collaborating on work projects has led to a huge growth in users for established services like Zoom, Microsoft Teams, Slack, and Google Docs. These are great applications with a lot of functionality but they come with considerable drawbacks for users who are concerned about their privacy or who have to abide by GDPR regulations. Zoom shares your data with third parties, Google gives itself some proprietary rights to the documents that you create, and your Slack conversations might not be as private as you think they are. These apps are high quality and convenient and the privacy issues might not be a concern for many users – but what if you are concerned about privacy and compliance issues like GDPR, or you just want your data to remain under your control?
In contrast to these other services Nextcloud allows you to fully configure your own cloud platform so that your data and activity are not shared with any third-parties. It has a growing number of apps that allow you to build your own custom cloud system with simple one-click add-ons so you can easily replicate some of the chat, file sharing, collaboration, calendar, video conferencing and social features that you might have experienced on other platforms. It also comes with a lot of additional security and privacy feature and is now becoming the cloud solution of choice for both the French and German governments. It is not a coincidence that Nextcloud has one of the simplest and clearest privacy policies you’re likely to read.

I first started using Nextcloud about three years ago because I wanted to try building my own Cloud storage server. It was one of my first Linux server projects and I learned an awful lot by doing it. I made a few mistakes along the way but in three years of constant use it has never failed. Not a single byte of my private data or activity on Nextcloud is transferred to any third parties. Now that I’m working from home a lot more I’ve expanded my server a little so that as well as file-sharing, it now includes video conferencing, project collaboration, and lots of other productivity tools. You don’t have to trade your privacy to stay connected when working from home.
In the rest of this post I’ll show you how to set up and run your own Nextcloud server and install a few productivity apps. Don’t worry if you’ve never done anything like this before – there’s no need to start tinkering with command lines and nameservers. Nextcloud is infinitely scalable – you can build your own personal cloud or run it as an enterprise level cloud service. This guide is designed to get you up and running quickly so we’ll start with the smallest possible Nextcloud service, but making it bigger and adding extra apps is very easy as you’ll see.
Getting Started
Nextcloud is able to offer high levels of privacy because it does not offer free hosting in exchange for access to your data. Nextcloud is only software, so to run it you have to have to provide the server space yourself. There are two ways to do this. You can either create your own Nextcloud server from the bottom up with a provider like Digital Ocean, or alternately you can make use of some of the dedicated Nextcloud hosting providers who will offer you an off-the-shelf product that you can customise as you wish. This guides assumes that you want your own Nextcloud server up and running without building it from scratch so I’ll show you how to set up Nextcloud with a dedicated provider. If you’re a little more technical and want to build a server from scratch then I’ll link some resources to help you do that at the end of this article.
Using a dedicated provider means that you don’t have to worry about managing backups, firewalls, certificates and the other nuts and bolts that keep a server working smoothly so I won’t refer to them in this guide.
Decide What You Want
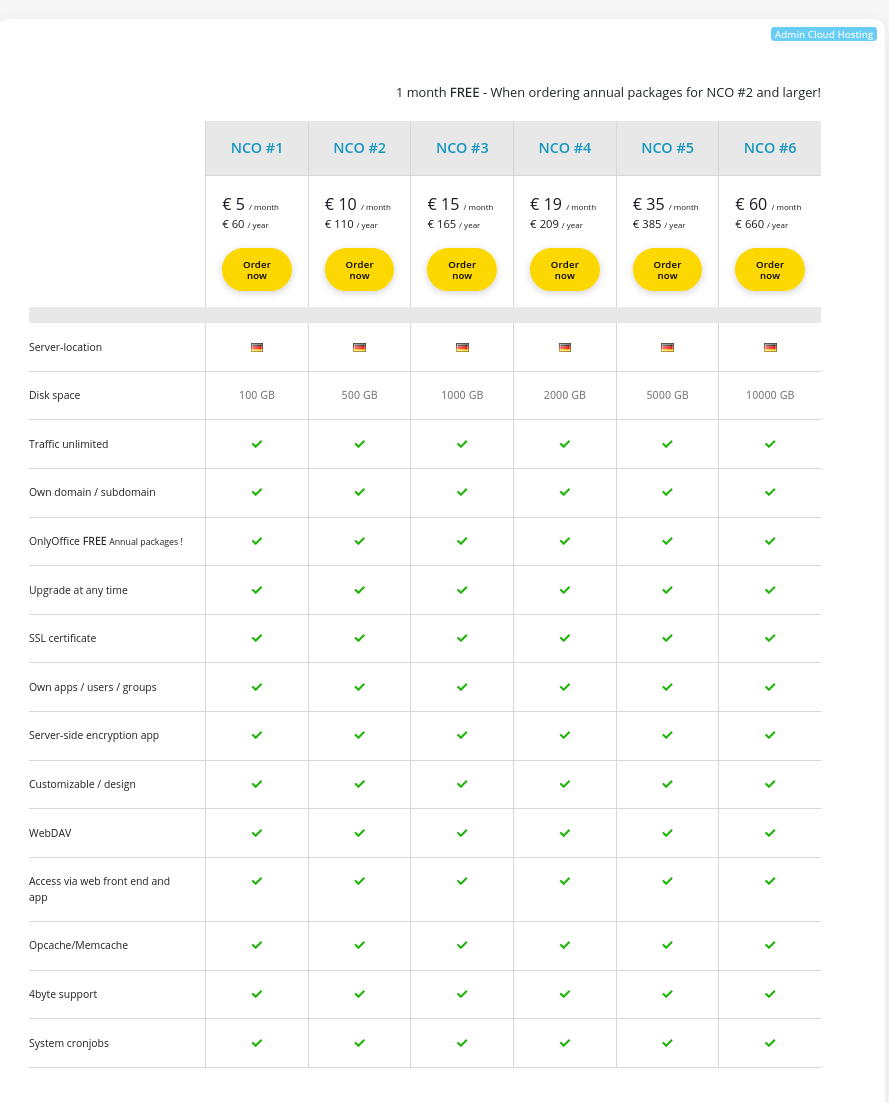
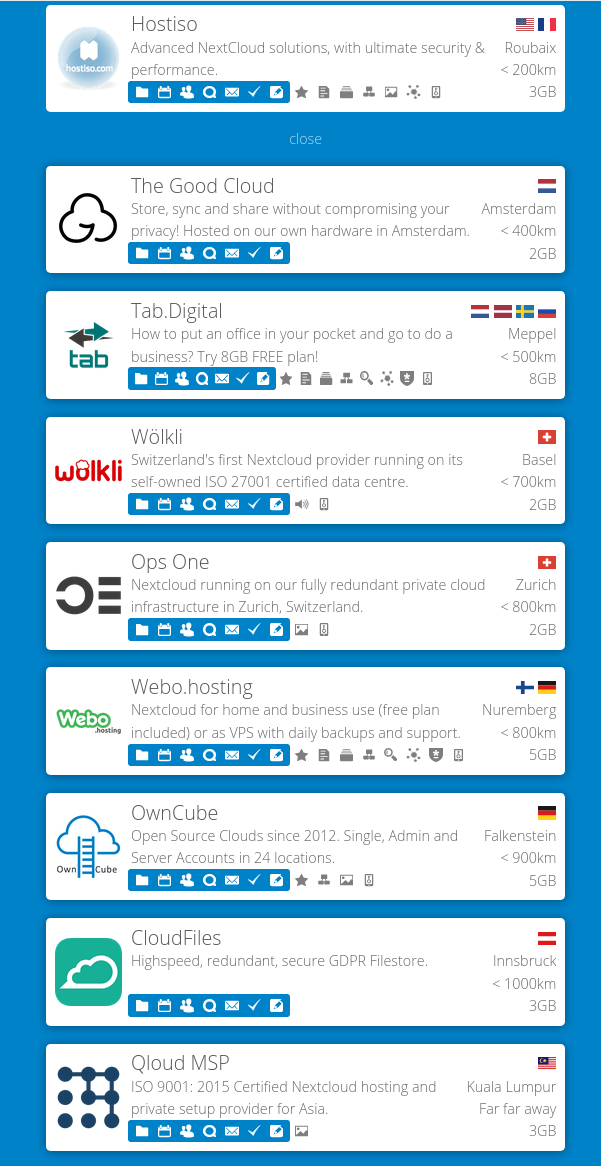
In this guide I’m going to show how to set up a Nextcloud server with OwnCube. Most Nextcloud providers offer a free personal cloud with a few apps and a few GB of storage but there’s no option for you to add extra users or install other apps, which you’ll need to do if you want to work from home collaboratively. OwnCube’s most basic package costs 5 Euros a month for a 100GB server where you will be able to add your own users, groups and apps to your Nextcloud service. A 10 terabyte server costs 60 Euros a month. (I have no affiliation to OwnCube and I do not receive anything from them for writing this blog).
If OwnCube isn’t for you then number of other Nextcloud providers are available. It’s noticeable that they are largely offering services in countries with strict privacy laws and where GDPR is the norm, not the exception:
Whichever provider you choose, at the end of the sign up process you’ll have a username, password, and a URL for your newly created server. Most providers will include a free subdomain for your server so that your shiny new Nextcloud server will be located at somewhere like https://myserver.myprovider.com.
Install The Desktop Client
Nextcloud syncs files between your own computer and your server. To do this you’ll need to install the Nextcloud client for your own operating system. There are clients for Windows, Mac, and Linux and also mobile clients for Android and iOS. Once installed and running you’ll see a screen like this:
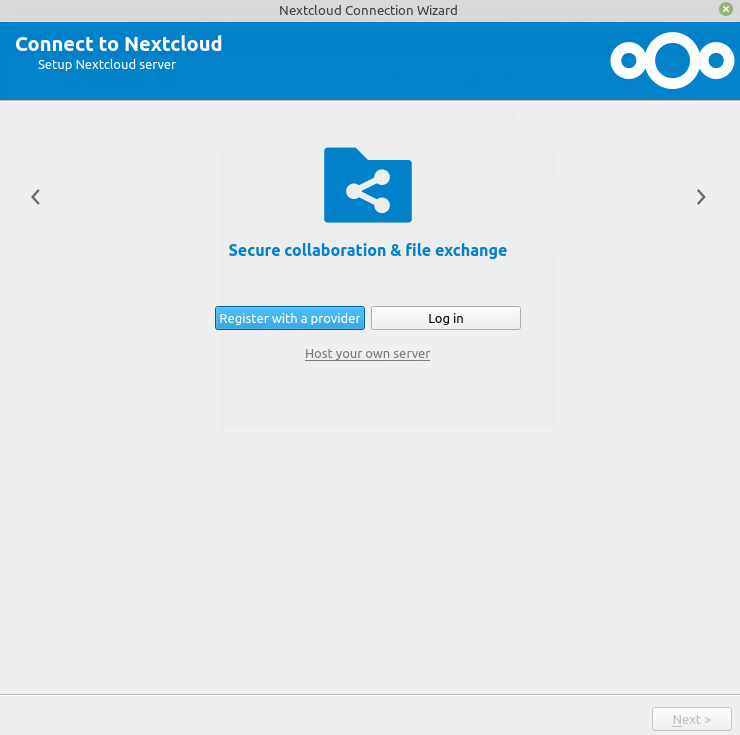
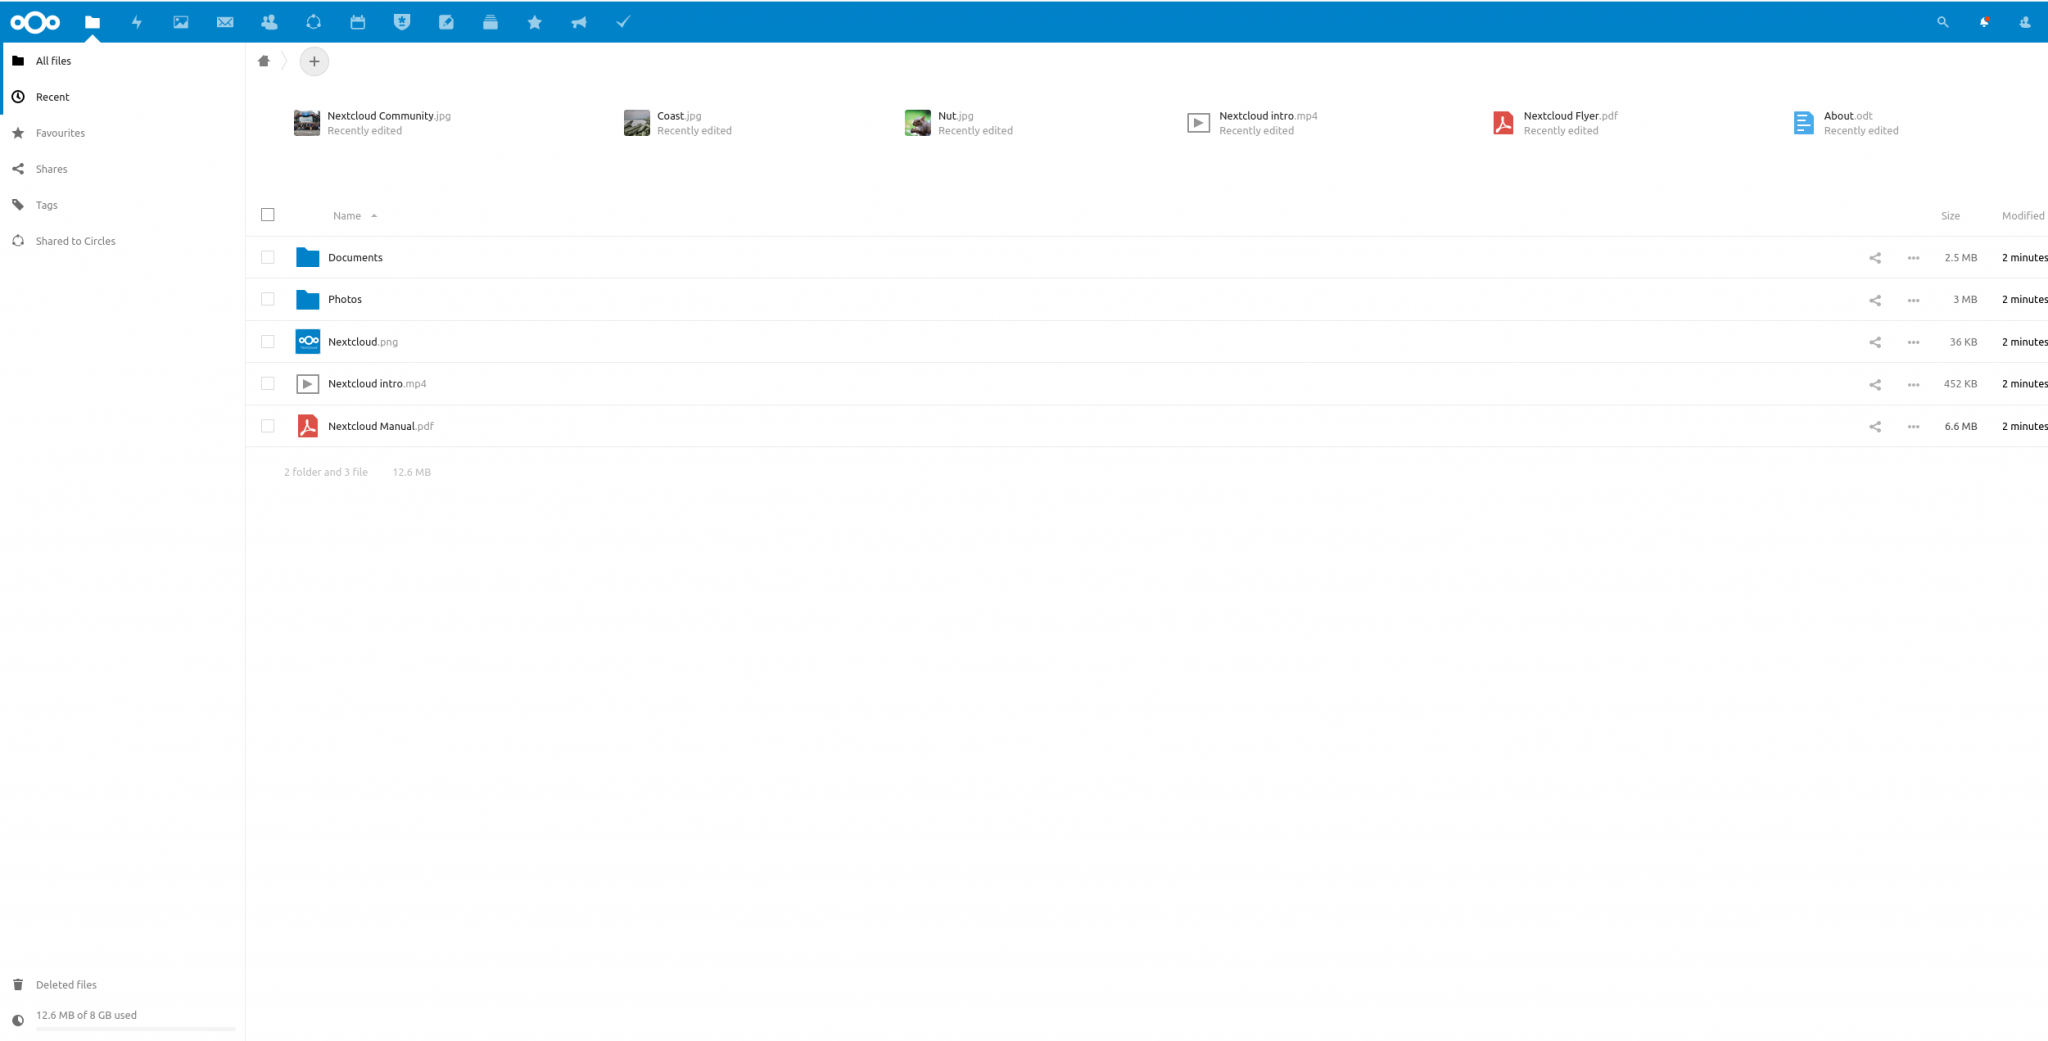
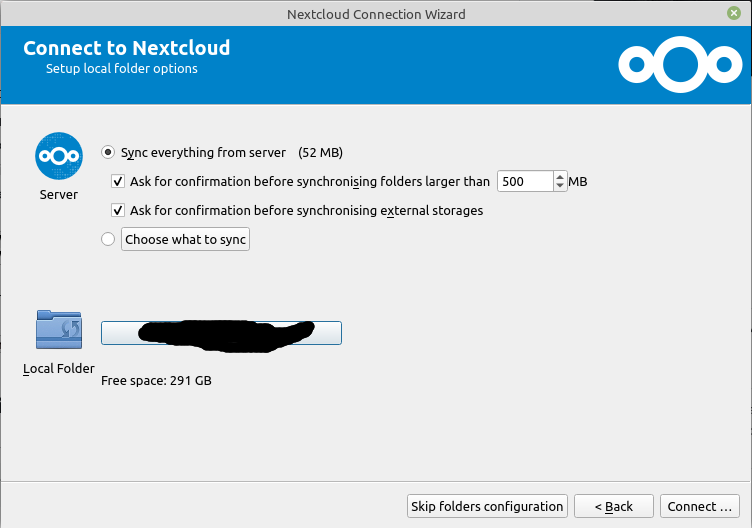
Click “Log In” and then enter the URL of your domain (e.g. https://mycloud.owncube.com) along with your username and password when prompted. Next you’ll create a local folder on your own computer. This will sync with your new Nextcloud server and any file changes you make locally will be replicated in the cloud, and vice versa. If you don’t want to sync everything in your local Nextcloud Folder, you can specify which folders to include and which to ignore.
Adding A Mobile App
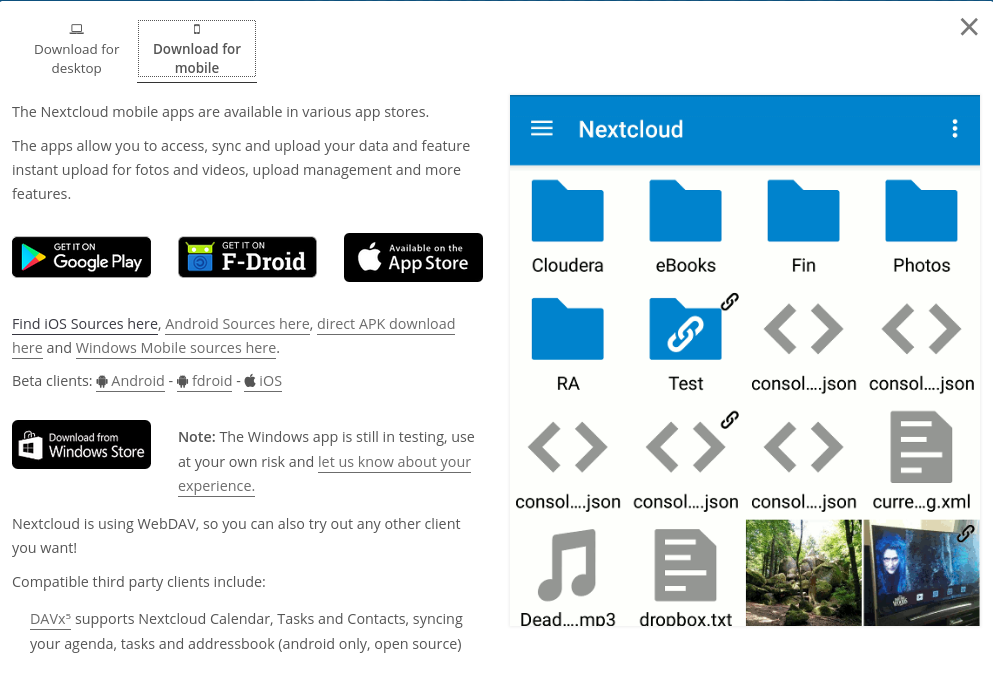
Nextcloud also includes an Android or iOS app that allows you to sync everything between your cloud and your mobile device. Simply download and install the app and enter your server name, username, and password – easy! If you’re a privacy conscious person who wants to reduce your reliance on Google, it’s possible to set up your Android phone to stop syncing with Google Photos and just sync with your personal Nextcloud instead.
Adding An App To Your Nextcloud
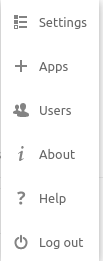
Nextcloud offers an ever increasing range of apps that you can add to your own server. Some of them are well-established although you’ll see that some are still beta versions. You need to be the server admin to install apps, so be aware that most free tier accounts do not grant you admin privileges to do this. If you are the admin user, click on your profile icon in the top right of your server homepage and choose “Apps”:
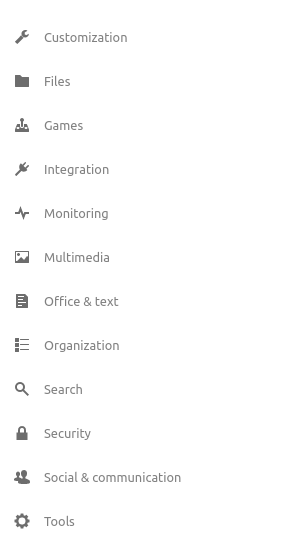
Now there’s a little app store on the left of the screen that allows you to browse through the available apps:
The app store looks like this:
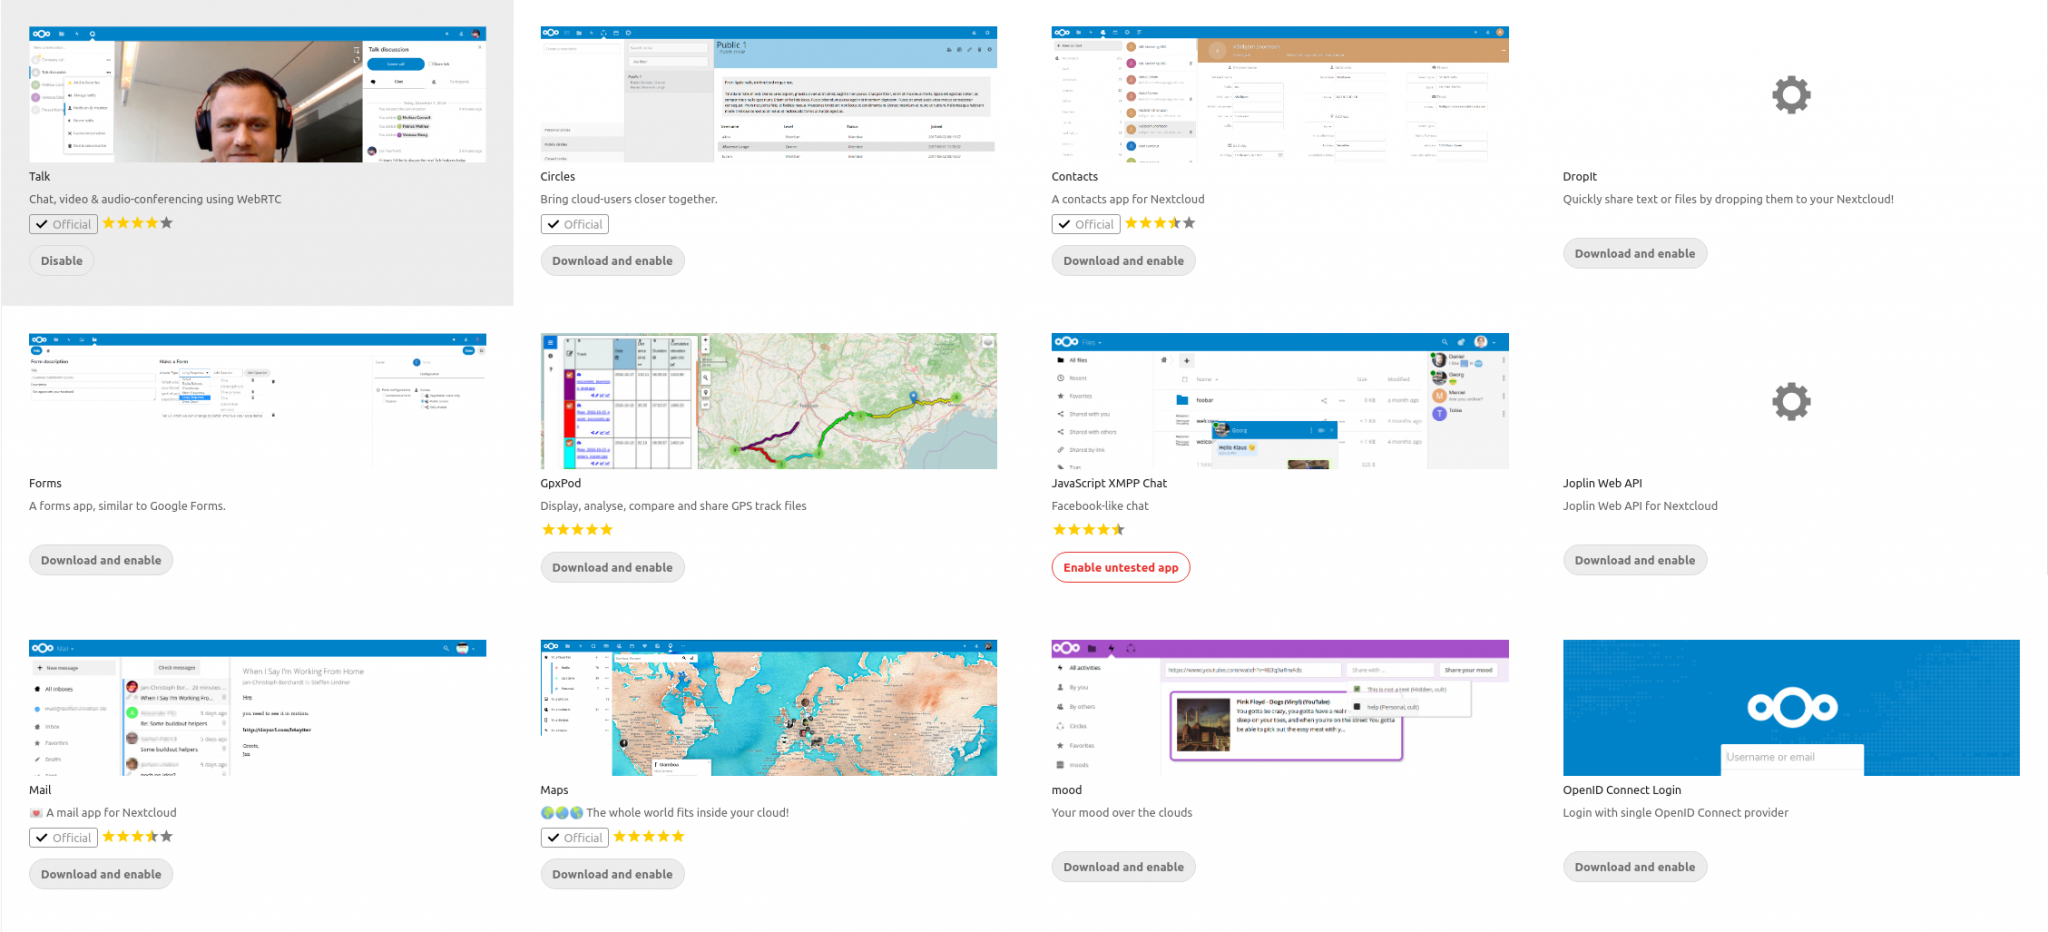
Choose the app you want and click “Download and Enable”. That’s all you have to do! Once installed each app has its own settings page, where you can make additional changes as needed. Installed apps are accessed from the toolbar at the top of the screen:

In this example you can see the File Manager, Activity Log, Gallery, Mail, Contacts, Circles, Calendar, Password Vault, Notes, and other applications are installed and ready to use.
To enhance the security of your Nextcloud server I recommend adding device based Two-Factor authentication to user accounts, installing password bruteforce protection, and enabling the HaveIBeenPwned checklist settings. The latter uses the HaveIBeenPwned API to check user account passwords. Any passwords that match the one million most commonly-used passwords are prohibited, so no one on your server will be able to use “password1” or “qwerty123” to log in.
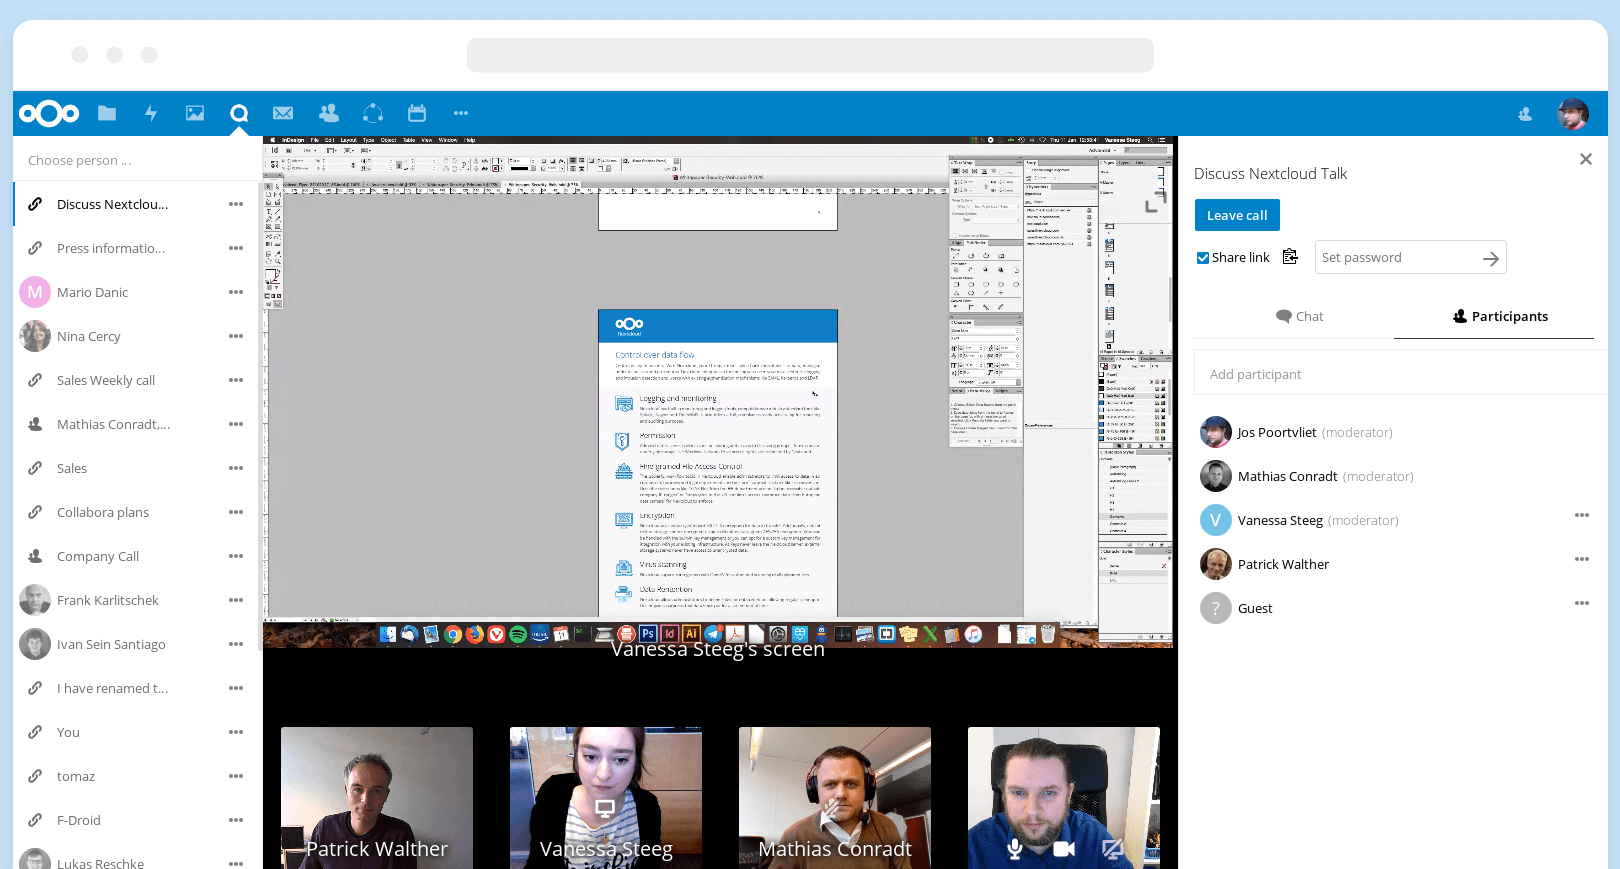
Nextcloud Talk
Talk is by far the most useful Nextcloud feature for staying in touch with colleagues while remote working. It incorporates group and person chat, audio, and video calls. I recommend watching this brief video which highlights some of the features:
Nextcloud Talk uses WebRTC for video and audio chat so it can just run in your browser. One limitation to be aware of is that WebRTC can’t conduct calls across some type of networks without the addition of a STUN server to handle the traffic. Personally I have not encountered this issue yet, but you may have a different experience. You don’t need to be technical to resolve this problem though – dedicated providers like Owncube will add this feature to your package for 3 Euros a month. As video conferencing demand increases, so does the workload of your server. Don’t expect to be able to host 30+ participants on a video call running on an entry-level Nextcloud package, although these smaller servers are fine for small user numbers. Nextcloud Talk offers paid support plans for groups with more than 50 users.
Nextcloud Talk also comes with its own mobile app for both Android and iOS so you can access the server on the move (this app is separate from the main Nextcloud app).
That’s a very brief guide to getting started with Nextcloud. It doesn’t take long to set up in the manner I’ve described (easily less than an hour) and if you get stuck there’s some excellent documentation, a support forum, and dozens of video tutorials.
Self-Hosting
If you’d prefer the technical challenge of hosting Nextcloud on your own Linux server or VPS then here are a few resources I found useful. You don’t need to be a Linux pro to get started – knowing how to set up an SSH connection, basic firewalls like UFW and a basic IDS like Fail2ban is enough to get started:
- DigitalOcean – guide to setting up Nextcloud on an Ubuntu server.
- Titus Tech Tips – video showing how to set up Nextcloud.
- Linuxbabe – installing Nextcloud with Nginx. This method works well, but if you’re unsure then using Snap to install Nextcloud like in the DigitalOcean tutorial is much more straightforward.
- Techno Dad Life – video on how to install Nextcloud with Docker.