In the last post we looked at the basic building blocks of the Open Street Map (OSM) database. Objects in the database are made up of single nodes, ways (which are a series of single nodes joined together), and relations (which are more complex structures where ways and nodes are combined). Tags are used to label these data points by describing the features each one possesses.
In this post we will see how to build different types of query to find information via the Overpass Turbo website.
Query Wizard
Overpass Turbo comes with a built in Query Wizard that makes constructing queries easier. The queries are converted into the more complex Overpass Query language before being sent to the API.
It’s still important to be aware of the tag structure because while the Query Wizard is very helpful it is sometimes still necessary to manually edit tags.
Let’s have a look at a really simple example.
I want to find all the railways within the city of Osnabrück. To set the bounding box (i.e. the target search area) I just need to move the map area to cover the city.
Tags come as a key-value pair. So because I want to find everything related to railways, so I will use the key railway and the catch-all * as a value. In the Wizard keys and values are separated with a = sign.
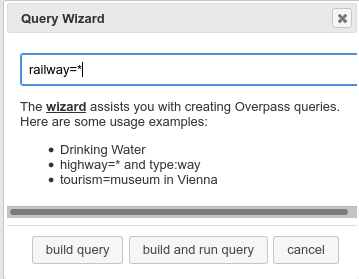
If I click on ‘build and run query’ this is the result:
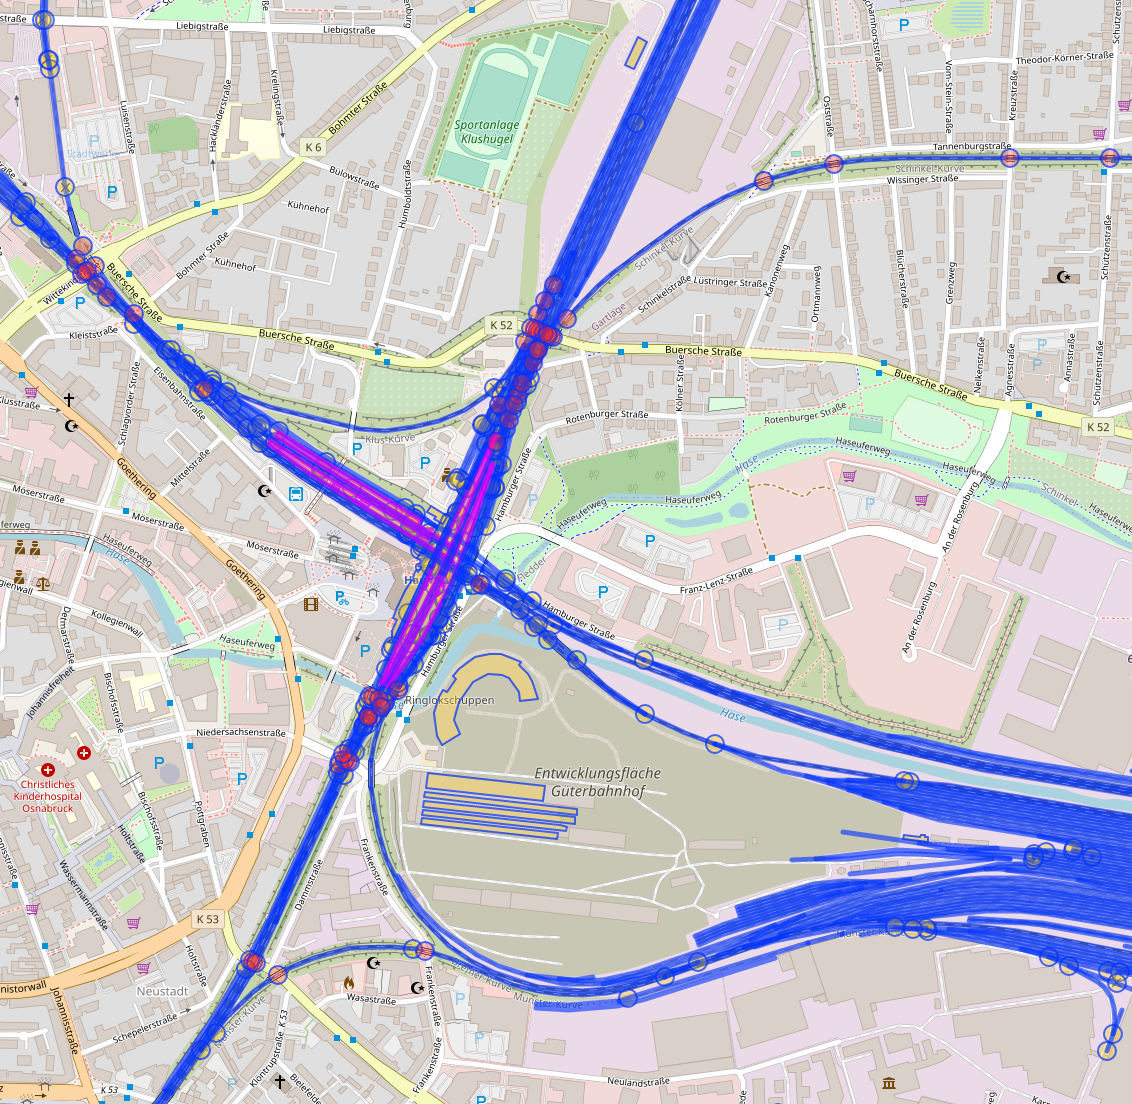
Literally everything with the tag key railway has been returned. Railway stations, bridges, crossings, platforms, signal boxes and other features have all shown up on the map. I’m only really interested in the tracks themselves, so I can amend the query and replace the * value with the value rail.
Running the query again gives a slightly different result. Now we only have objects that match the tag railway=rail and not railway=*. The display in the bottom corner of the map says that within the map area there are 613 nodes and 186 ways that match this query.
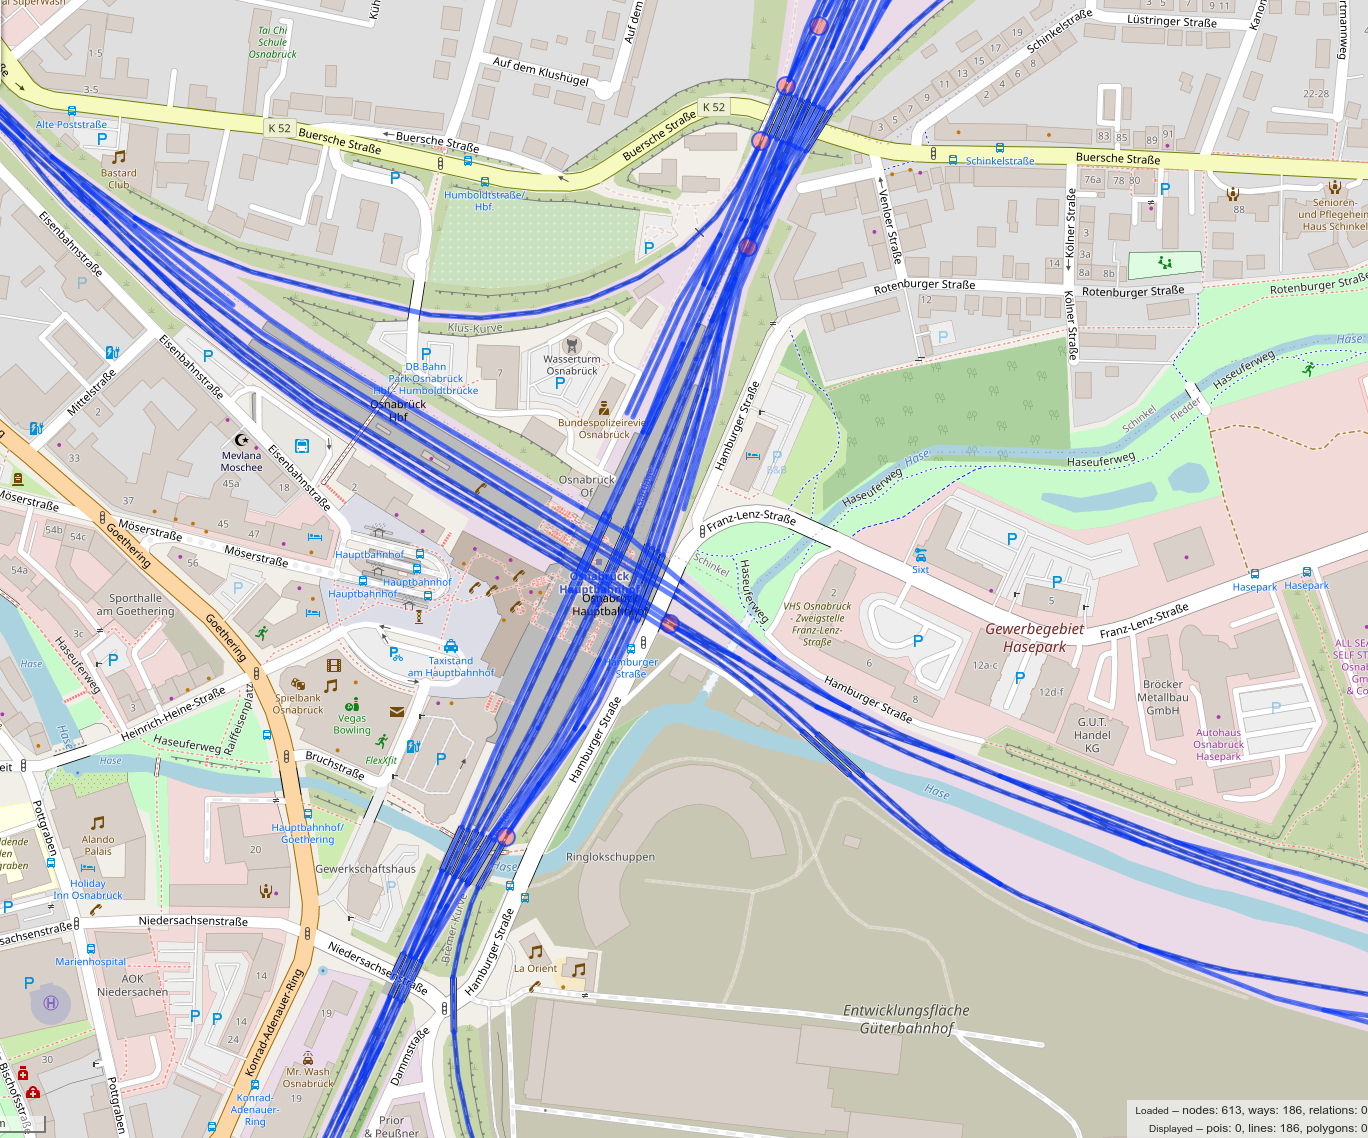
Before moving on to more complex queries, it’s worth looking at the Overpass query language generated in the left-hand pane. This is the actual code sent to the API and for more complex queries it is sometimes necessary to edit it. Here’s the query that produced the data in the image above.
[out:json][timeout:25];
// gather results
(
  // query part for: “railway=rail”
  node["railway"="rail"]({{bbox}});
  way["railway"="rail"]({{bbox}});
  relation["railway"="rail"]({{bbox}});
);
// print results
out body;
>;
out skel qt;
The first tag [out:json] tells Overpass to return the data in JSON format, although other options such as CSV or XML are available. You can use these tags to export the data for your own projects, but if you just want a map for quick reference then this isn’t necessary.
The [timeout:25] tag tells Overpass to stop querying the database after 25 seconds. Large requests can cause your connection to time out, so this tag imposes a limit although you can adjust it as needed.
The main body of the query is here:
  node["railway"="rail"]({{bbox}});
  way["railway"="rail"]({{bbox}});
  relation["railway"="rail"]({{bbox}});
There are actually three separate queries. One for nodes, one for ways, and one for relations. Any object type will be returned if it matches the railway=rail tag.
If you write queries manually you can avoid this repetition by using the term nwr instead of writing separate queries for nodes, ways, and relations. This will give the same result as the query above:
[out:json][timeout:25];
// gather results
(
  // query part for: “railway=rail”
  nwr["railway"="rail"]({{bbox}});
 );
// print results
out body;
>;
out skel qt;
Combining Tags – AND
Having used tags to do a basic search, we can now start to build more complex queries. For this example we’re going to try and find every military airbase in northern Germany.
If I use the query landuse=military. I can see all the land assigned for military purposes in northern Germany.
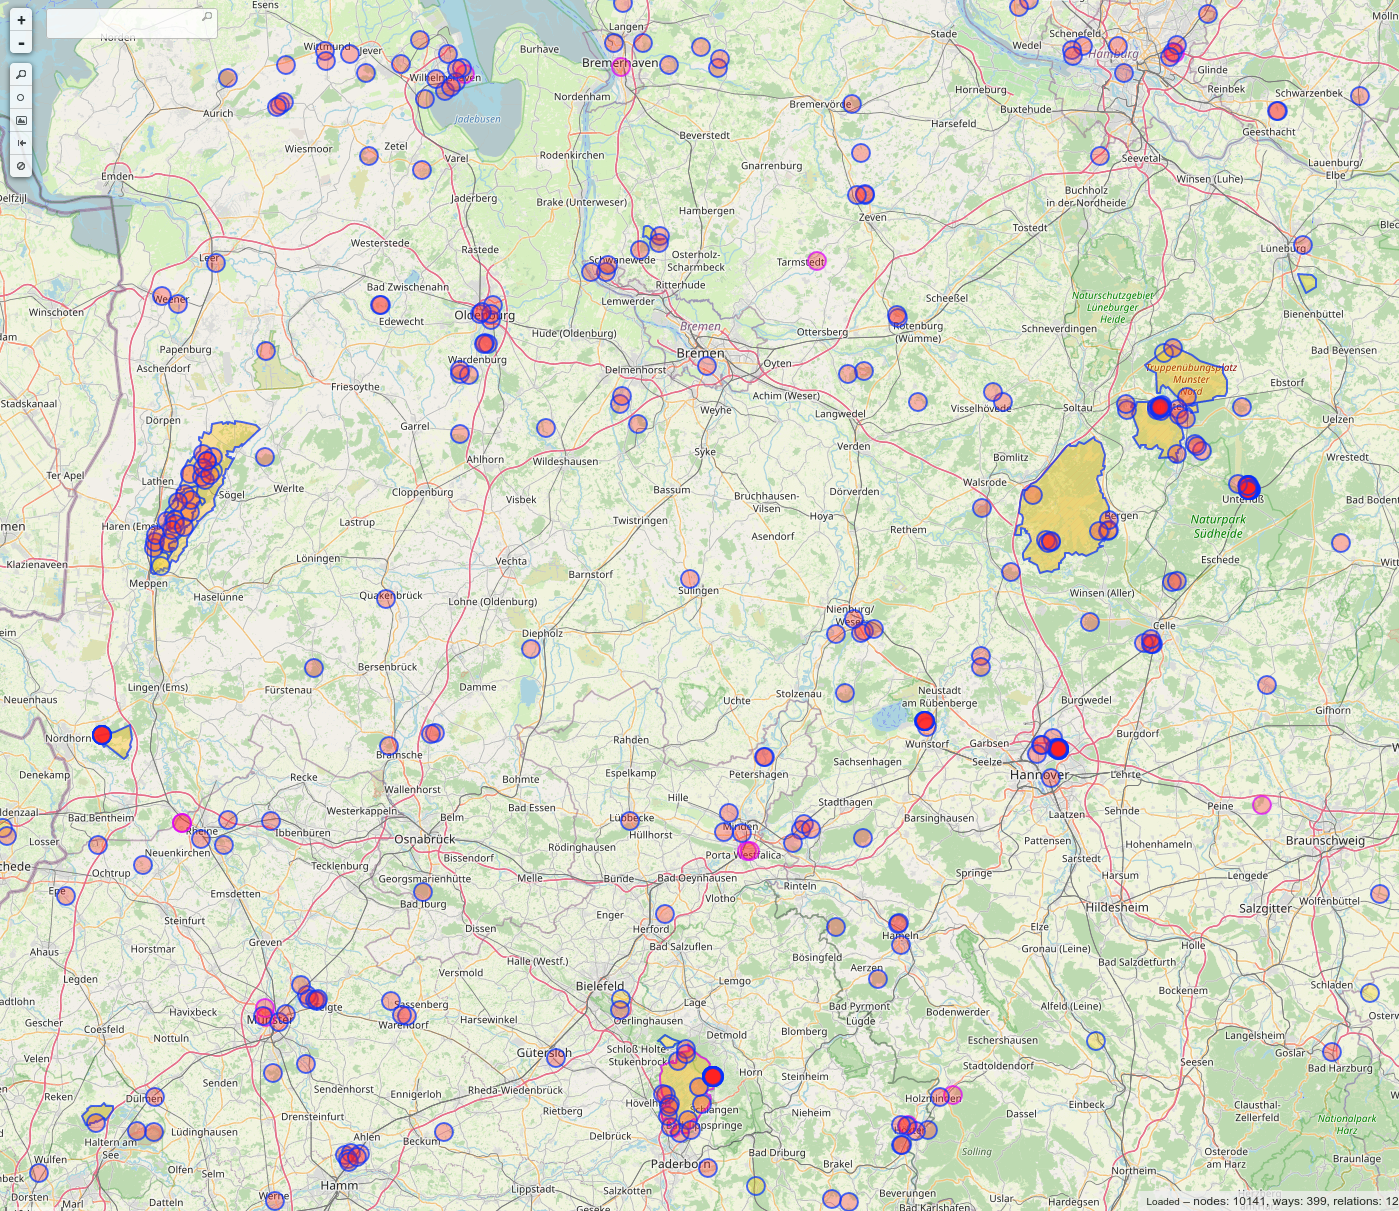
But I only want airfields, not all military installations. So after searching Taginfo for suitable keys, I can add the tag military=airfield into the wizard.
Combining keys like this requires the use of the AND operator (although you don’t have to capitalise it). In the wizard it looks like this:
landuse=military and military=airfield
The Overpass query looks like this:
[out:json][timeout:25];
// gather results
(
  node["landuse"="military"]["military"="airfield"]({{bbox}});
  way["landuse"="military"]["military"="airfield"]({{bbox}});
  relation["landuse"="military"]["military"="airfield"]({{bbox}});
);
// print results
out body;
>;
out skel qt;
Notice with AND queries, the tag parameters follow one after the other:
node["landuse"="military"]["military"="airfield"]({{bbox}});
For an OR query, they are on separate lines separate by a ;
  node["landuse"="military"]({{bbox}});
  node["military"="airfield"]({{bbox}});
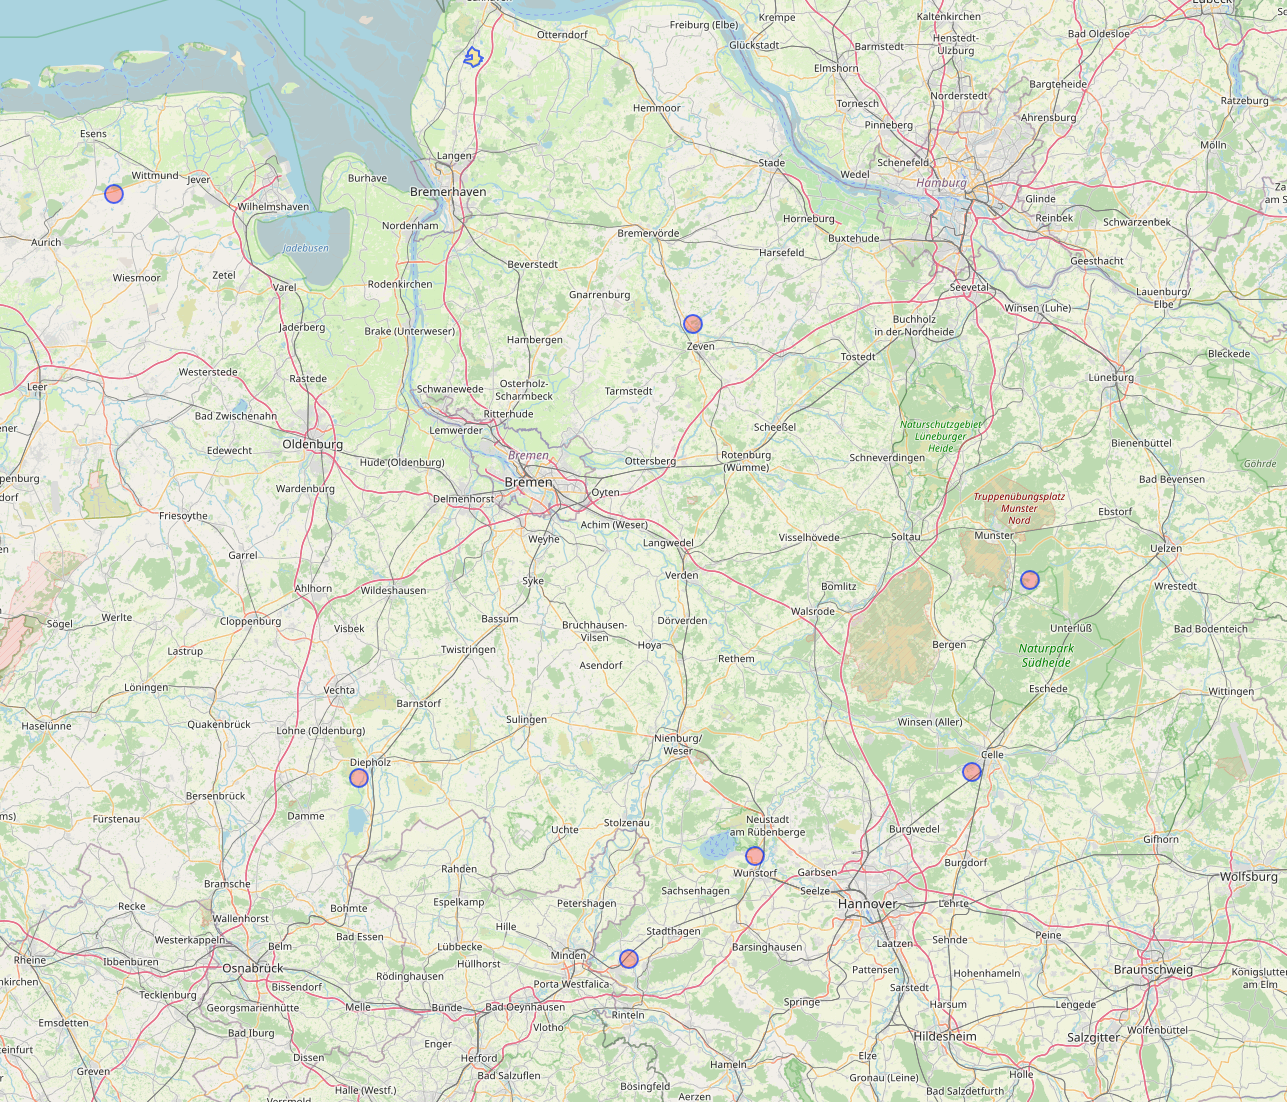
Running the query now only shows military airbases, all the non-airbase military land is filtered:
Combining Queries – OR
Let’s day that I want to find somewhere to go on a camping holiday in Dorset this summer. I like to fly my drone so this means I can’t stay near an airfield, military training area, or power lines. I also can’t fly a drone near a bird sanctuary or other similar nature reserves.
With Overpass Turbo I can choose the area I might want to go on holiday and then check to see if any of these hazards are present. In plain language, the code would look like this:
In my holiday area show me any:
Airfields OR
Military installations OR
Power lines OR
protected areas
In the wizard it looks like this
landuse=military or power=line or aerodrome:type=civil or boundary=protected_area
And running the query produces this:
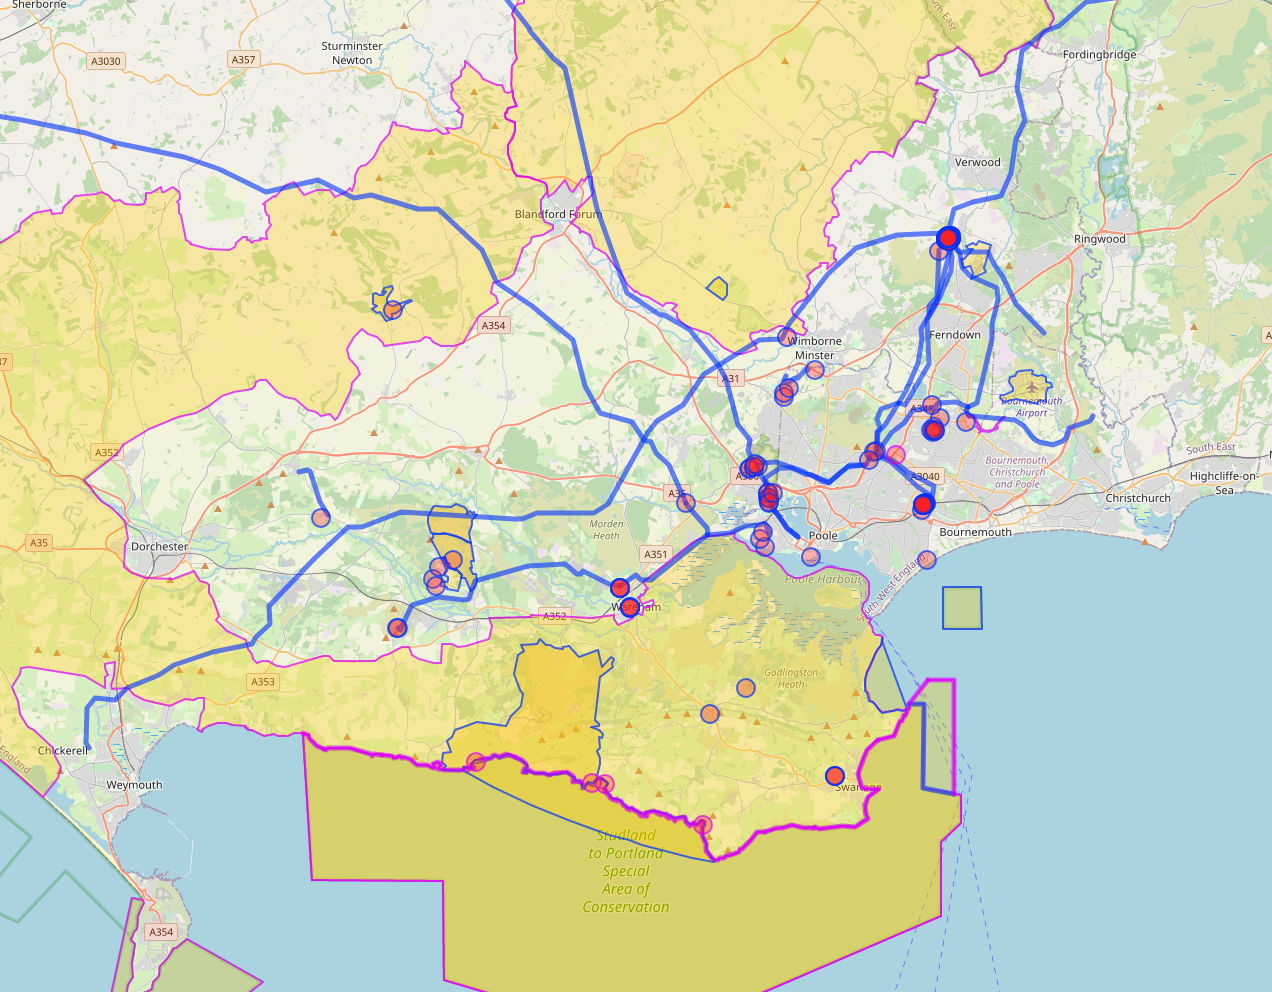
Power lines, airfields, military areas and protected areas are all marked on the map. Not a lot of room left for drone flying.
Combining Multiple OR Queries
Boolean terms like OR and AND allows more complex queries to be built.
For amother quick fictional example let’s say I need some data to investigate the link between burning fossil fuels or waste for power generation and illness in children. I want to see where children might have the greatest exposure to these power sources.
After choosing suitable tags from Taginfo I can create a query in the wizard like this. Notice the OR parameters are now wrapped in brackets:
(generator:source=waste or generator:source=coal) or (amenity=school or building=school)
Here is the result: all the schools and power generators that rely on the combustion of coal or waste in the Hamburg region:
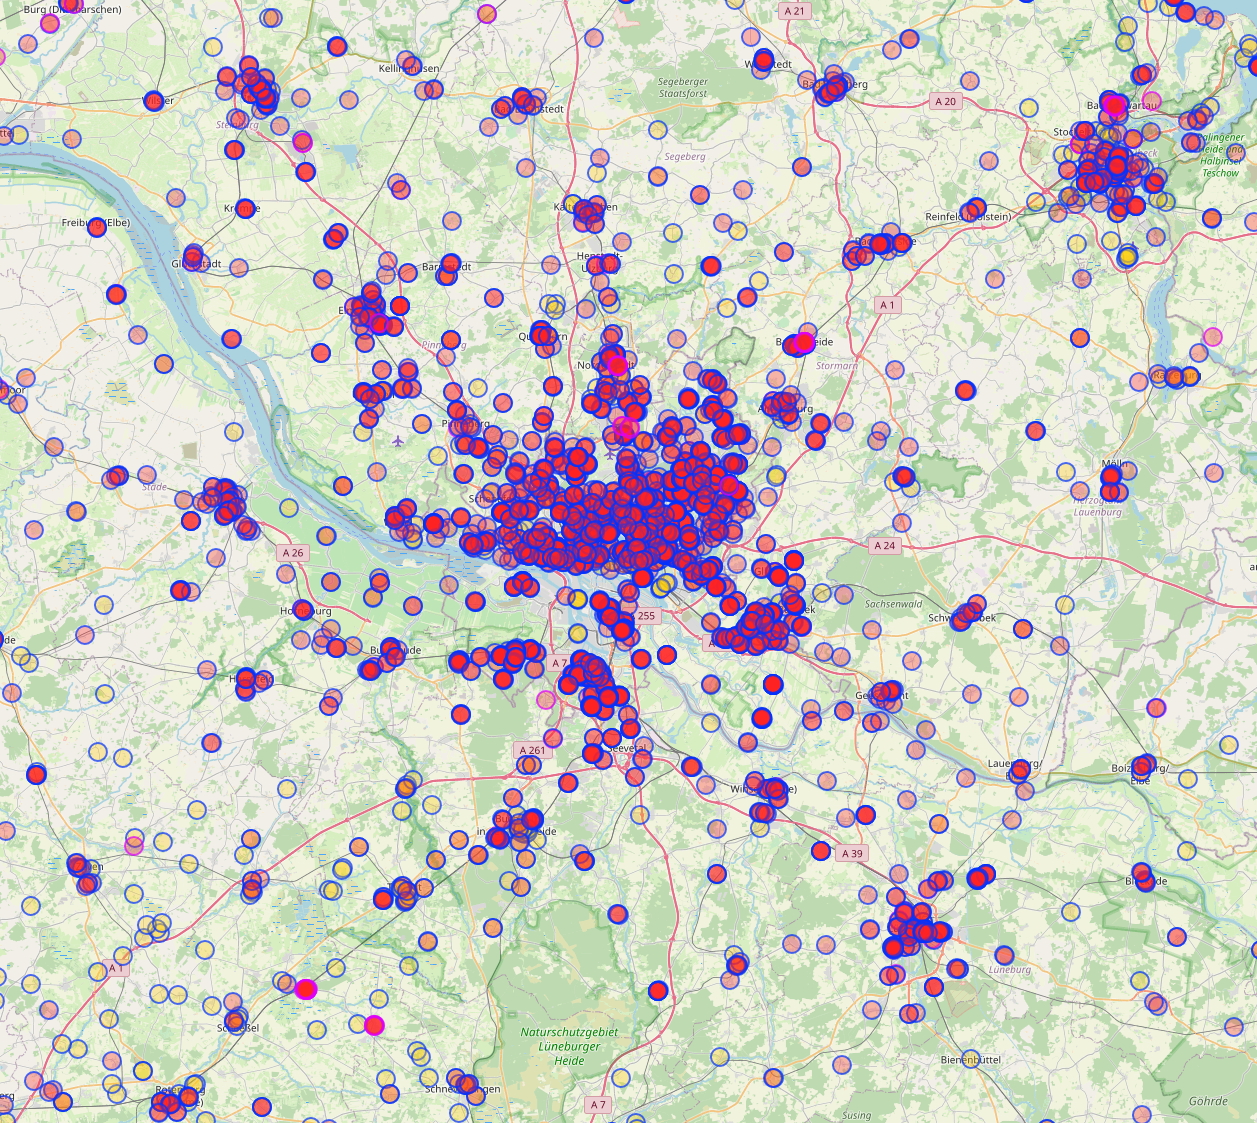
It looks nice but it isn’t actually all that useful. There are too many schools and it isn’t obvious from the map where the schools are and where the power stations are.
Find X Near Y Within A Certain Radius
To get more focused results we can use Overpass Turbo’s around
To help with our fictional research case it will be easier to just show schools that are near to power stations. To do this we can tell Overpass only to return schools as results if they are within 1000m of a power station.
In plain language this is what we need to do with the code:
Put all the power stations in a group call "power_sources".
Put all the schools in a group called "schools".

Create a new group made up of any "schools" that lie within 1000m of a "power_sources" object and display it on the map.
So with a little editing we can bundle all the power station objects together in a variable called power_sources:
[out:json][timeout:25];
// gather results

  // query part for: “"generator:source"=waste”
  (node["generator:source"="waste"]({{bbox}});
  way["generator:source"="waste"]({{bbox}});
  relation["generator:source"="waste"]({{bbox}});
  // query part for: “"generator:source"=coal”
  node["generator:source"="coal"]({{bbox}});
  way["generator:source"="coal"]({{bbox}});
  relation["generator:source"="coal"]({{bbox}});)->.power_sources;
Next we can bundle up all the schools together in a variable called schools:
// query part for: “amenity=school”
  (node["amenity"="school"]({{bbox}});
  way["amenity"="school"]({{bbox}});
  relation["amenity"="school"]({{bbox}});
  // query part for: “building=school”
  node["building"="school"]({{bbox}});
  way["building"="school"]({{bbox}});
  relation["building"="school"]({{bbox}});)->.schools;
Finally we tell Overpass to display schools that are within 1000m of power_sources and display the results:
nwr.schools(around.power_sources:1000);

// print results
out body;
>;
out skel qt;
If you want to play with this query for yourself you can see it here.
Here’s the result:

Now we can see that there are four schools in Hamburg that are within 1000m of a power station, these might be good places to begin our research.
Setting An Area
So far all the queries we have looked at have used the bounding box (i.e. the visible area in the map window) to search for queries but this isn’t always helpful. What if I want to find information within a particular city or region thast is not a nice neat rectangle shape?
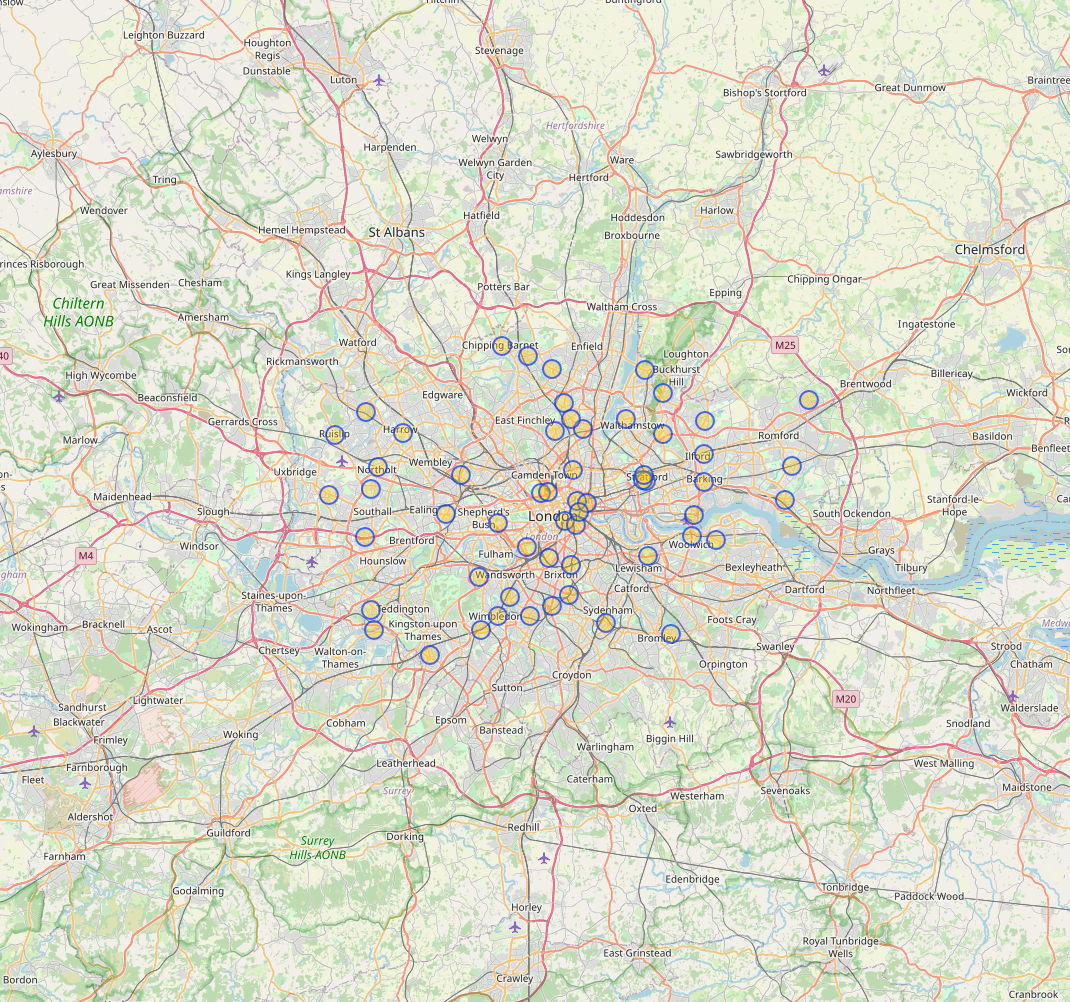
Let’s say I want to find all the police stations in London. The query would look something like this:
nwr["amenity"="police"]({{bbox}});
out;
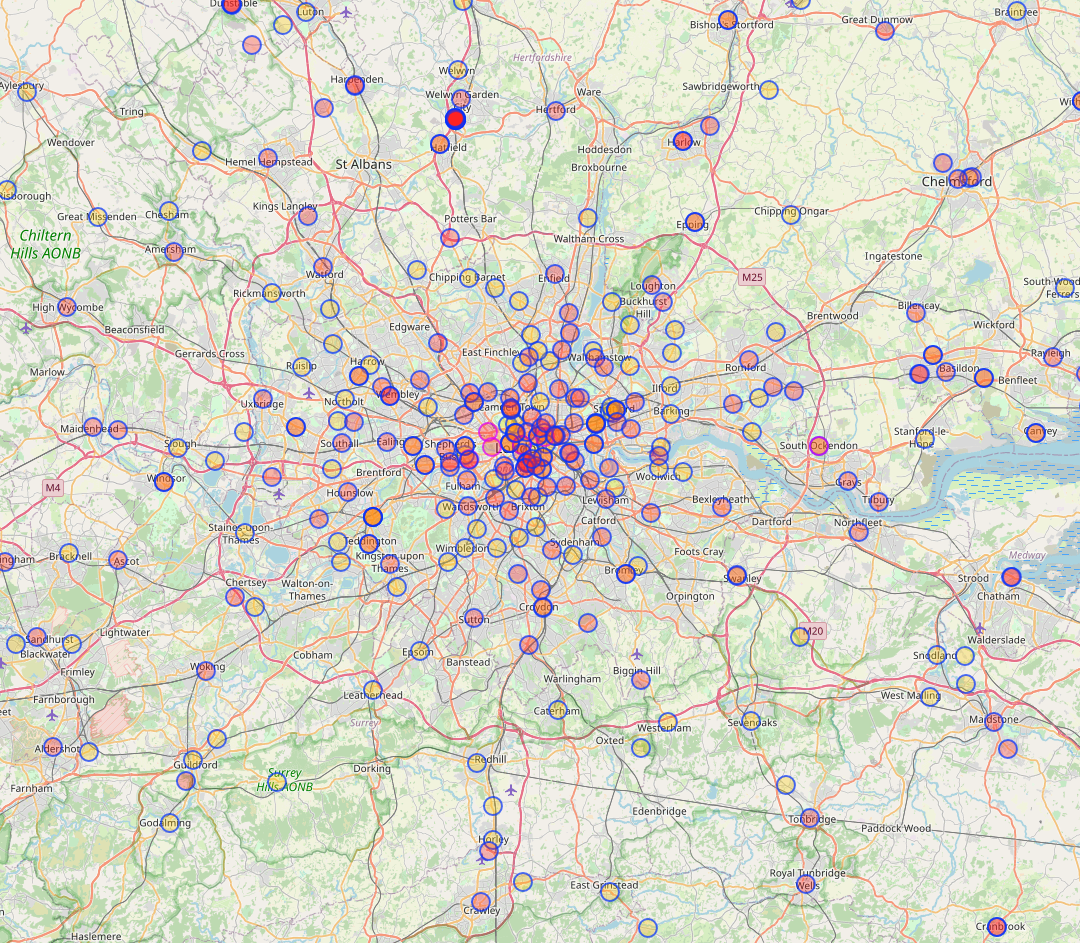
This result is no use to me. It shows me every police station in the map box, which includes the areas outside London.
Instead of using the bounding box for the search area, it is possible to specify a specific region by creating an area object and directing the query there instead. So without moving the map box, I can get results just from within Greater London:
// Set the area by name

area["name"="Greater London"];

//Search for object types in the defined area

nwr["amenity"="police"](area);
out;
The area object just replaces the {{bbox}} object in the query. You can see the difference in the results:
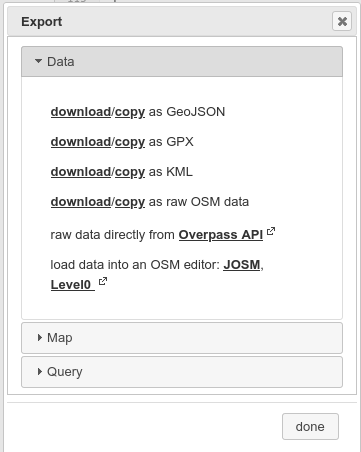
Exporting The Data
Overpass Turbo allows you to export this data as a GeoJSON or KML file, as well as a PNG file of the map itself. Simply click on ‘Export’ to explore the options.
Conclusion
In this tutorial we saw how to use tags to build increasingly complex queries, but this is still only scratching the surface of what is possible with OSM.
In the next post I will revisit some old Quiztime challenges to show how Overpass Turbo could be used to solve them quite quickly.
So far, great! I hope that you are going to create more. Btw, being fairly expert at SQL and databases has been almost no help in understanding overpass. I would be interested in how to look at overpass from the perspective of a database designer. It seems remarkably non-intuitive. :–)
Hi,
this is a great resource for me, since I am just getting started with Overpass. Do you know about a way to query a large list with overpass? I am trying to insert the country as area and search for the name of a place. My query works fine manually, but I have about 15k row in a cdv table I need to map as nodes. I’ve included the query below for reference.
Really appreciate your help,
Felix
[out:json][timeout:25];
{{geocodeArea:austria}}->.searchArea;
(
node[name=”Vienna”][place~”^(city|town)$”](area.searchArea);
node[“name:en”=”Vienna”][place~”^(city|town)$”](area.searchArea);
);
// print results
out body;
>;
out skel qt;
Pingback: Начинаем работу с Overpass Turbo – Часть 2 - Osint Library