Being able to prove exactly when data was posted to the internet is a core skill for internet investigators. If you want to be able to prove when a video was first uploaded, when an account was created, or when an editorial change was made to a website, then you need to be able to do this with as much precision as possible.
It might seem obvious when a post was made or when an image was uploaded because the publication time or date are displayed on the web page, but the visible time information often lacks the precision needed for detailed analysis or verification work. Fortunately there is often extra time-related data hidden inside a webpage’s source code that is not directly visible in the browser. By accessing this information can improve the quality of your investigation by allowing you to create very precise timelines and prove (or disprove) precisely when things took place.
No two platforms are the same and each one stores time information in a different way. This means that a little trial and error is required to discover how each service works, but broadly speaking there are two types of method for retrieving this data. The first is to find information embedded in a webpage source code, and the second is to find time information in the JSON content that is sent from the website’s database to the browser. The first technique is slightly simpler than the second, so let’s start with an example that finds detailed timestamps for YouTube livestreams.
YouTube Live Streams
YouTube is a good place to show the difference between the minimal time information displayed in the browser and the more detailed information hidden in the webpage source code.
Here’s an OSINT Curious livestream video that we broadcast last week on Jan 27th 2022. The caption underneath the video states when the video was first streamed:

But supposing we wanted to know exactly when it was broadcast? YouTube provides us with a date but no time, so we need to dig into the page source code to find more specific information.
To do this, right click in your browser and click “View Source” or “View Page Source”. You’ll be presented with something like this:
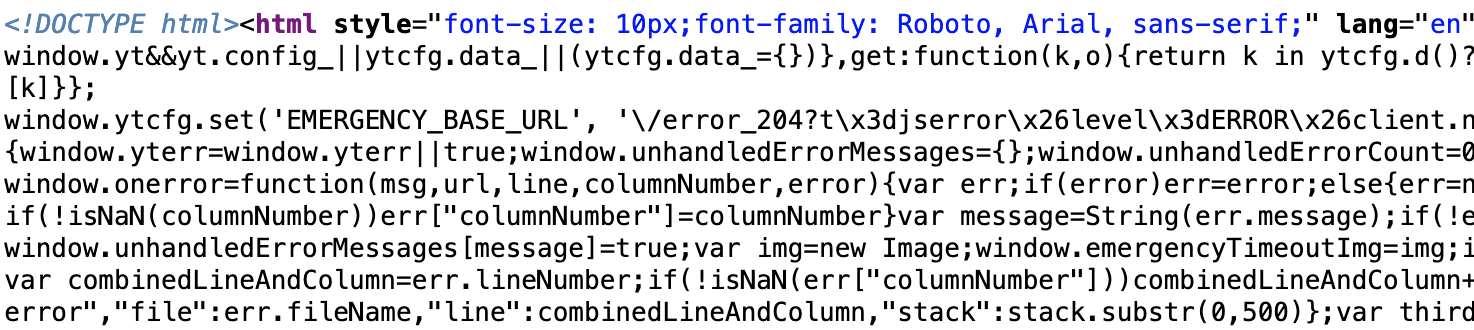
This is the raw HTML and Javascript that your browser obtains from YouTube and transforms it into the webpage that you’re used to seeing. Not all the data your browser obtains makes is used to render the visible page – but this unused data is still there for us to access. By using Ctrl+F and searching for words like “uploaded“, “time“, “date“, “published“, or “created” it is usually possible to find additional time related information.
Sure enough, searching for “published” brings up some useful information.

I’ve prettified the code below so that it’s a little easier to read:
<meta itemprop="interactionCount" content="441">

<meta itemprop="datePublished" content="2022-01-28">

<meta itemprop="uploadDate" content="2022-01-28">

<meta itemprop="genre" content="Entertainment">

<span itemprop="publication" itemscope itemtype="http://schema.org/BroadcastEvent"><meta itemprop="isLiveBroadcast" content="True">

<meta itemprop="startDate" content="2022-01-27T19:59:36+00:00">

<meta itemprop="endDate" content="2022-01-27T20:35:05+00:00">

</span></div>
The meta itemprop tags contain much more precise information then we were initially presented with. The tags “startDate” confirm that the livestream started on 27th Jan at 19:59:36 as per the UTC timezone (which is what +00:00 refers to) and the “endDate” tag confirms that it ended at 20:35:05 on the same date. Notice that the “uploadDate” is actually dated after the stream took place – this is likely the result of some post-broadcast delays before final uploading, but the given start and end times reflect the time of the original broadcast.
If you want a good example of how this technique can be used for real-world investigations, see how Brecht Castel used livestream timestamp data to reconstruct the timeline at a recent street demonstration.
Twitter Account Creation
The second technique for recovering timestamp data involves capturing the information obtained from the database behind a website. When you navigate to a website in your browser, you make a request to the webserver for information that is held in that site’s database. The webserver responds to your request and returns the matching information it has in its database. The data is usually passed from the database in JSON format. This response JSON data is then used to render a visible webpage in your browser.
By using a browser’s developer mode it’s possible to see all the content of these requests and responses. This frequently includes interesting extra information that isn’t always available in the page source code. Let’s have a look at how this works with Twitter account creation timestamps.

When was the OSINT Curious Project Twitter account first created? It’s quite obvious from the profile page that this was first set up in December 2018. For general Twitter usage this might be all the detail that you need – but what if you were investigating a malicious troll account, or a series of fake accounts set up by a foreign government designed to spread misinformation? Being able to show precisely when an account was created, or that a series of suspicious profiles were all created at the exact same time is hard to do when you only have a month/year to work with.
By searching through the website requests and responses we can find more specific information about when an account was created. First enter developer mode in your browser by pressing F12. In this guide I’m using Firefox but the process is the same for Chrome.
- Press Ctrl + R to reload the webpage.
- Click on the Network tab and you’ll see something like this:
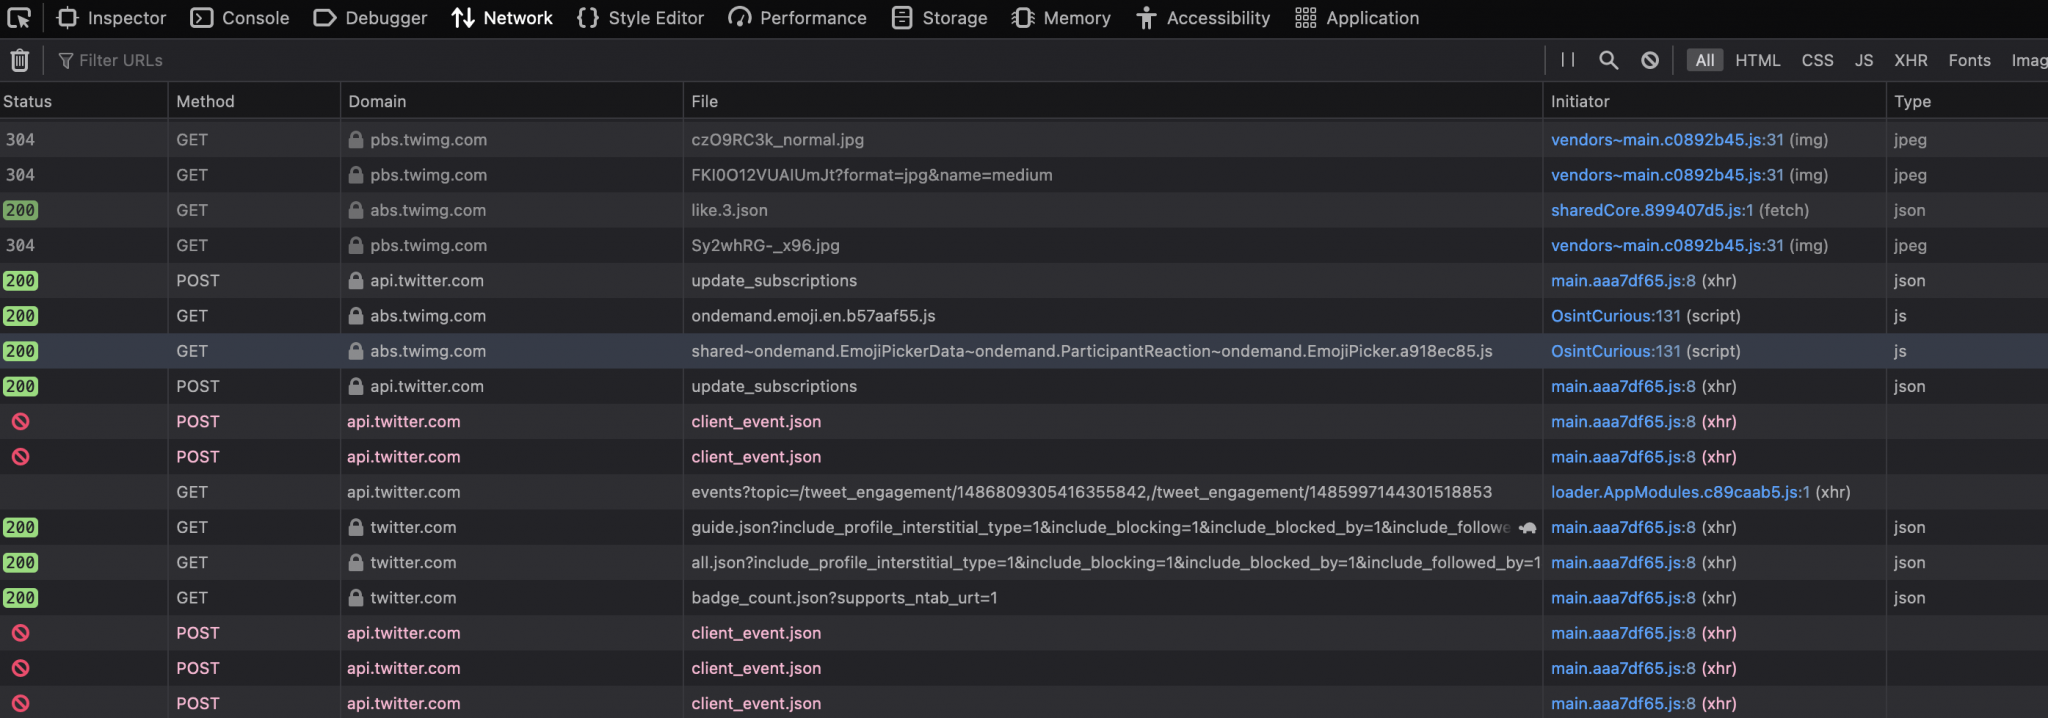
Here you can see all the requests and responses between your browser and Twitter’s servers. This is a lot of information and there’s far too much to sift through manually. Fortunately we can search through all these files for keywords like “created”, “published”, “posted” or “time” in the same way that we searched through the page source code in the YouTube example previously. To search click on the magnifying glass icon (just above the “initiator” column in the image above.) A search box will open appear where the keywords can be entered.
Not all of this information is relevant, but all the entries found under “twitter.com” point to JSON data from Twitter that contain far more information about a Twitter profile than is visible in the webpage alone. Note that because Twitter displays several other profiles on the same page (“You Might Like…”) you will get results for more than one profile.
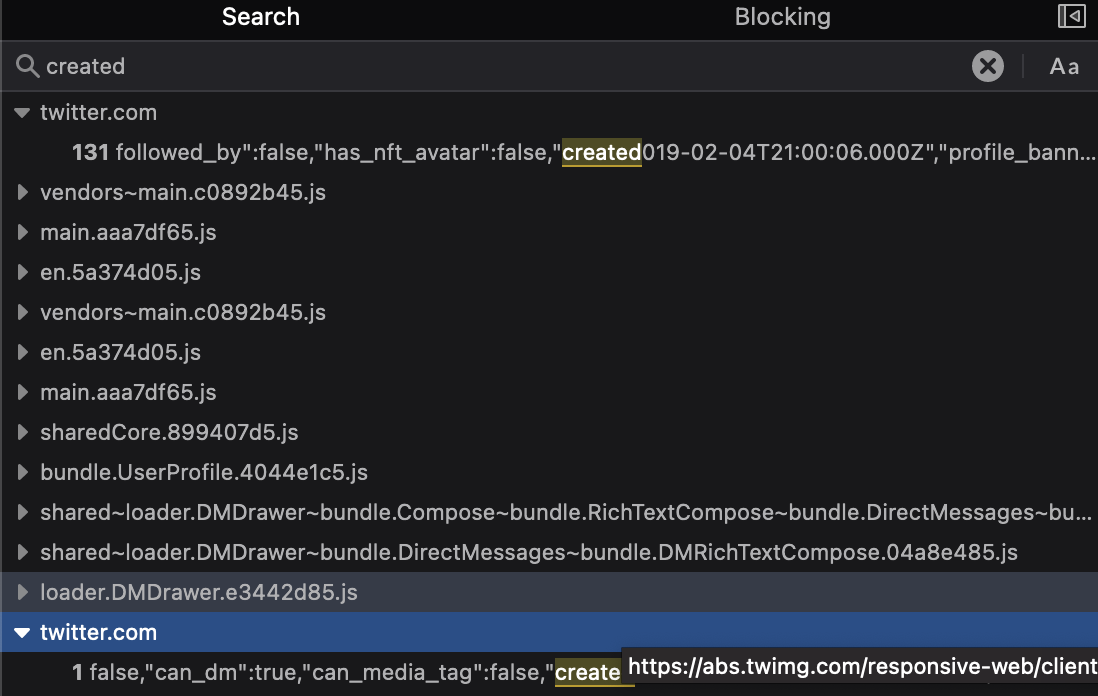
Click on one of the results. A panel displaying the response will open like the one shown below. Uncheck the “raw” option to view the results in a human-readable format. It should look something like this:
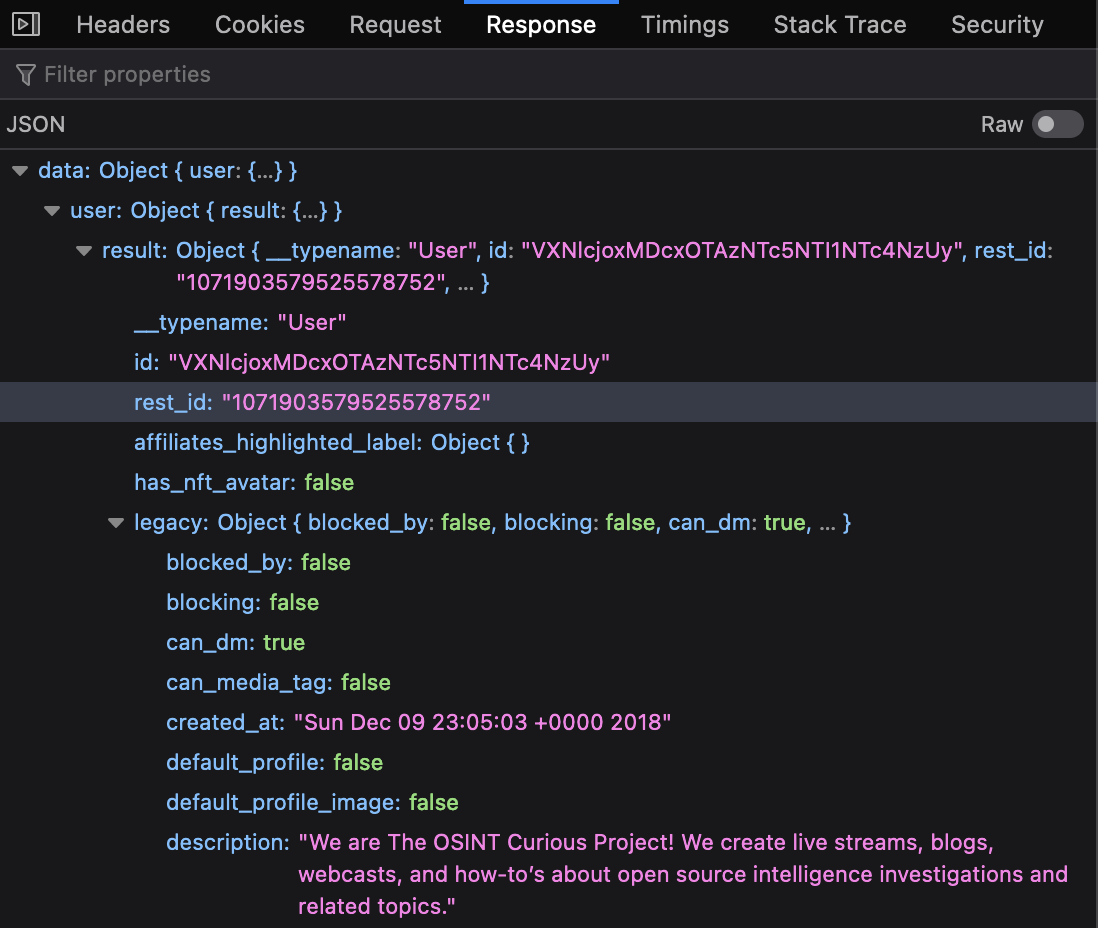
The “created_at” field shows the full timestamp for when the account was created. We already knew the account was created in December 2018, but now we know the exact day, date and time to the nearest second – much better!
Instagram Posts and Comments
Once you’re familiar with how to search in webpage source code or server responses then it becomes easier to search for other types of useful data. Instagram is notoriously difficult to poke around but there are still some useful snippets of data to be found. One challenge that Instagram poses for investigators is that as time goes by timestamp information becomes more vague. Recent posts are very specific (“9 hours ago”) but over time the posting time is only referenced by a date with no time, and comment timestamps are only referenced in weeks. For Instagram users this is not a problem, but it is problematic for investigators who want to recreate events with a high degree of accuracy.
Fortunately Instagram also has some useful tidbits hidden away inside the server responses that we can use. Let’s have a look at The Rock’s Instagram account to find some.

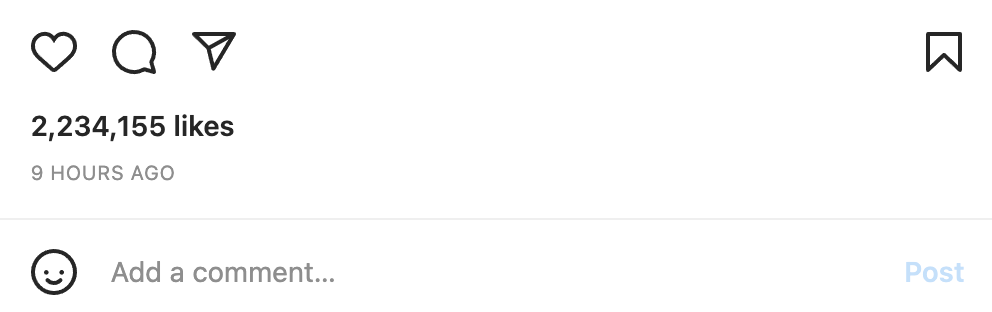
As I write this (Sunday 6th Feb 2022) there’s a recent post from The Rock showing him doing a gym workout. I can see it was posted 9 hours ago:
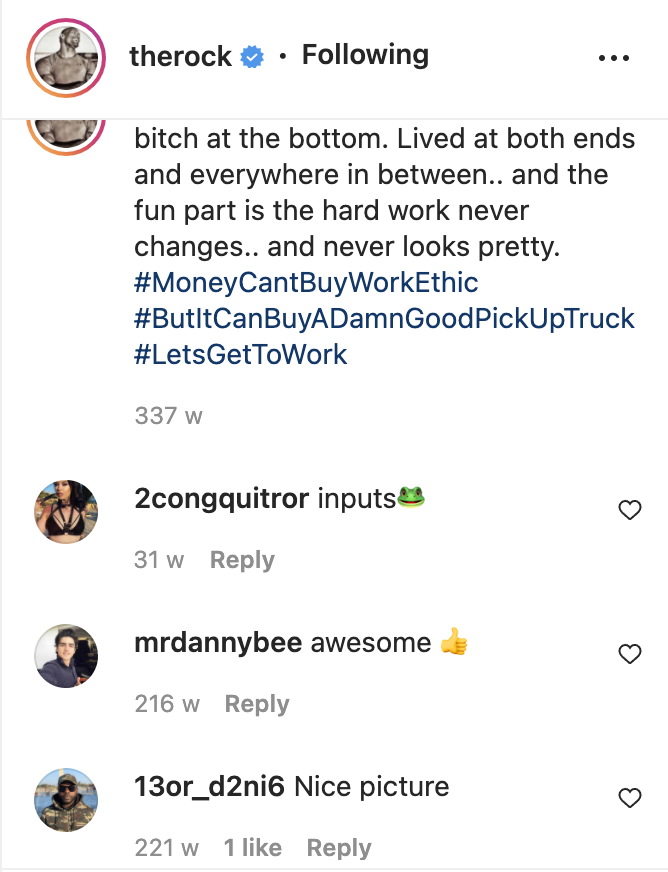
That’s ok for now – but what if I want to analyse content that was posted months or years ago? This post from 2015 shows how the data becomes less accurate as time passes. Although there is still a time stamp (“August 19th 2015”) it contains only date information with no time information. The comments are even less accurate – they only say how many weeks ago they were posted, which is not very helpful and doesn’t allow us to be specific.
There must be some useful data somewhere though. How can Instagram tell me a comment was made 216 weeks ago unless it has additional timestamp information to refer back to? If we can find this reference point we should be able to find the more accurate timestamp data ourselves.
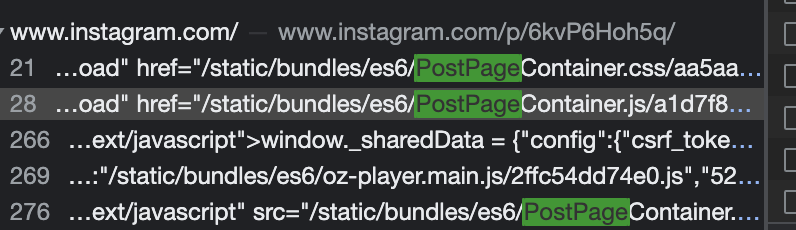
To find the timestamp for a specific Instagram post, open the page in developer mode as in the Twitter example above. Search for the term “PostPage” and you’ll find some useful JSON data that provides extra information about the post, including timestamp data. You may find several matches for “PostPage”, but the information you need will be listed under the main URL for the post you are researching. So in this case when the post URL is https://www.instagram.com/p/6kvP6Hoh5q/ then this is where the relevant information will be. The results tell me that “PostPage” information can be found on lines 21, 28, 266, 269 and 276 of the response content.
This is what we find at line 266:
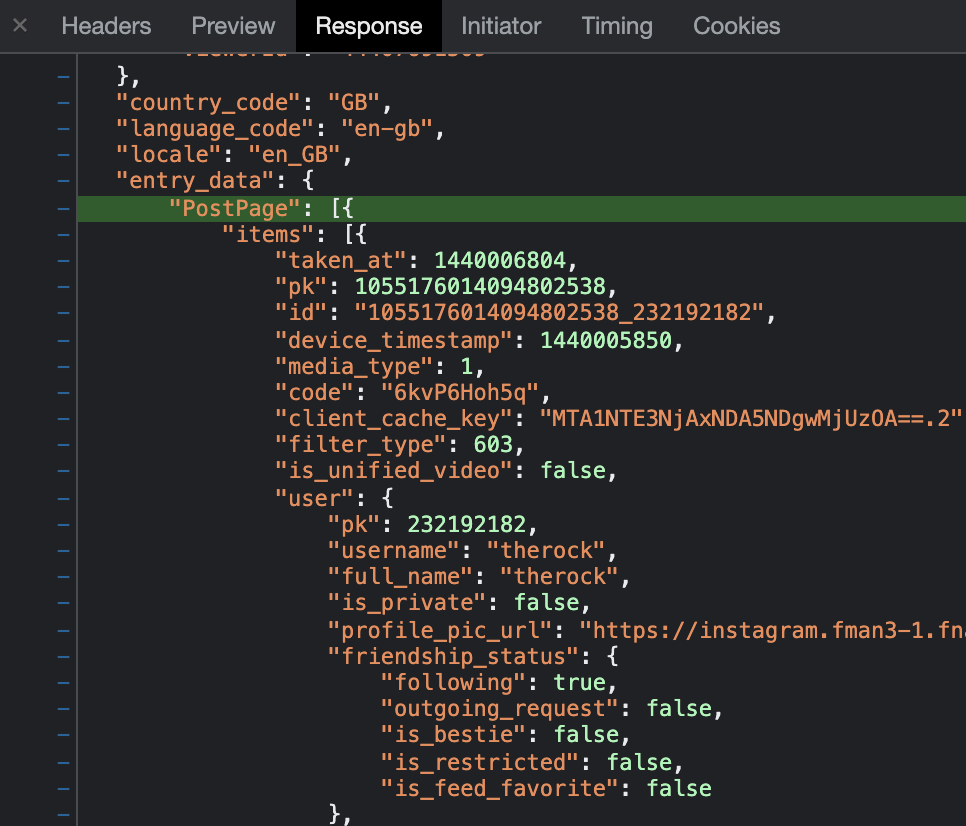
There’s a “taken_at” field with a UNIX timestamp. Using a UNIX timestamp convertor we can see that 1440006804 refers to Wednesday 19th August 2015 at 17:53:24. This is much more specific than a date alone!
You’ll also a notice a second UNIX timestamp called “device_timestamp”. In this case it refers to a time on the same date but at 17:37:30 – approximately 16 minutes before the “taken_at” field – so what is the reason for this? In my research on this I’ve noticed that the “device_timestamp” field is always before the “taken_at” field. My best explanation for this at the moment is that “device_timestamp” is based on the time that the image or video is actually created on the device, and that the “taken_at” field reflects an actual upload time. I need to do a little additional research to verify this is the case, but it’s a reasonable hypothesis for now.
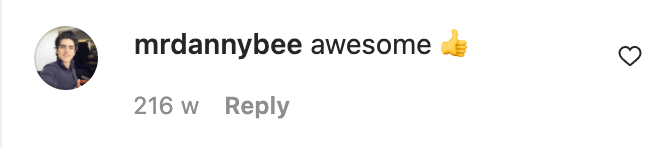
The same process can be applied to find comment timestamps. Instagram states that a comment on The Rock’s post from mrdannybee was posted 216 weeks ago, but searching for “mrdannybee” in the responses brings up a JSON for his comment, which contains a much more specific timestamp:
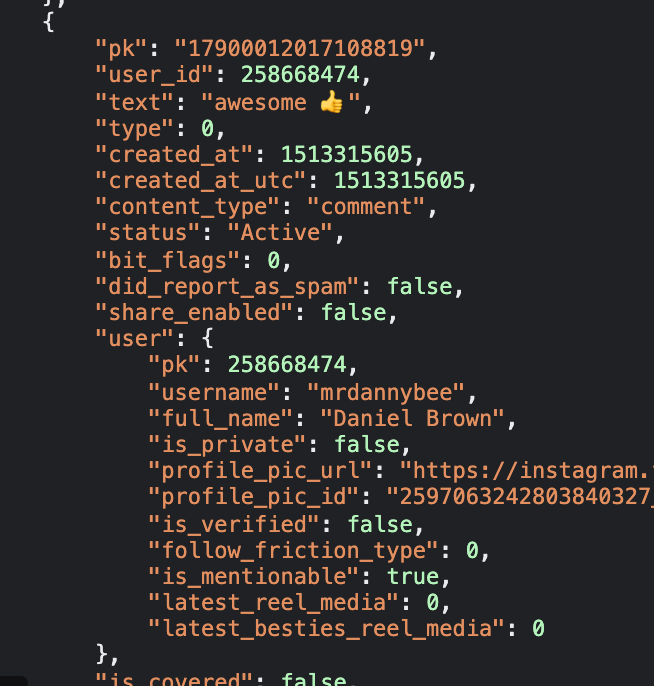
Sure enough 1513315605 refers to Friday 15th December 2017 at 05:26:45 UTC, which is 216 weeks ago. To double check DateTimeGo will help you calculate the date x weeks or months ago.
This has been a brief overview of just a few techniques for retrieving more detailed information from website content, but once you learn how to find extra data this way it opens up many more opportunities for finding useful data.
If you found this guide useful, you might also enjoy my previous post on extracting timestamps from images posted on websites.
Any suggestions about a Facebook Story post.. having a hard time finding it