Recently I’ve been setting up a web application built with Docker. The setup posed a little challenge since it was necessary to run the app on the internet but at the same time I didn’t want it to be directly accessible on the web for anyone to poke around.
It’s possible to limit access to web applications with passwords and MFA but exposing login portals still attracts bots, password-sprayers and other kinds of internet nuisance. I needed to run the app on a public server but restrict access to it for anyone who wasn’t an authorised user.

SSH Tunnels are a very effective way of restricting access to a server, since only users with a valid key can connect and I wanted to use one for this project. I’ve set up SSH Tunnels before, but this was the first time I’ve used one to manage access to an application built with Docker. Docker handles firewall rules and exposed ports in a slightly different way and this caused me a few issues along the way. I couldn’t find much helpful guidance as to how to deal with some of the problems I encountered so I’ve written this article in case anyone else will find it helpful.
This guide will explain how Docker affects iptables rules, how to restrict access to a Docker web app with an SSH tunnel, and how to harden SSH services to prevent unwanted access and privilege escalation.
Docker & Iptables
Iptables filters network traffic according to a predetermined set of filters: INPUTFORWARDOUTPUT
DOCKERDOCKER-USER
To restrict access to my application I want to allow connections via SSH on port 22, but deny direct access to the app on ports 80/443.
On a non-Docker application I could begin by adding a rule to INPUT
iptables -A INPUT -p tcp -m multiport --dport 80,443 -j REJECTThe problem is that this won’t work. Why? Because the DOCKERINPUTDOCKER
Chain DOCKER (2 references)
num  target     prot opt source               destination
1    ACCEPT     tcp  --  anywhere             172.18.0.5          tcp dpt:https
2    ACCEPT     tcp  --  anywhere             172.18.0.5          tcp dpt:http
DOCKER
Point Docker To Localhost
The first thing is to stop my Nginx Docker container from talking to the outside world. The Docker Compose yaml file tells Nginx to forward ports 80 and 443 on the container directly to the whole internet (0.0.0.0). The default config for the Nginx container looks like this:
ports:
      - "0.0.0.0:80:80"
      - "0.0.0.0:443:443"
This is why my firewall rules were ignored and my SSH tunnel was ineffective in restricting access. I modified the yaml file so that Nginx now only forwarded ports 80 and 443 to localhost instead of the whole internet.
ports:
      - "127.0.0.1:80:80"
      - "127.0.0.1:443:443"
After restarting the container, the application now only speaks to localhost. Next we need to adjust the firewall to reflect these changes.
Modifying DOCKER-USER
It is not advisable to modify the DOCKERDOCKER-USER DOCKER-USERlocalhost.
iptables -I DOCKER-USER 1 -i eth0 ! -s 127.0.0.0/8 -j REJECTInserting this rule at the start of the DOCKER-USER eth0localhost will be rejected. No more direct access from the outside.
Extra Firewall Changes
I still need to enable some HTTP/HTTPS traffic so that the server can receive updates, so blanket blocking of ports 80/443 is not desirable. At the same time I still want to fully disable access to the server for all protocols and services except SSH tunnel traffic, so a little tweaking of the remaining firewall rules is necessary.
Firstly any new HTTP/HTTPS requests originating from outside the server are rejected. Using ! -s 127.0.0.0/8 ensures that connections from any IP address that is not on the loopback address block will be rejected:
iptables -A INPUT -p tcp ! -s 127.0.0.0/8 --dport 443 -j REJECT
iptables -A INPUT -p tcp ! -s 127.0.0.0/8 --dport 80 -j REJECT
However since we need to allow HTTP/HTTPS access for server updates, we can permit traffic that is related to connections that are initiated from the server while ignoring those that originate from the outside.
When the server runs apt-get update to check for software updates it needs to use HTTP/HTTPS to do this, so we can use the iptables conntrack module to allow inbound connections on ports 80 and 443 for RELATED and ESTABLISHED traffic. In other words, as long as the HTTP/HTTPS connection was initiated by the server itself, the traffic will be allowed in.
iptables -A INPUT -p tcp -m multiport --dports 80,443 -m conntrack --ctstate RELATED,ESTABLISHED -j ACCEPT
The OUTPUT NEW in the conntrack options.
iptables -A OUTPUT -p tcp -m multiport --sports 80,443 -m conntrack --ctstate NEW,RELATED,ESTABLISHED -j ACCEPTTo allow tunnel creation SSH is enabled for both INPUT OUTPUT
iptables -A OUTPUT -p tcp --dport 22 -m conntrack --ctstate NEW,ESTABLISHED -j ACCEPT
iptables -A INPUT -p tcp --sport 22 -m conntrack --ctstate ESTABLISHED -j ACCEPT
Enabling the SSH Tunnel
Now to test it all out. If it the rules work as planned, I will be able access the application only when I have an SSH Tunnel open. Any attempt to access the server directly by any other means should be rejected.
On my local machine I ran the following command to set up the SSH tunnel.
ssh -i priv-key user@remote-ip -N -L 5000:localhost:443The connection is established and if I navigate to https://localhost:5000 in my browser, I can view the web application running on 443 on the remote server.
Direct access to port 443 on the remote server is not possible since 443 only accepts connections from the server localhost. However since I will already be connected to the server via SSH, my requests to access the Docker app running on localhost:443 will be accepted.
If I disconnect the SSH tunnel and try to access the server directly via HTTP/HTTPS I get the following rejection. This is what anyone else should see if they try to access the application other than via SSH:
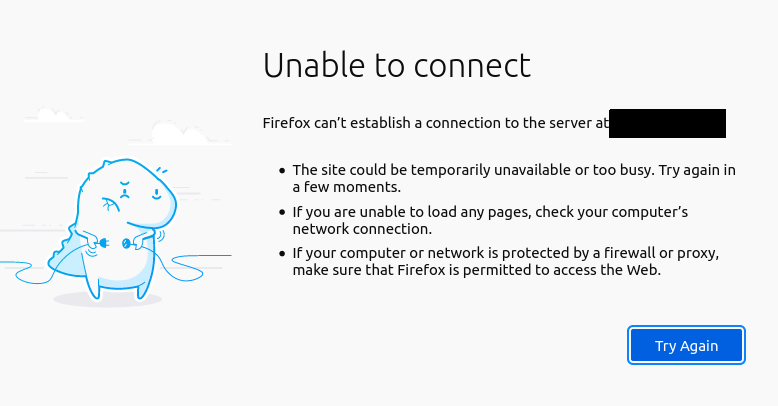
It works! I can access the app when the SSH tunnel is connected, but if it isn’t enabled I can’t access the app. More importantly no one else can either.
Bonus: Optimising For Security
I want to share this app with a few other people. To do this I need to add their public SSH keys to the server so that they can create an SSH tunnel to the app in the same way that I did.
A golden rule of security is to never allow users to more privileges than they need. When bad things happen to computer systems there is almost always some privilege escalation involved. For this reason limiting user rights and making privilege escalation as hard as possible should be incorporated into all development projects, no matter how small.
I need to retain a privileged account to manage the server, but no one else does. The requirements for my users are:
1. Authenticate to the server via SSH.
2. Use the web app they access via the SSH tunnel.
3. Nothing else.
The server needs to be configured to reflect this. First of all the SSH service can be hardened by disabling login for root /etc/ssh/sshd_config as follows:
PermitRootLogin no
ChallengeResponseAuthentication no
PasswordAuthentication no
Use PAM no
The changes will take effect after restarting SSH with the command
sudo systemctl restart sshd.service
I administer the server from a non-root account that can use sudo to run privileged commands – but I don’t want to share this with other users. To allow users to access the app first I create a non-privileged user called tunneluser
$ sudo useradd -m tunneluserNext step is to create a .sshauthorized_keys file where user SSH keys can be stored. Unless a user’s keys are in this file they won’t be able to authenticate and create an SSH tunnel.
$ mkdir /home/tunneluser/.ssh
$ nano /home/tunneluser/authorized_keys
All my users’ SSH keys can then be added directly to the authorized_keys file.
Since my users only need to authenticate via SSH and nothing else, they don’t need shell access. Shell access can be disabled by editing the user’s entry in /etc/passwd/bin/bash/bin/true
From their own machines, the users will be able to run the following command:
ssh -i priv-key tunneluser@remote-ip -N -L 5000:localhost:443They will then be able to access the web app via SSH tunnel as intended.
Further SSH hardening can be achieved with Fail2ban.