
Ever since I started blogging about image geolocation I’ve tried to write about methods and techniques that make solving these kind of puzzles more structured and systematic. In my professional career I was (until recently) a criminal investigator so it was helpful for me to transfer habits and methodologies from traditional investigation to the subject of image geolocation, but sometimes these methods can be a little complex to explain clearly.
Recently I’ve been making some video tutorials for The OSINT Curious Project on the subject of image geolocation. While making the videos I began to think about how to come up with a simpler methodology but one that will cover cases of all sizes and scales. Gap analysis is a very effective way to plan and conduct investigations (and still my preferred away to approach complex problems) but it’s hard to explain clearly and simply in ten minutes.
So to try and simplify things a little I’m going to try and explain geolocation challenges in three parts: extract, research, and verify. The three parts work like this:
1. Extract – examining the image carefully to extract every last possible detail from it, no matter how small or obscure. In some images this will be easy, in images with less detail you might have to take more time to do this.
2. Research – looking at all the data points you extracted from the original photo and researching them with whatever means necessary. For example a car registration plate, a street sign, a geological feature, and so on. Some data points will be more useful than others, but you cannot always know from the outset which the most important point will be.
3. Verify – researching all the data points you extracted will lead you towards a rough idea of where a location might be, but now you need to check if your hypothesis is right. If you’re right, well done! If you’re stuck, then returning to steps 1 and 2 might help.
Hopefully that’s a simpler approach to geolocation problems. Obviously the more complex the problem, the greater the time and effort that is required to extract and research information, but it should scale to investigations of all sizes.
The only thing a methodology cannot do is be a substitute for skill and practice. The famous photographer Henri Cartier-Bresson said that the first 10,000 photos you take will be your worst. The same is probably true with image geolocation puzzles; the more you practise, the more you will improve. The good news is that it will probably not take as many as 10,000 practice images to become competent.
Where Is This Parking Meter?
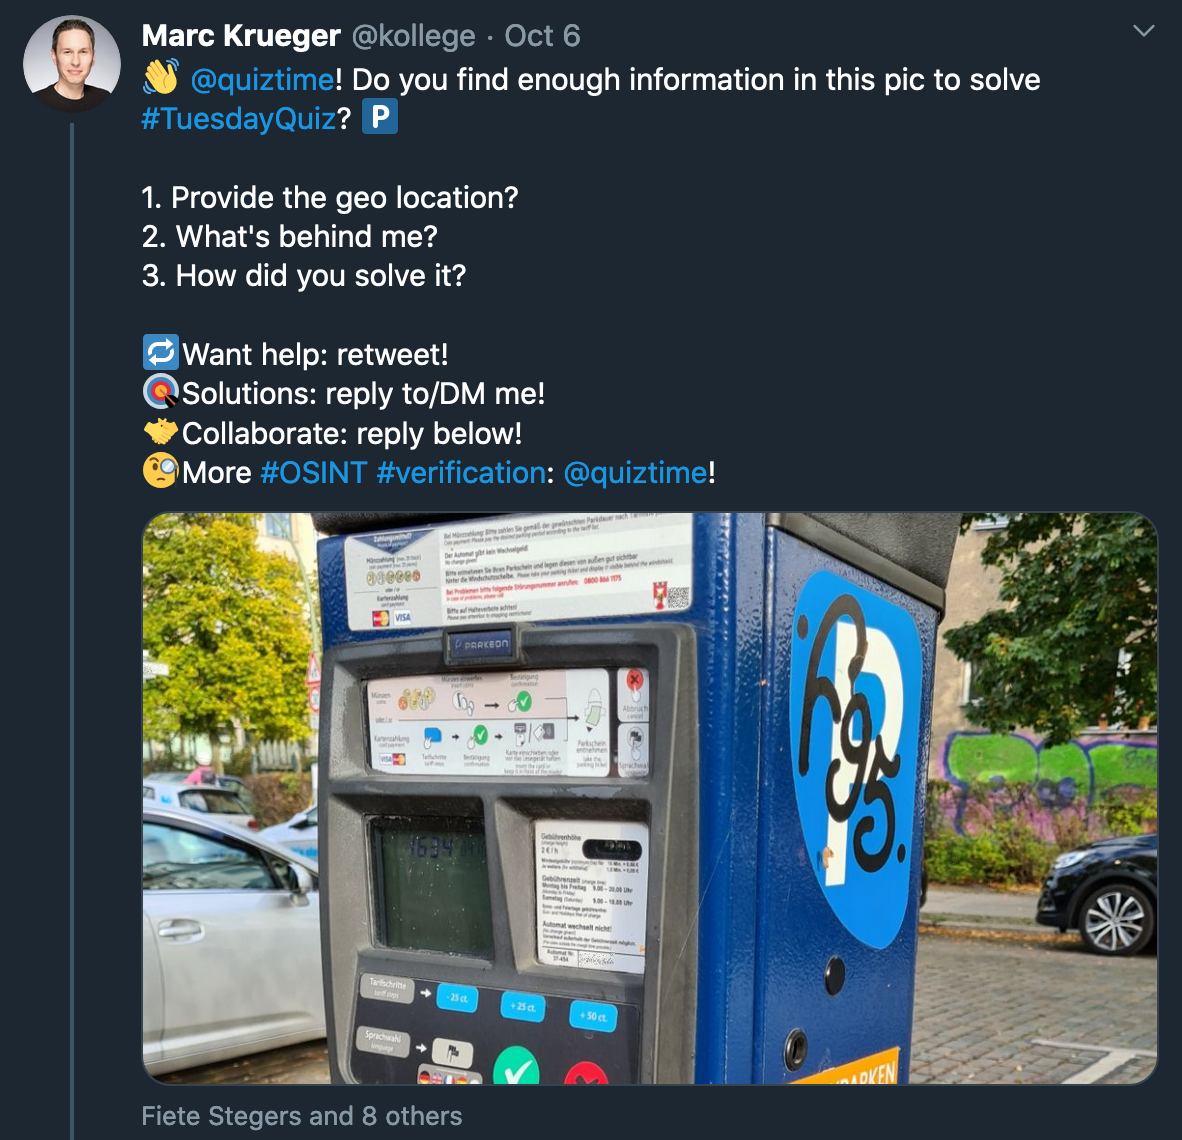
Time to put the theory into practice. Last Tuesday Marc challenged us to geolocate this parking meter. It’s too generic to find a quick hit with a reverse image search or Google Lens so we need a more methodical approach.
1. Extraction
Let’s see how much information we can extract from the photo. I’ve set myself the goal of finding at least 20 pieces of information before researching them:
1. Parkeon parking meter, the language is German
2. The ‘Handyparken’ location reference is 100022.
3. Several parking apps can be used here, including Pay By Phone, EasyPark, and ParkNow.
4. ‘F95’ graffiti tag.
5. Red and white logo on the parking meter
6. Contact phone number 0800 866 1175 on the parking meter
7. Cobbled streets
8. Silver cars with blue writing on the side (taxis?)
9. Cyclist (is there a cycle lane?)
10. 30 km/h speed limit and pedestrian sign – location is likely adjacent to a residential street
11. Car parking on the street, but the cars are parked at right angles, not parallel.
12. Building on the right has distinctive graffiti
13. Building on the left has 4-5 storeys
14. It has a flat roof
15. It has rectangular windows, most have 3 panes of glass. Those on the upper floor have 4.
16. Pavement with a hedge and trees next to it.
17. Time appears to be 16:34 on 4/10
18. Marc has redacted some details on the parking meter, so these are probably location clues. Might help if we can find an unredacted photo of meters in the same area.
19. Tall green lamp post at the junction
20. The second language on the parking meter is English. This location is likely to receive international visitors.
It was tricky to extract 20 specific pieces of information, but by setting this limit it forces you to pull out tiny details that you might skip over otherwise.
2. Research
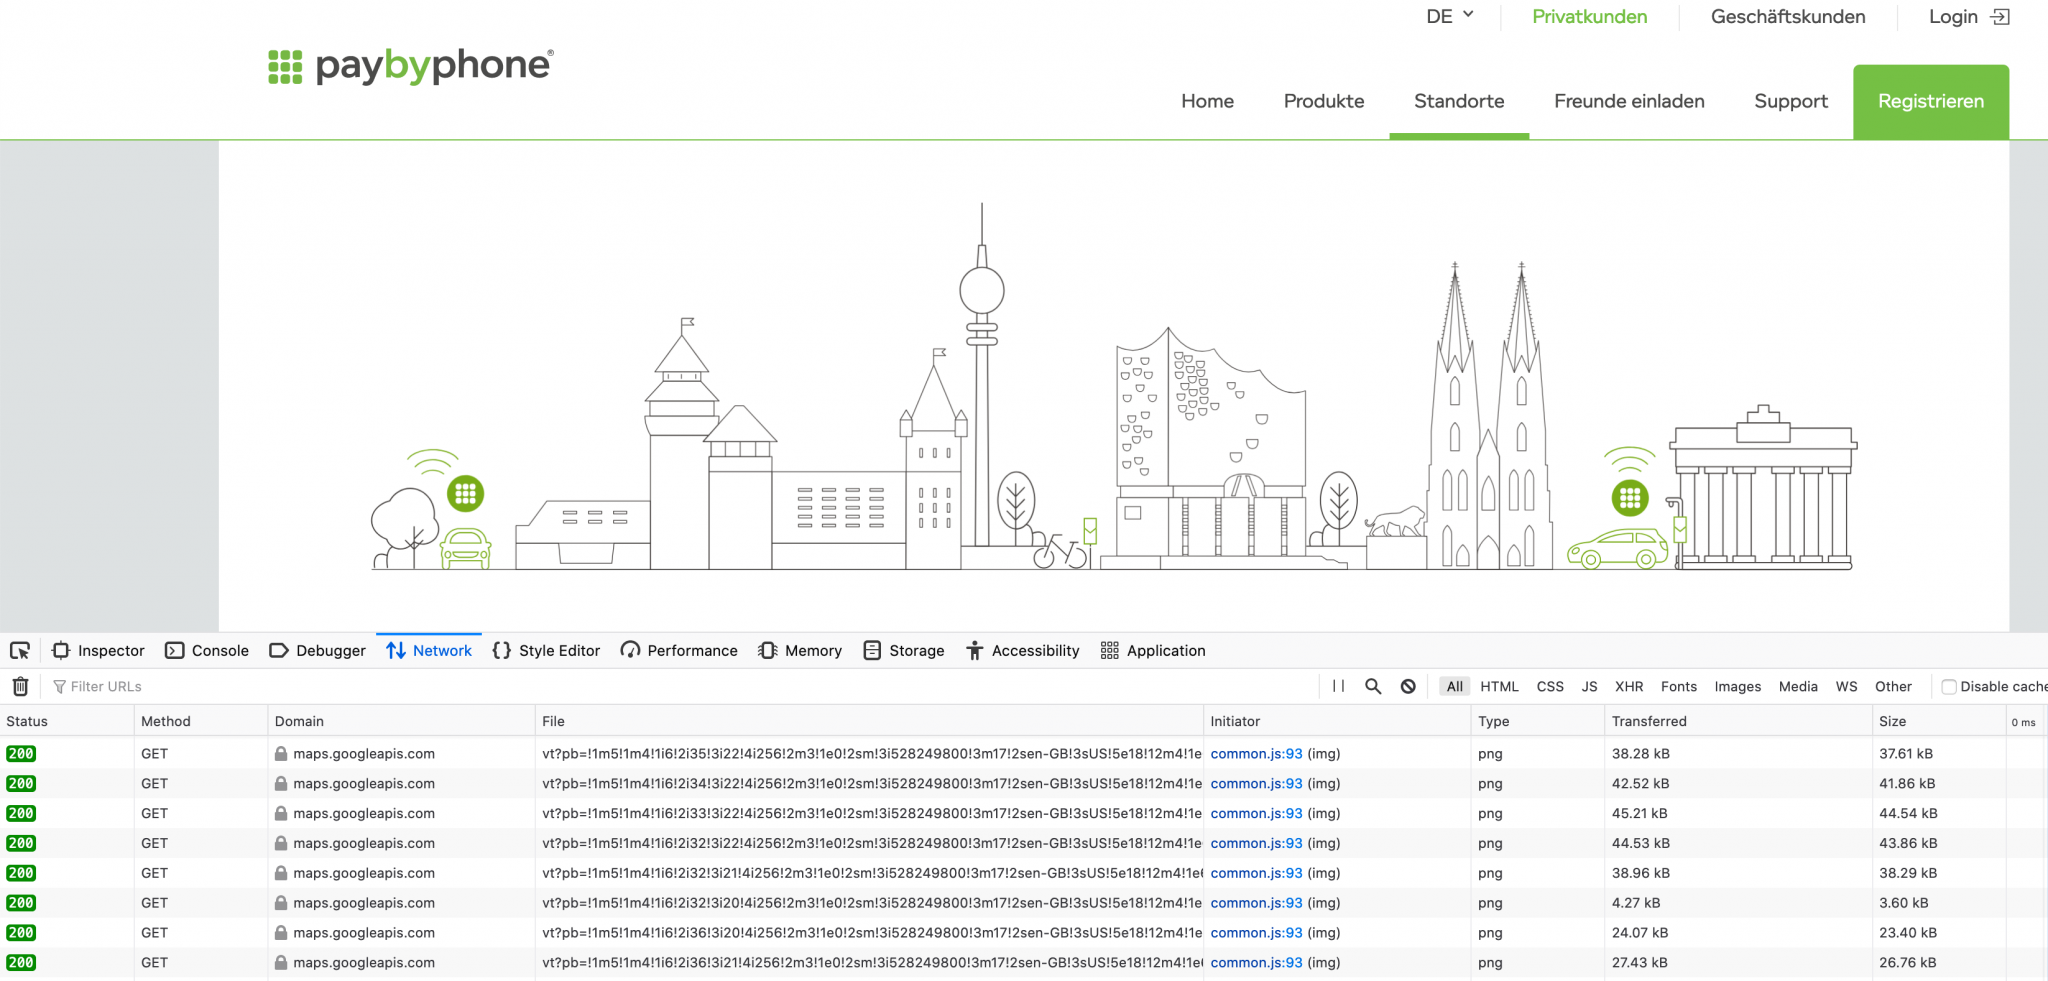
We’ve now got 20 pieces of information to work with. Some will be helpful and some won’t, but we can’t necessarily know which yet. Like many who attempted this quiz I thought that it might be possible to look up the Handyparken reference number (point 2) on one of the app websites. Unfortunately there was no easy way to do this. Even digging around in the source code and network requests doesn’t make it easy to figure out which geographical location corresponded to “100022”. I considered installing the parking apps but as I am in the UK it was pretty difficult to get access to the versions of the apps designed to work in Germany, even with a German VPN. This line of research took me nowhere, so I needed to try something else.
Some of the data points we’ve extracted are not very distinctive. They might be helpful for verification later on, but they probably won’t help find the specific area. We can use the details about the cobbled streets (7) and the lamp post (19) to verify the location is correct, but researching cobbled streets and lamp posts won’t even tell us the correct city, let alone the correct street.
As a general rule, the more unique and specific a data point is, the more likely it is to refer to a specific location. The Handyparken reference is very specific but it was hard to research further. The next most specific detail to look at is the helpline phone number on the parking meter, 0800 866 1175. I Googled the number and there weren’t any obvious matches. There was a Google image match though. I was a little surprised by this because if you view the original page where the image was posted then there is no actual mention of the phone number. I can only assume that Google employed some kind of OCR to read the phone number in the matching image or that it was referenced elsewhere on the forum.

We can see that the new picture features a parking meter that is almost identical to the one in Marc’s picture. The coat of arms is identical on both meters, so now we know that Marc was probably in Berlin-Mitte.

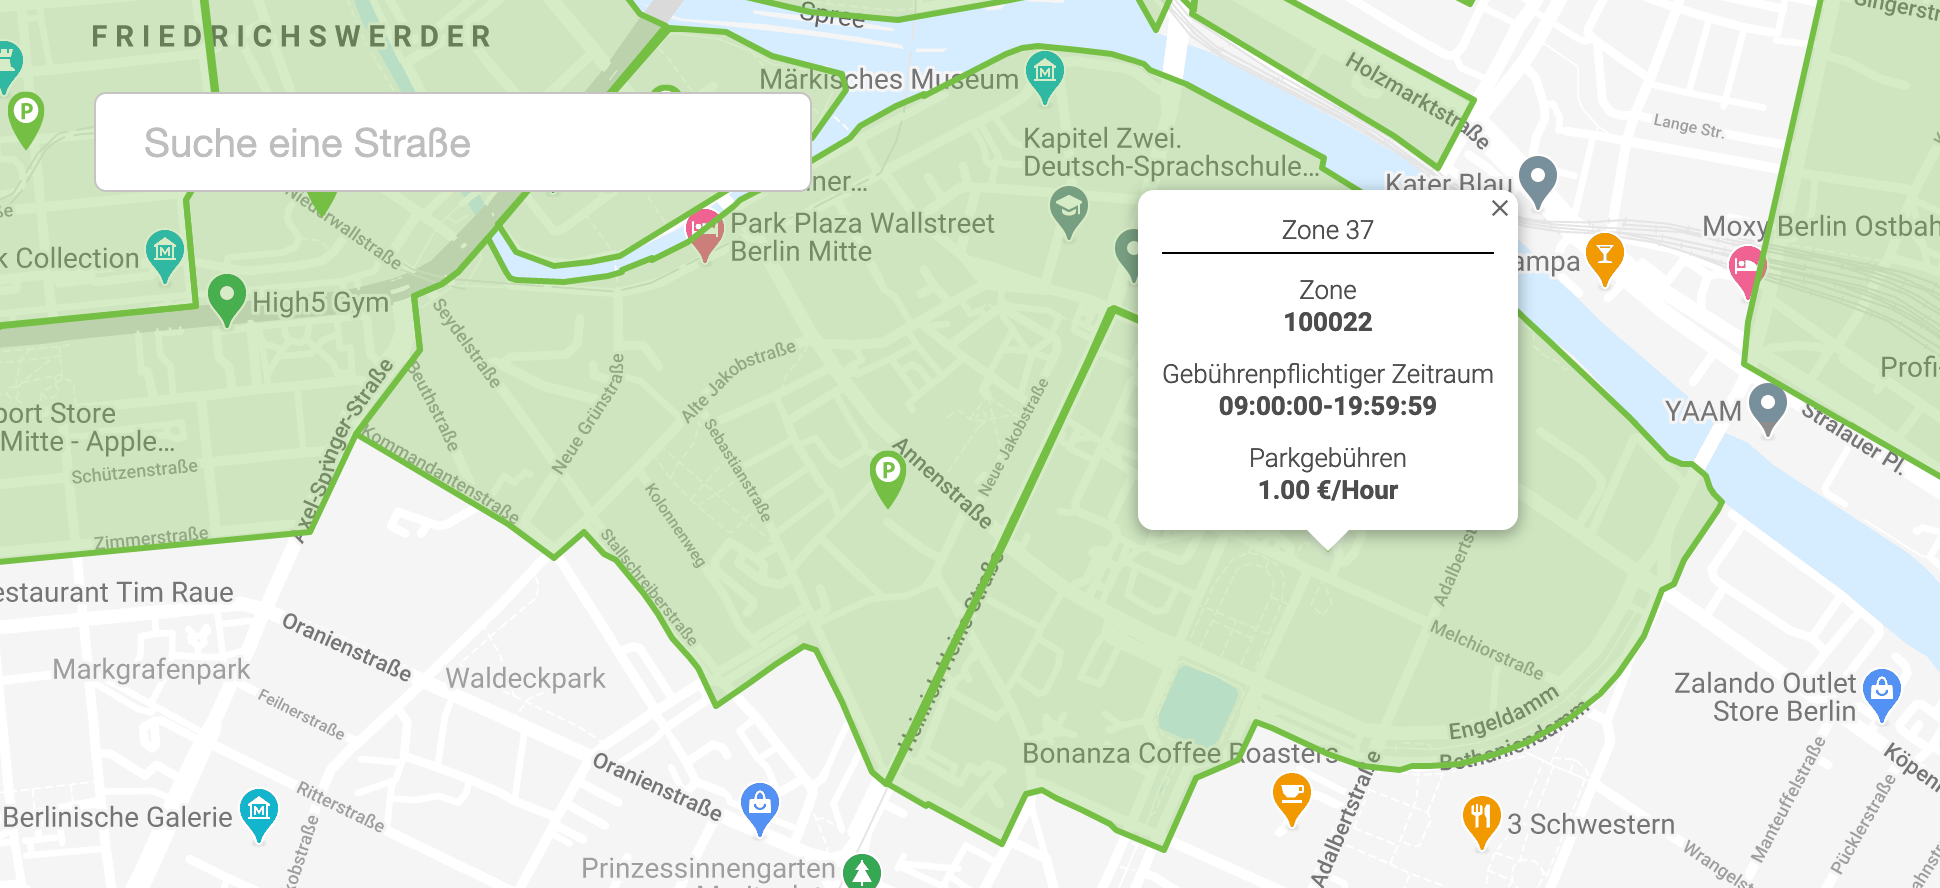
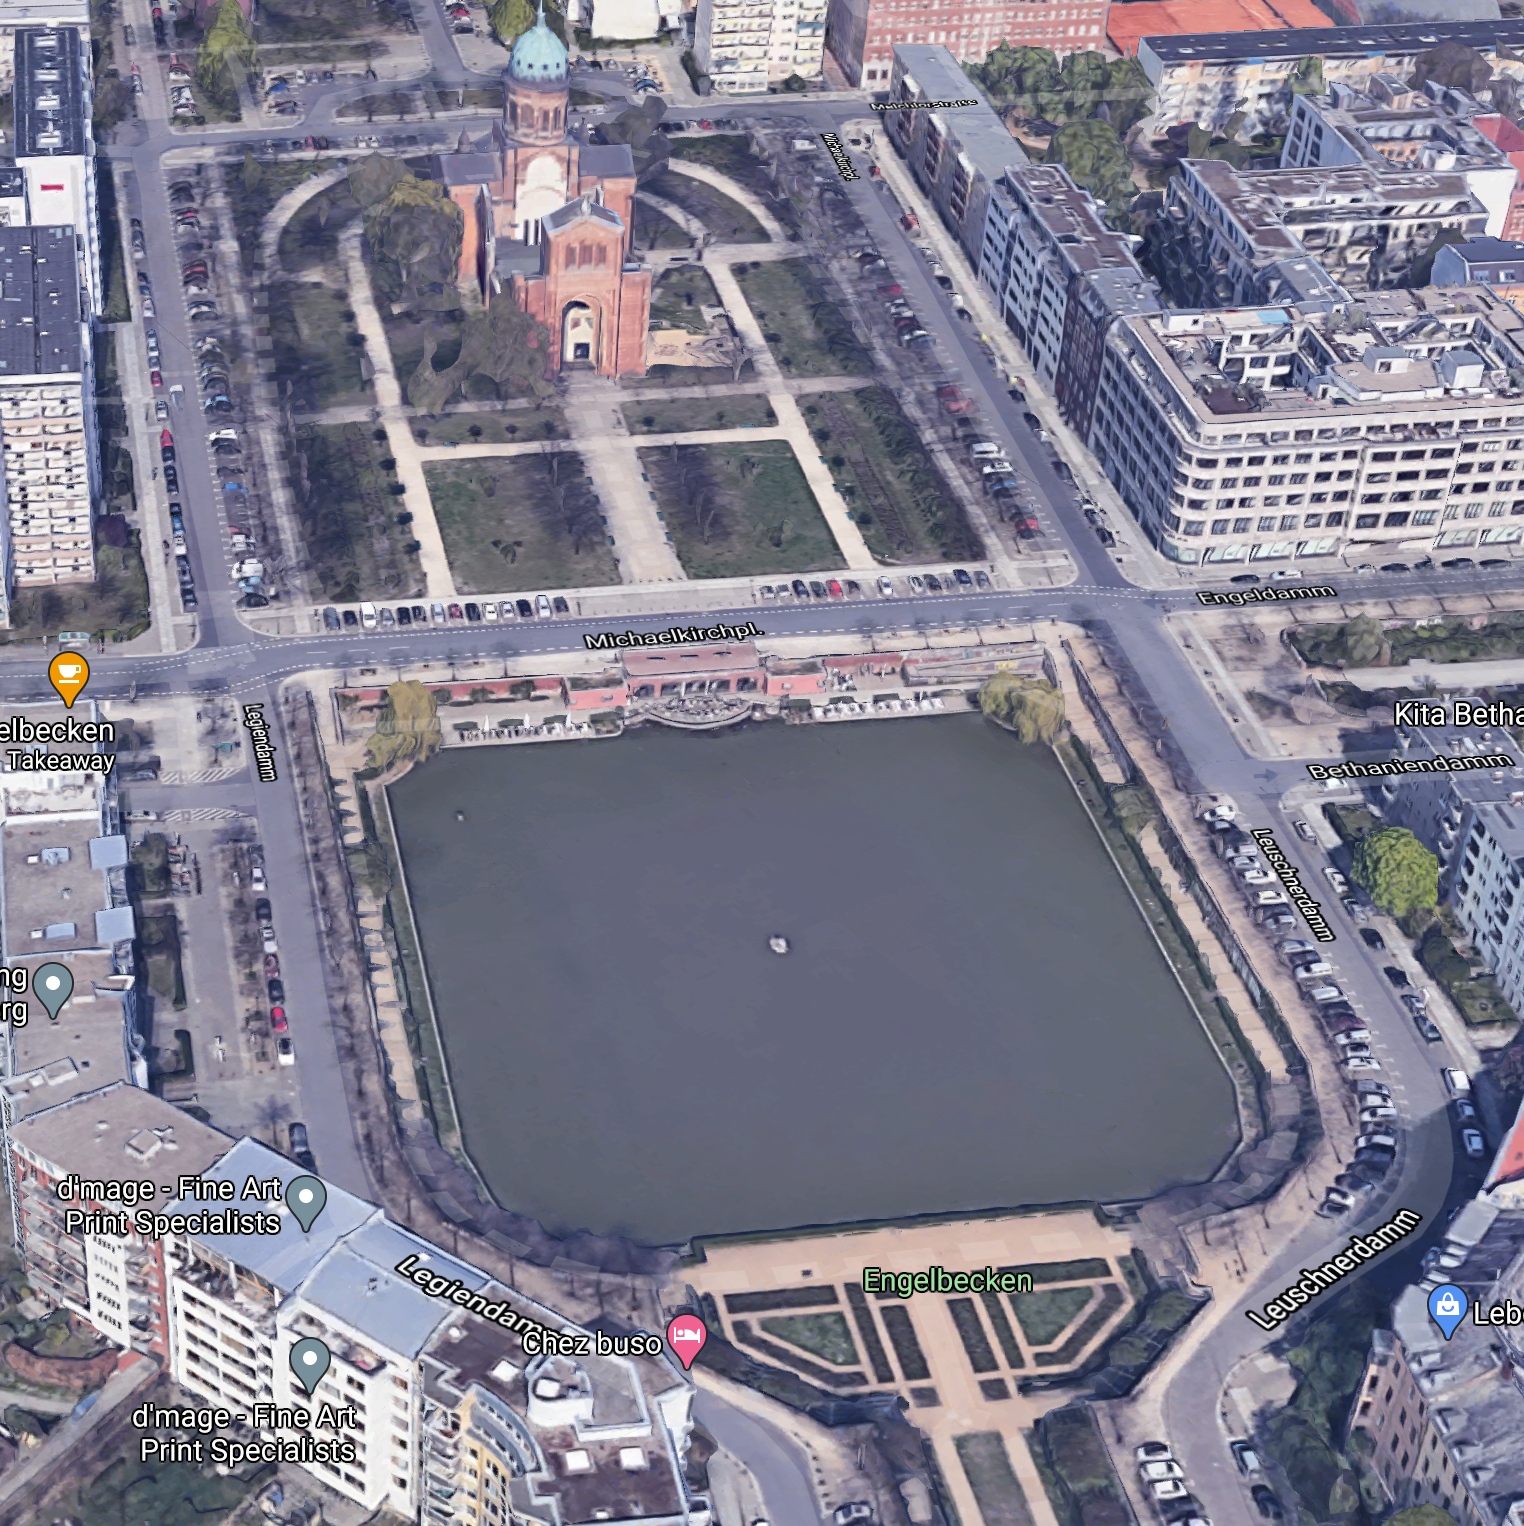
So what do we research next? We’ve narrowed it down to a specific region of Berlin, but now we need to try and find a specific street in that area. Since we now know we’re looking at Berlin, I decided to revisit the Pay By Phone map and look at Berlin specifically. You can see from the map that each district in Berlin has its own parking reference number. They all seem to follow the sequence 1000xx so it only takes a few clicks to find that the area 100022 refers to a small area between the Spree and Heinrich-Heine Strasse. Marc must be there somewhere.
It’s tempting at this point to jump straight into Street View to zoom around to try and find the location, but this will still be quite time consuming and not very methodical (how could you be sure you had covered every single street, for example?) There are other data points that we extracted that we can now use to be a little more precise.
There’s a building we can try to identify (13,14,15) but since we’re looking for a parking meter, why not look at where people are parking their cars? We are looking for places that have cars parked at right angles to each other. Most of the car parks in this area have cars parked in parallel, so we know these locations are not correct:

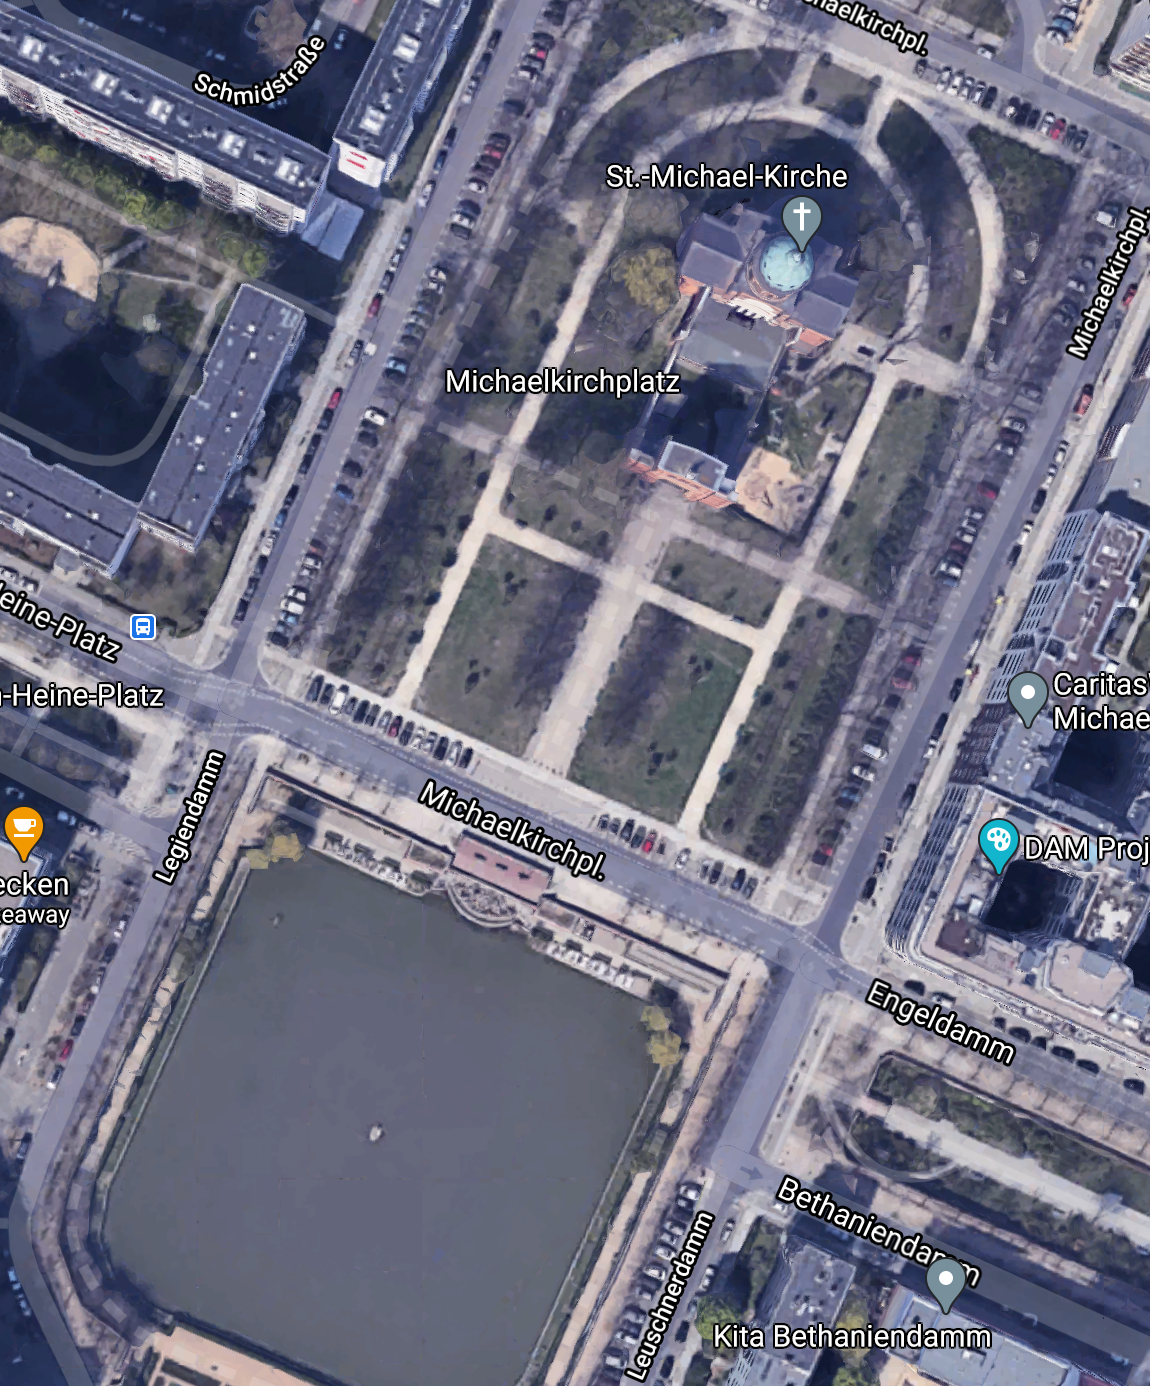
However in the area around Michaelkirchplatz there are a lot of cars parked at right angles to each other, just the same as in our target location (11).
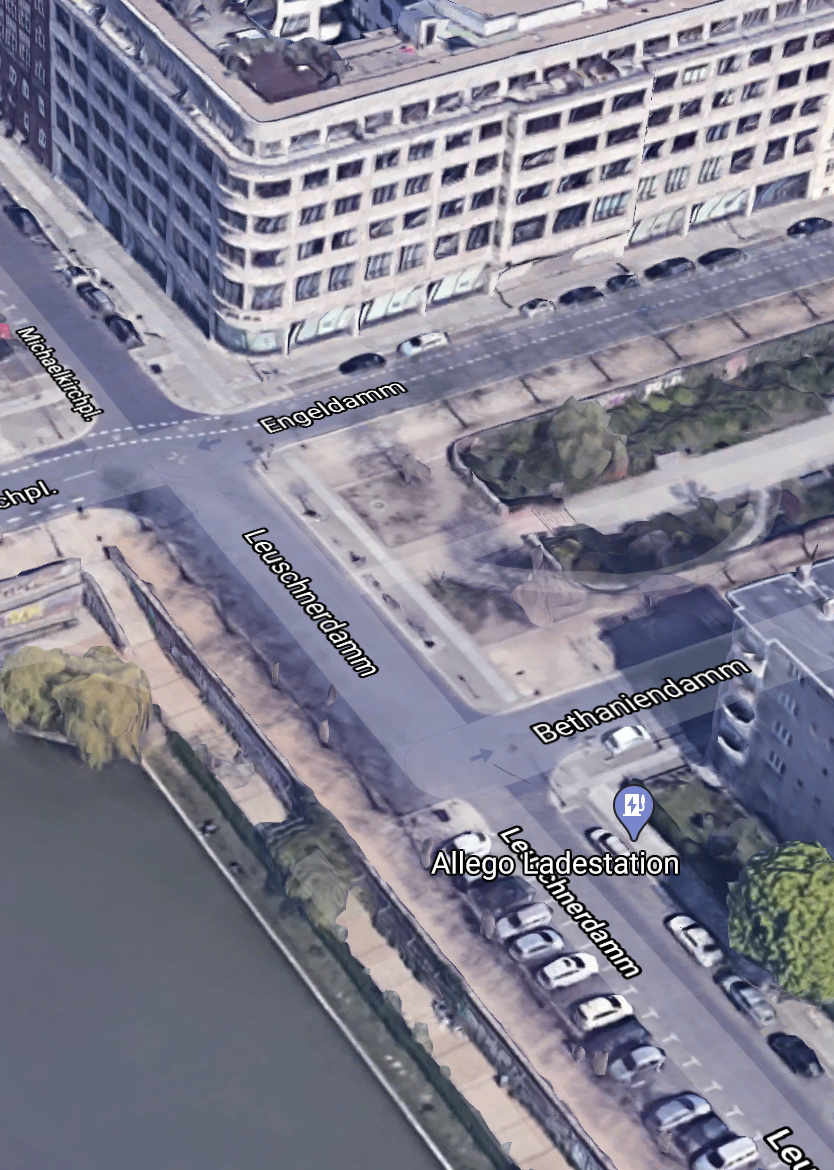
So this looks promising, but can we find a building that matches the one in the original photo? We can enable 3D mode in Google Maps to try and get a better look:
The building on the corner of Leuschendamm and Engeldamm looks like it could match.
So far all the research we have done leads to this point and it looks like Marc was probably stood somewhere on Leuschendamm but before committing to this conclusion we need to test it out and verify that everything is correct.
3. Verification
If we’re right about the location then we should be able to compare the data points we originally extracted and find that they match with the location our research has brought us to. Since this is an urban street location, Google Street View is a good place to start with. Street View coverage is very limited in Germany but the major urban centres still have quite good coverage even if most of the images are now more then ten years old.
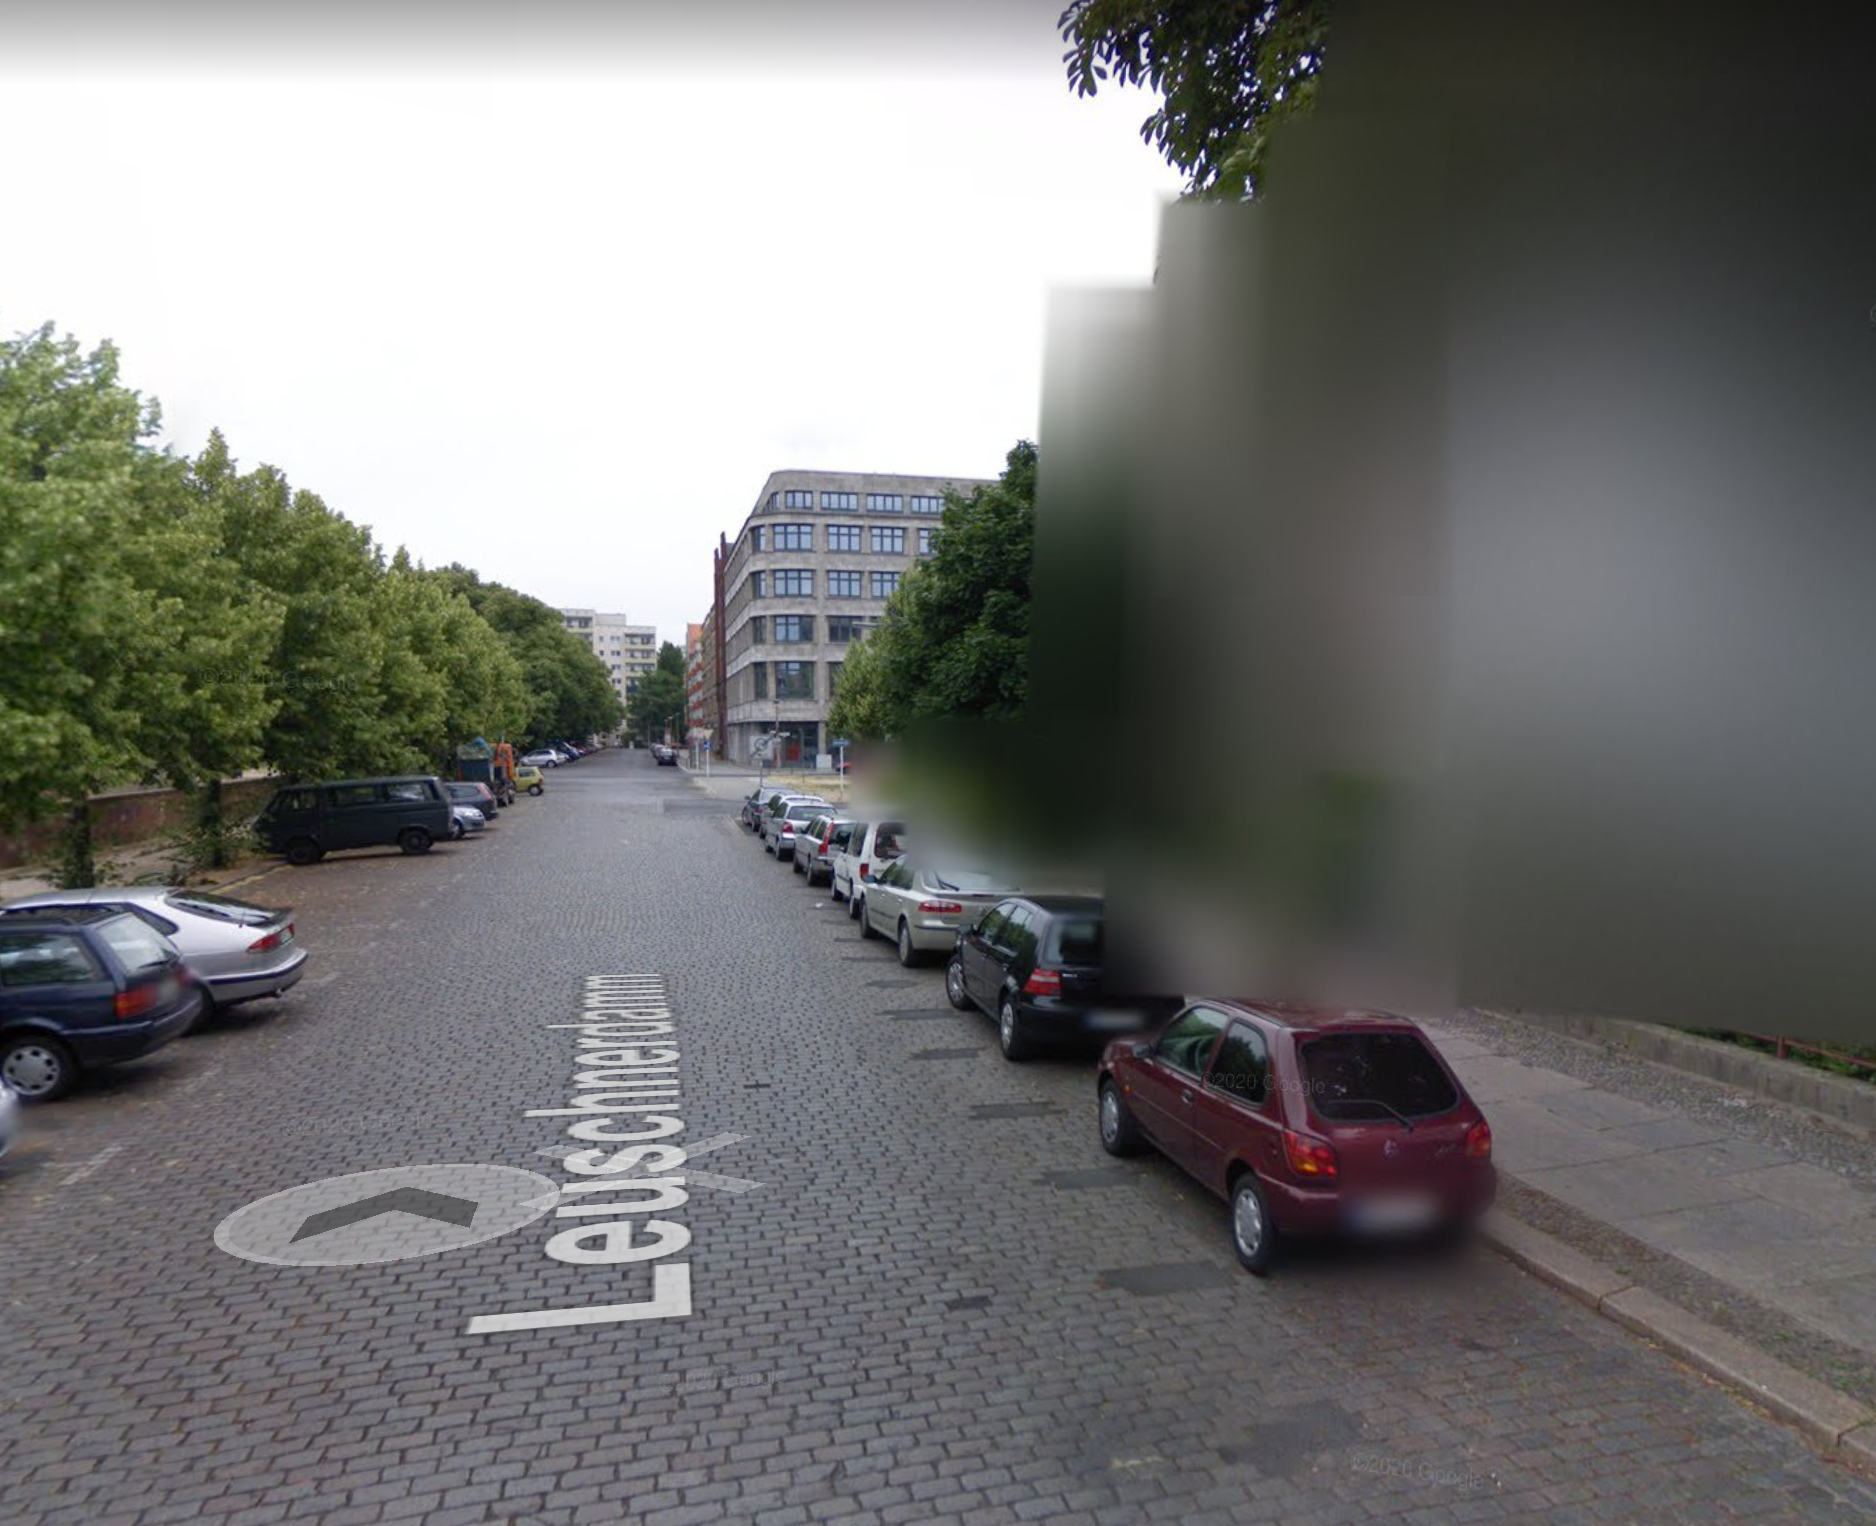
Agh. Did I also mention that lots of people in Germany have chosen to blur out their homes on Street View? In this case we will have to use Mapillary instead. Mapillary coverage is not as complete as Google, but it does fill in gaps for places like Germany where Street View is very limited. Here’s what Mapillary looks like at the location:
Looks pretty good! It seems obvious that this is the correct location, and even though Mapillary does not offer the 360 panorama that Street View does, we can still make out enough features to verify that this is the same place that Marc took his picture. The street is cobbled (7), there’s a matching sign (10) and lampost (19), and the pavement and hedge are similar (16). More importantly the building on the corner of Engeldamm matches (13,14,15) and the same distinctive graffiti can be seen on the building opposite where Marc was standing (12).
So to answer Marc’s original question, he was standing in front of the Engelbecken Park and Gardens.
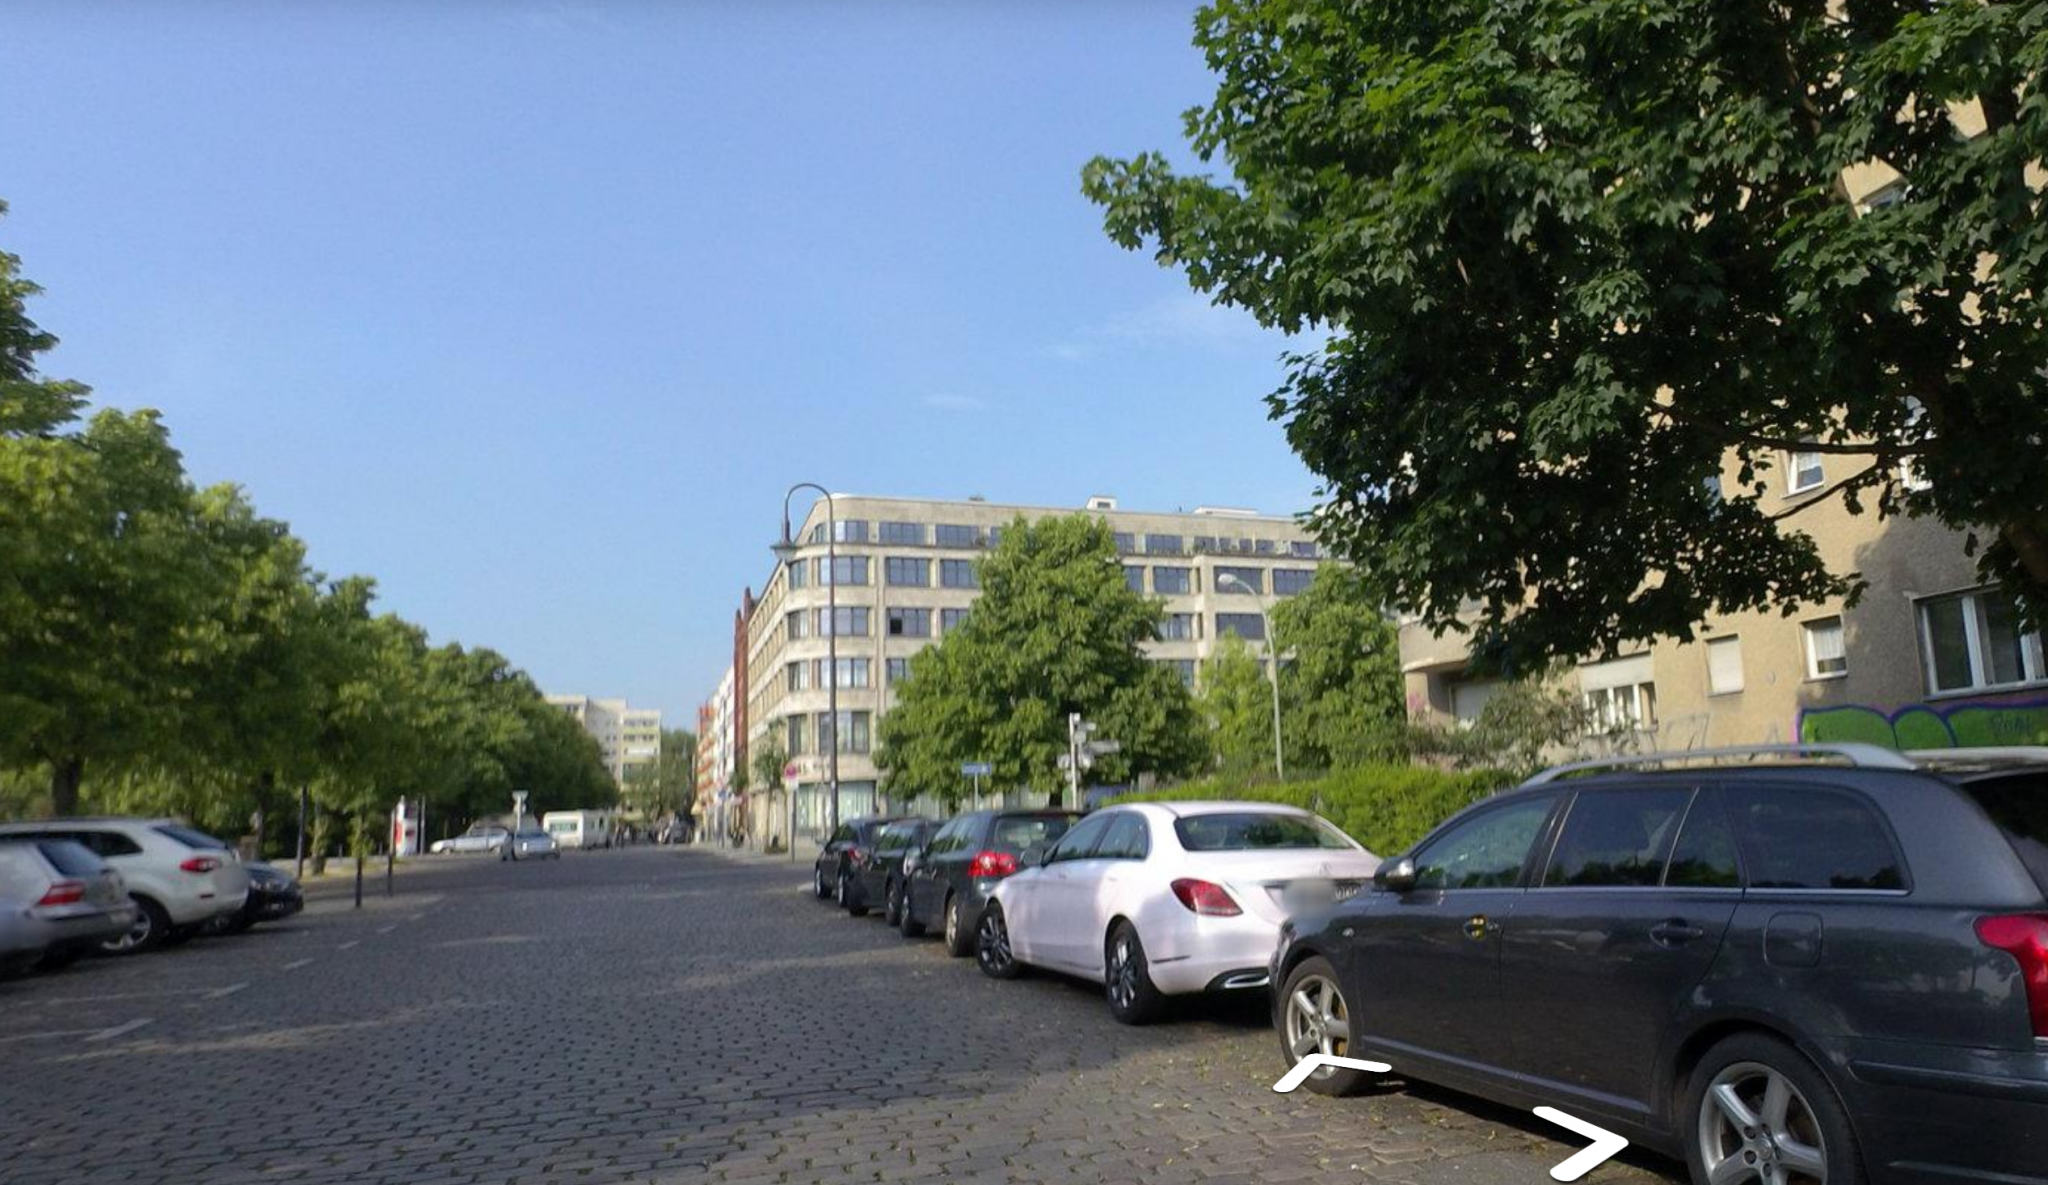
“9. Cyclist (is there a cycle lane?)”
Where?!
In the pink top, just behind the car. It’s a little blury and could be someone walking but I thought it looked as though they were wearing a white bike helmet.