Hunchly is an excellent OSINT tool designed to capture and record your browser activity as you go. Once activated it sits quietly in the background as you browse and saves copies of webpages as you view them. It also records searches, captures EXIF data from images, takes screenshots, and saves lots of other useful data as you browse. As you conduct your OSINT enquiries, all your activity is logged and preserved automatically with no need for slow and cumbersome manual data capture. The end results can be easily exported into a written report.
One of Hunchly’s lesser-known features is that all the data it captures can also be exported directly to Elasticsearch as you browse. This allows a user to build a searchable database of all their investigative activity carried out with Hunchly.
Why Use Hunchly With Elasticsearch?
There are a few advantages to working this way. Firstly, it allows multiple Hunchly users to send all their data to a single database which is then easily searchable, so cooperation becomes much easier. Let’s say that OSINT Researcher A is investigating a particular website. He/she can use Elasticsearch to search for mentions of the website URL in the shared pool of Hunchly data. He/she then discovers that OSINT Researcher B has also researched the same website on a previous occasion, and they can now cooperate and compare notes. I should also point out that using Hunchly in this way does not stop your case data being written and saved to your local computer, this is an additional feature, rather than a replacement.
A second advantage of feeding Hunchly data into Elasticsearch is that it makes compiling and exporting reports easier. If I want to see all the URLs I visited between date X and date Y, or which websites I use the most, or which websites feature a particular phone number or email address, I can enter this as a query into Elasticsearch and view the result or export it as a CSV. Elasticsearch has a powerful search query structure that allows reporting on pretty much any data or event type that you can think of.
Thirdly, Elasticsearch’s GUI interface Kibana allows users to create a wide range of visualisations. Hunchly feeds a lot of metadata into Elasticsearch, all of which can be turned into smart-looking visualisations with Kibana’s built-in tools. If you’re trying to explain to someone what you did during your OSINT investigation, then being able to produce data-driven graphics can be a more effective way to show what you did than a written report alone.
In the rest of the post I’ll show how to configure Hunchly to work with Elasticsearch and Kibana.
Setting Up Elasticsearch & Kibana
There are plenty of good tutorials on how to install Elasticsearch and Kibana, and I won’t repeat them in this article. This guide explains how to install Elasticsearch on Windows, and this one offers different option for Linux and Mac. Once you’ve installed Elasticsearch, you can follow this guide to installing Kibana on Windows, and this one for installing it on Linux/Mac.
If you prefer to watch rather than read, this short video is up to date and goes through the steps of installing Elasticsearch and Kibana on Windows:
If you’re running a relatively small setup then you can run Elasticsearch and Kibana on your local machine where Hunchly is also installed. This is a great way to create your own Hunchly database and visualise or report on your work, but an ES instance on your own machine means that you can’t share or cooperate with other users.
There’s also memory usage to consider. I’ve managed to run ES with just 2GB of free RAM but it is a slow and miserable experience. For a local install on one machine 4GB of spare RAM is better, and 8GB or more is better still. The bigger your dataset grows, the more memory you’ll need, but Elasticsearch scales very easily and in general a OSINT investigator doing manual browsing with Hunchly will generate far less data than, say, a business that sends thousands of server logs to Elasticsearch every day. You don’t need a huge and expensive set up just to start using ES to organise your OSINT data, especially if you’re only working at a small scale.
An alternative solution is to run your ES setup on a remote server and scale the memory requirements according to your need. This is more expensive but it is much more effective if you plan to work cooperatively with other Hunchly users. Elastic offer ready-to-use cloud services for reasonable prices.
Basic versions of both Elasticsearch and Kibana are free and absolutely fine for small scale use but they do not come with basic security features. Consequently if you decide to install free versions of the software on a server that is exposed to the internet then you are going to have a bad time. Insecure Elasticsearch instances are found all over the net and their content made available for all to see. Security costs money, but no security costs even more. Sermon over.
For the purposes of this brief tutorial I’m going to assume that Elasticsearch, Kibana, and Hunchly are all set up and running on a local machine.
Once ES and Kibana are installed, you’ll need to start them up. On Windows you can configure Elasticsearch to run as a service. It can be started and stopped from Powershell with the following commands:
Get-Service Elasticsearch | Start-Service
Get-Service Elasticsearch | Stop-Service
On Linux you’ll need to start Elasticsearch with:
sudo service elasticsearch start
Followed by:
sudo service kibana start
Once both programs are running, open your browser and head to http://localhost:5601. This is the default interface for Kibana and all your interaction with your Elasticsearch data will be done through here. Elasticsearch itself actually uses port 9200, and this is where Hunchly will send all the data to once we’ve set it up but for this project there is no need to interact with Elasticsearch directly outside of the Kibana interface.
Creating A Hunchly Elasticsearch Index
Hunchly sends data to Elasticsearch in the form of a JSON file for every webpage you visit. The JSON data is sent to Elasticsearch using an HTTP POST request, but before Hunchly can post your data it needs to have somewhere to send the data to. You can’t just put your server’s IP into the Hunchly settings and post away, it’s necessary to create an index for it to be written to first.
Fortunately Kibana makes this very easy. Choose Dev Tools (spanner icon) and go to the Console. To create an index called ‘hunchlydb’ enter the following:
PUT hunchlydb
Then click the Play icon to send the command. In the adjacent console window, you should see the following message displayed:
{
  "acknowledged" : true,
  "shards_acknowledged" : true,
  "index" : "hunchlydb"
}
This is confirmation that we’ve successfully created the index called hunchlydb. Note that to create an index in Elasticsearch requires using a HTTP PUT request. Hunchly itself only sends data to a pre-existing index, it can’t create one itself, so you’ll need to set one up in Kibana before sending your data.
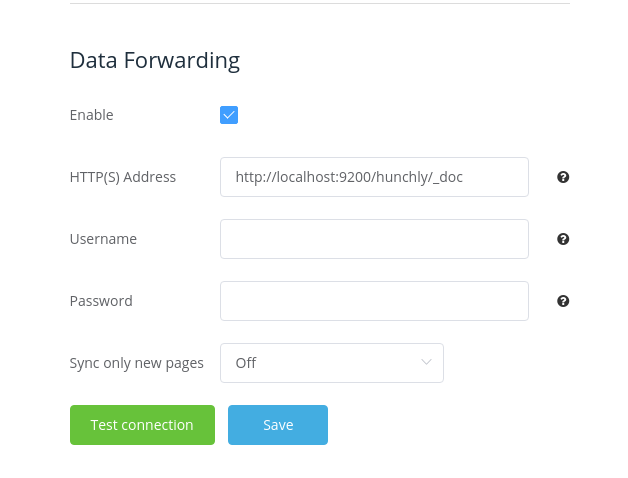
Once you’ve created your index, you’ll need to point Hunchly towards it in the settings. Under Data Forwarding enter the following in the HTTP(S) field, together with your username and password as needed:
http://localhost:9200/hunchlydb/_doc
Your settings should look like this:
If you’re sending the data to a remote server, you’ll need to enter the server IP and index reference in the same way e.g.:
https://1.2.3.4:9243/hunchlydb/_doc
Your Elasticsearch cloud provider will specify which port to use. Remote servers usually send ES data via HTTPS to either port 443 or 9243. Data sent via HTTP to port 9200 is unencrypted and fine for your local machine but not really suitable for sending data over the internet.
Lastly, you may also want to enable the Case Information fields in the Hunchly settings. They aren’t enabled by default but they allow you to append your name and details to the Hunchly data. If you intend to use Elasticsearch for cooperating and sharing with other Hunchly users then this is essential otherwise it’s hard to know which user the data originated from:
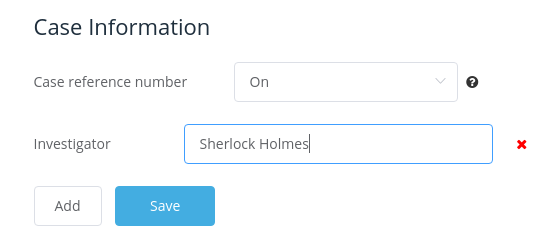
Now you’re ready to start browsing and saving your data to Elasticsearch!
Tweaking Kibana
To check if the data is working, activate Hunchly via the browser plugin and browse a few web pages so you have some initial data to work with.
Once you’ve done that. Go back to Kibana, choose settings (cog icon) and you’ll see the following options:

Choose “Index Management” from beneath the Elasticsearch option. If the index was successfully created, you’ll see it listed here. Click on hunchlydb and choose Mappings and you’ll be able to see that Elasticsearch has read the Hunchly JSON files and has automatically detected the structure. From now on all Hunchly activity you undertake will be indexed in this format. Below is a sample of the mappings to show the kind of data that Hunchly captures for each web page you visit:
{
  "mappings": {
    "_doc": {
      "properties": {
        "case_information": {
          "properties": {
            "Investigator": {
              "type": "text",
              "fields": {
                "keyword": {
                  "type": "keyword",
                  "ignore_above": 256
                }
              }
            },
            "case_id": {
              "type": "long"
            },
            "case_name": {
              "type": "text",
              "fields": {
                "keyword": {
                  "type": "keyword",
                  "ignore_above": 256
                }
              }
            },
            "case_reference": {
              "type": "text",
              "fields": {
                "keyword": {
                  "type": "keyword",
                  "ignore_above": 256
                }
              }
            }
          }
        },
        "data": {
          "properties": {
            "data": {
              "type": "text",
              "fields": {
                "keyword": {
                  "type": "keyword",
                  "ignore_above": 256
                }
              }
            },
            "data_extractor": {
              "type": "text",
              "fields": {
                "keyword": {
                  "type": "keyword",
                  "ignore_above": 256
                }
              }
            },
            "data_type": {
              "type": "text",
              "fields": {
                "keyword": {
                  "type": "keyword",
                  "ignore_above": 256
                }
              }
            }
          }
        },
        "javascript": {
          "type": "text",
          "fields": {
            "keyword": {
              "type": "keyword",
              "ignore_above": 256
            }
          }
        },
        "page": {
          "properties": {
            "case_id": {
              "type": "long"
            },
            "hash": {
              "type": "text",
              "fields": {
                "keyword": {
                  "type": "keyword",
                  "ignore_above": 256
                }
              }
            },
            "page_id": {
              "type": "long"
            },
            "timestamp_created": {
              "type": "date"
            },
            "timestamp_updated": {
              "type": "date"
            },
            "title": {
              "type": "text",
              "fields": {
                "keyword": {
                  "type": "keyword",
                  "ignore_above": 256
                }
              }
            },
            "url": {
              "type": "text",
              "fields": {
                "keyword": {
                  "type": "keyword",
                  "ignore_above": 256
                }
              }
            }
          }
        },
        "page_content": {
          "type": "text",
          "fields": {
            "keyword": {
              "type": "keyword",
              "ignore_above": 256
            }
          }
        },
        "photos": {
          "properties": {
            "exif": {
              "type": "object"
            },
            "photo_hash": {
              "type": "text",
              "fields": {
                "keyword": {
                  "type": "keyword",
                  "ignore_above": 256
                }
              }
            },
            "photo_url": {
              "type": "text",
              "fields": {
                "keyword": {
                  "type": "keyword",
                  "ignore_above": 256
                }
              }
            }
          }
        }
      }
    }
  }
}
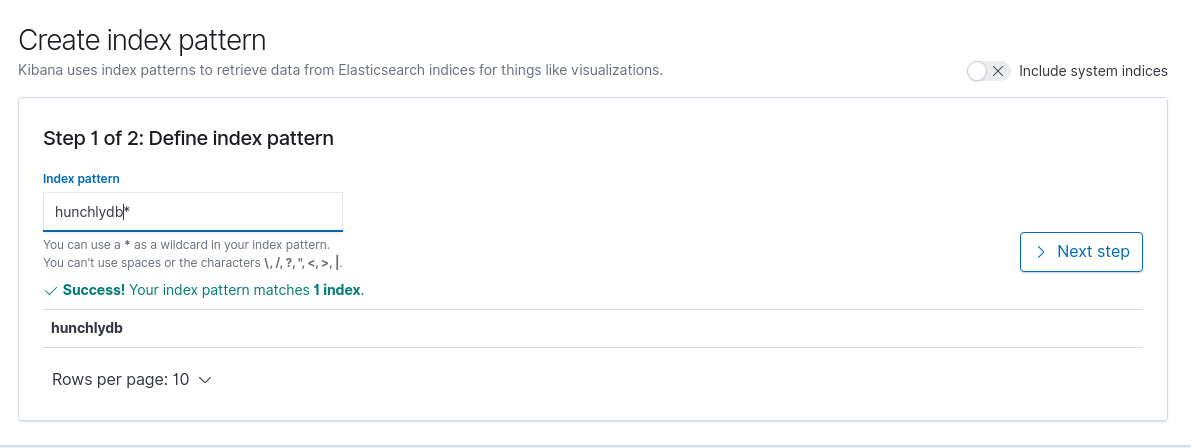
There’s just one more thing to do before we can start using Kibana properly. We need to tell Kibana which index pattern we want it to use for managing our data. Back on the Settings page, click on Index Patterns underneath the Kibana heading. Next click on Create Index Pattern and enter hunchlydb as the name. Kibana confirms it has found the index we just created in Elasticsearch:
The next screen will ask you which field in all the Hunchly data should be used for timestamp information. Choosing the page.timestamp_created option will mean that Kibana uses this as its main reference point for date/time when organising your data. This particular timestamp is generated by Hunchly when you visit a webpage during the course of your OSINT investigation.
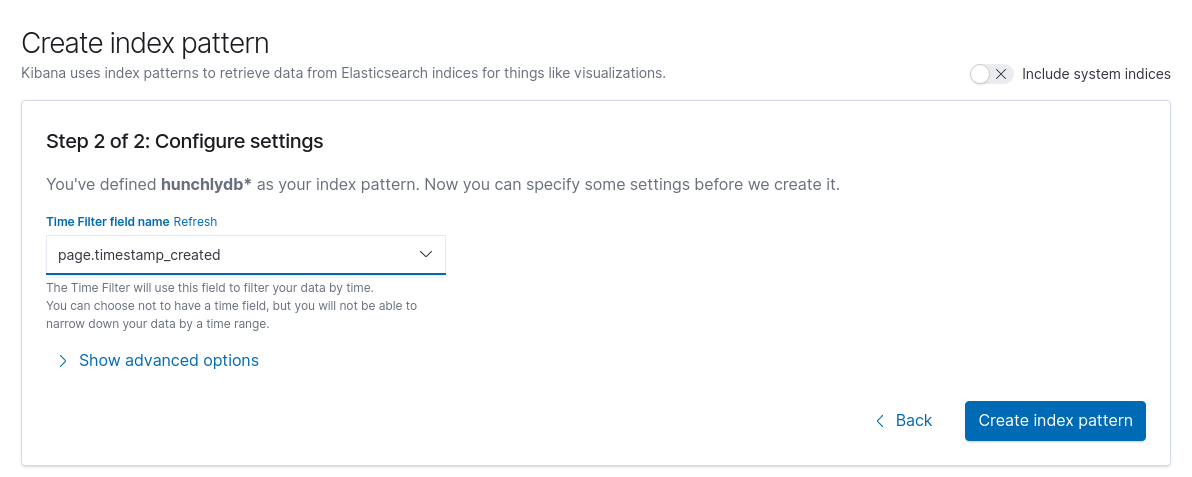
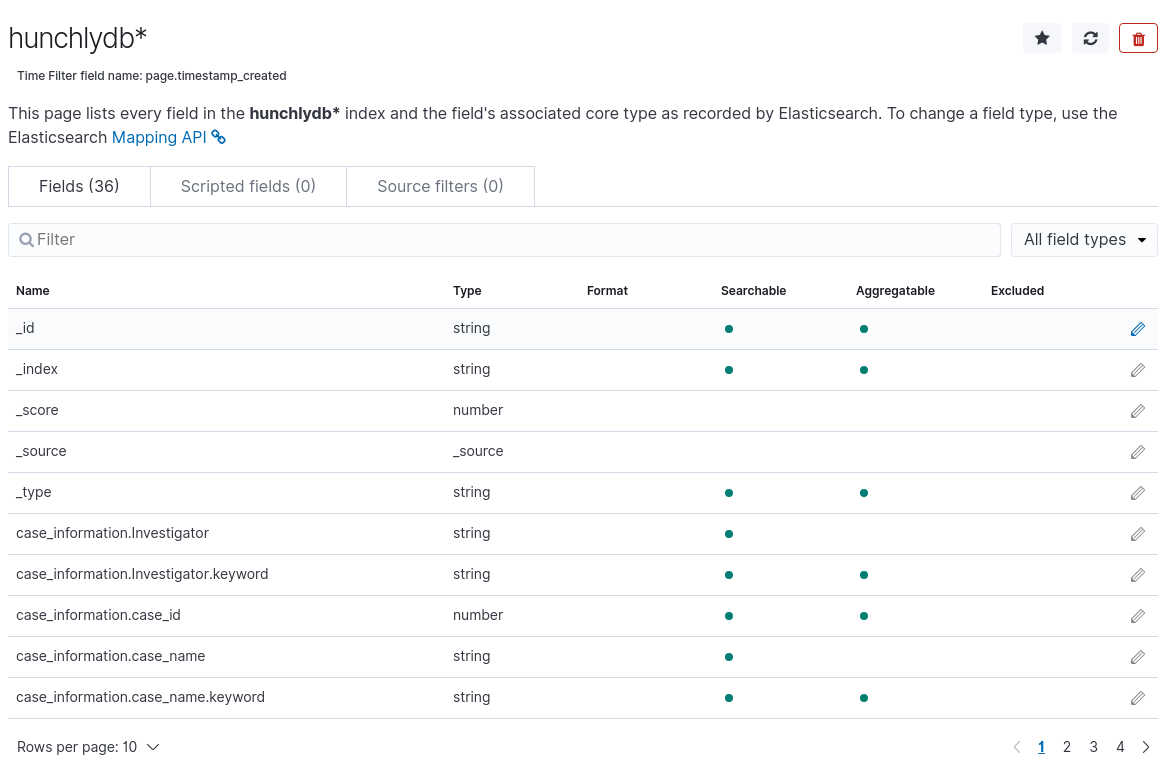
Next Kibana will confirm that it has found all the necessary data fields it needs to organise your Hunchly work. There’s no need to do any additional manual modification at this point:
You’re finally ready to start working with your Hunchly data! From the main Kibana dashboard, choose Discover (compass icon), select hunchlydb as your index, and be sure to choose the correct time parameter from the drop-down menu in the top right corner. The default is only to show results from the last 15 minutes so if you don’t see any data, this is usually the best place to check first.
Here’s a sample of data from three webpages I visited for the purposes of writing this blog post:
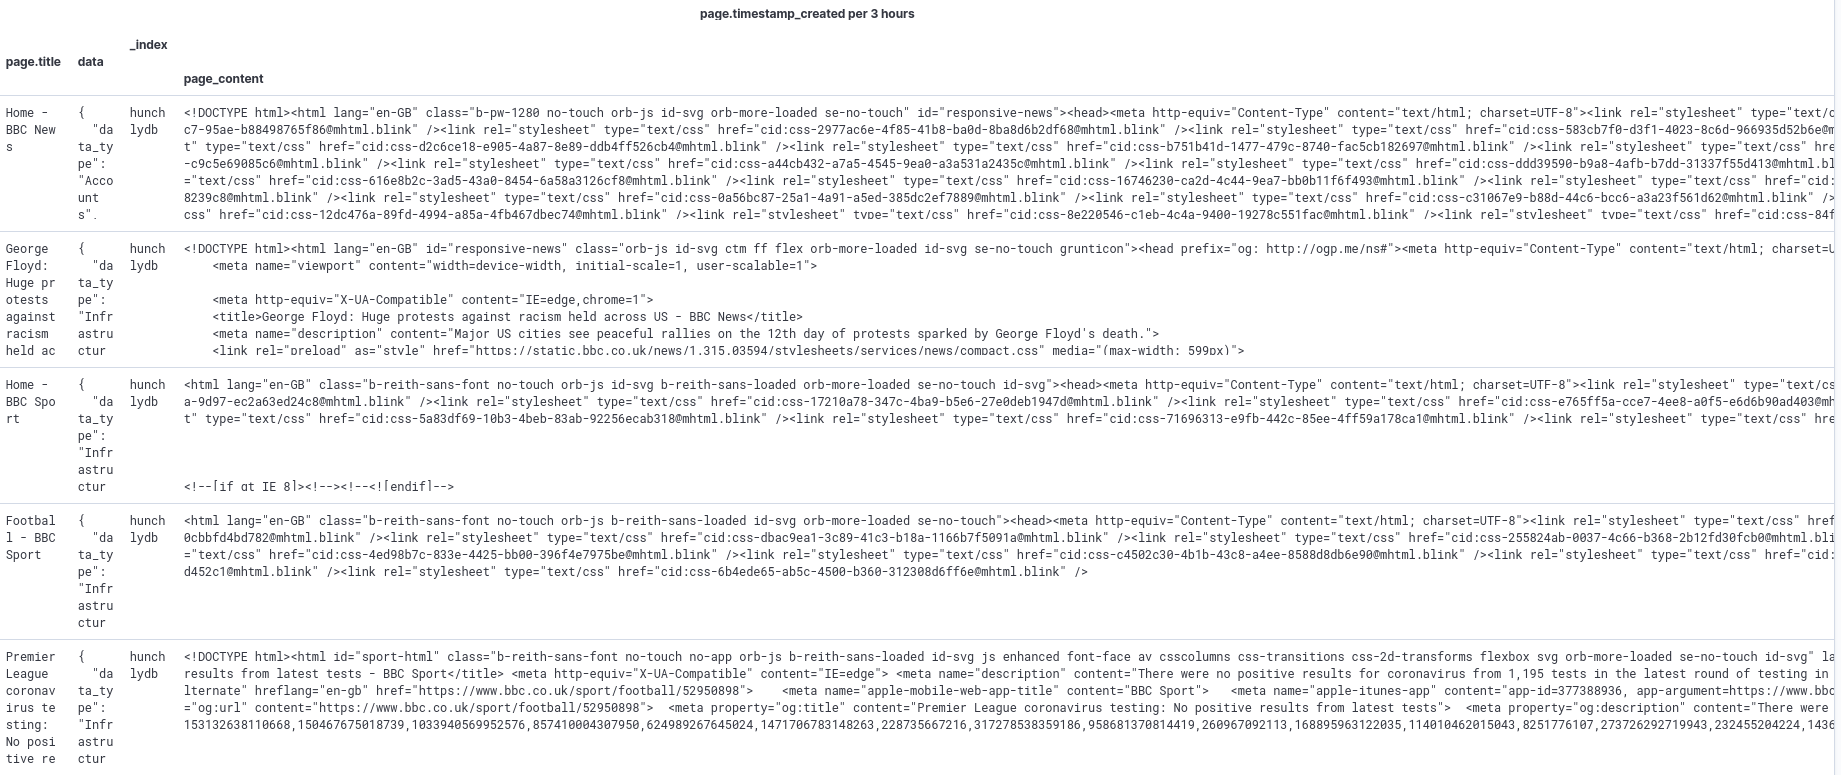
You’ll notice that Hunchly imports all the HTML content of a webpage into Elasticsearch, which means that all this content is indexed and becomes searchable. In the example above I’ve only enabled a few fields (page.title, data, _index and page_content) but there are many more to choose from. Fields can be enabled or removed from the menu on the left:

If you got this far then you’re all set up for working with Elasticsearch and Hunchly! From now on all your Hunchly activity will be exported into the database you’ve just created so you can begin to explore it as you need. You can make your own reporting dashboard, visualise your Hunchly data, and even make your own infographics and presentations with Canvas.
I am in no way associated to Hunchly. This article was written completely independently from Hunchly and I receive no benefit or reward for writing it.