The last post in this guide looked at how to install some useful OSINT programs for Linux directly from the internet. In this post I’ll show how to install some of the many popular Python-based OSINT tools that are available. It’s easy to feel intimidated by using the command line, but by the end of this guide it’ll be clear what pip, git, and Python are all about. Python is brilliant for carrying out a large number of repetitive tasks and sorting through data quickly. These tools can’t make your investigative decisions for you, but they can crawl the web and pull back data very quickly, certainly much faster than most browser-based tools will.
In this guide I’ll go through the installation of reconaissance tool theHarvester step-by-step from the absolute basics all the way through to launching it with a custom alias. Then I’ll explain how to install recon tools like Photon, Sublist3r, and Gasmask, username search tool Sherlock, scraping tools for Twitter (Twint) and Instagram (Instalooter), phone number searcher PhoneInfoga, and password breach checker h8mail. It might seem like a lot now, but once you understand how these programs work, you’ll be cloning them from Github and using them for your research like there’s no tomorrow.
Getting Started With Installation – Basics
These programs don’t usually come with a nice shiny user interface like some of the programs you install from the Ubuntu Software Centre. This can make them seem complicated and installing them can cause a lot of frustration, but by the end of this guide you’ll know your Pip from your Git and be able to install a wide range of powerful OSINT tools. The guide is intended for people who are fairly new to Linux, so I’ll try and cover everything from the very beginning.
In the DIY-Buscador Ubuntu machine, open up the terminal by pressing Ctrl+Alt+T. You’ll see something like this:
If you’ve never used a terminal before, don’t worry! The computer doesn’t care whether the instructions came from a shiny GUI that you clicked on or whether you typed the command into the terminal directly. For example in this previous post I showed how to install Stegosuite by finding it in the Ubuntu Store, clicking on “install” and entering my admin password to give it permission to run.
In the terminal the exact same thing can be done by typing the following command:
sudo apt install stegosuitesudo prompts me to enter my admin password and confirm that the program is authorised to run. Apt is simply the program that Ubuntu uses to manage software packages, so adding ‘install’ tells apt what I want it to do, and stegosuite tells apt which one of the thousands of available Ubuntu packages I want to install on my system. So it’s pretty obvious what this command would do:
sudo apt remove stegosuiteAnd stegosuite would be uninstalled, just like that. Notice that if you try to use apt without sudo, Linux won’t let you. If you’re not authorised, you aren’t allowed to modify the software or any part of the operating system. (On some older tutorials you might see “apt-get” instead of “apt”, but they do the same thing.)
Getting Git
Using sudo apt install programname works well for programs that are listed in the Ubuntu repository – but none of the OSINT Python tools we want to install are listed there. They’re all available on GitHub, so to get them installed on the OSINT machine it’s necessary to use a program called git. A few of the tools can also be installed using another program called Pip, but I’ll get to that shortly.
Git is a complex tool used by developers for version control of their software, but for the purposes of this guide it’s only necessary to know that Git allows you to clone software directly from GitHub onto your computer.
In the console, check to see what version of git is installed in Ubuntu by entering the following command:
git --versionYou’ll be told that git is not installed! It isn’t part of Ubuntu by default, so quickly add it into your OSINT build with:
sudo apt install gitPress Y when prompted and git will install in a few moments.
Pip and Python
As of Ubuntu version 20.04, Python 2.7 is no longer installed in Ubuntu by default. The new default version is Python 3. To check this in the console type:
python3 --version
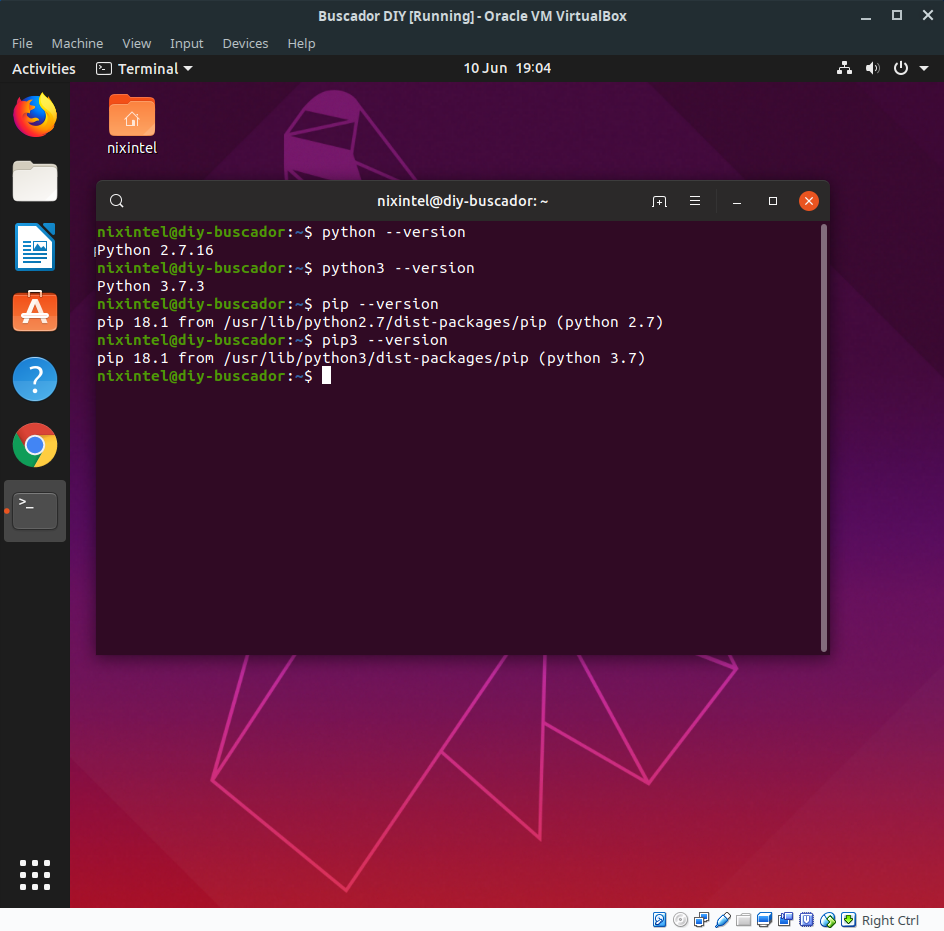
The screenshot above is from Ubuntu 19.04, which did include Python 2. The latest and all future versions of Ubuntu will not include Python 2.
Install With Pip
Pip is a package manager for Python. It ensures that when you’re installing a Python program, all the necessary libraries and modules will be installed too. Usually these requirements are listed in a text file called requirements.txt, so installing all the necessary addons is usually as simple as:
sudo pip3 install -r requirements.txtThe other great thing about pip3 is that it allows you to install some Python programs with one simple command. This is much cleaner and easier than building software from GitHub. I’ll show how to install Twint this way later on.
So for best practice, use the following guidelines:
1. If you have the choice to use pip to install directly (e.g. as with h8mail or Twint), use pip.
2. If not, use git.
3. If the program uses Python 3 (i.e. most of them) use python3 and pip3 in the console
4. Most tutorials often assume you’re running as root, i.e. with sudo and don’t explicitly mention it. In this build, it will always be necessary to put sudo in front of any pip or pip3 commands.
Installing theHarvester
It’s always easier to learn by doing rather than just reading so I’m going to demonstrate how to install theHarvester. theHarvester is an established tool that is used to find out about a particular domain. It will pull back e-mail addresses, PGP keys, IP addresses and other information about the domain you’re investigating.
theHarvester Github page can be found here: https://github.com/laramies/theHarvester. This URL is important, so copy it from your browser’s navigation bar and keep it in the clipboard. Open the terminal with Ctrl + Alt + T and enter the following, you can just paste the URL you copied into the terminal with Ctrl+Shift+V (not just Ctrl+V like on the regular Desktop):
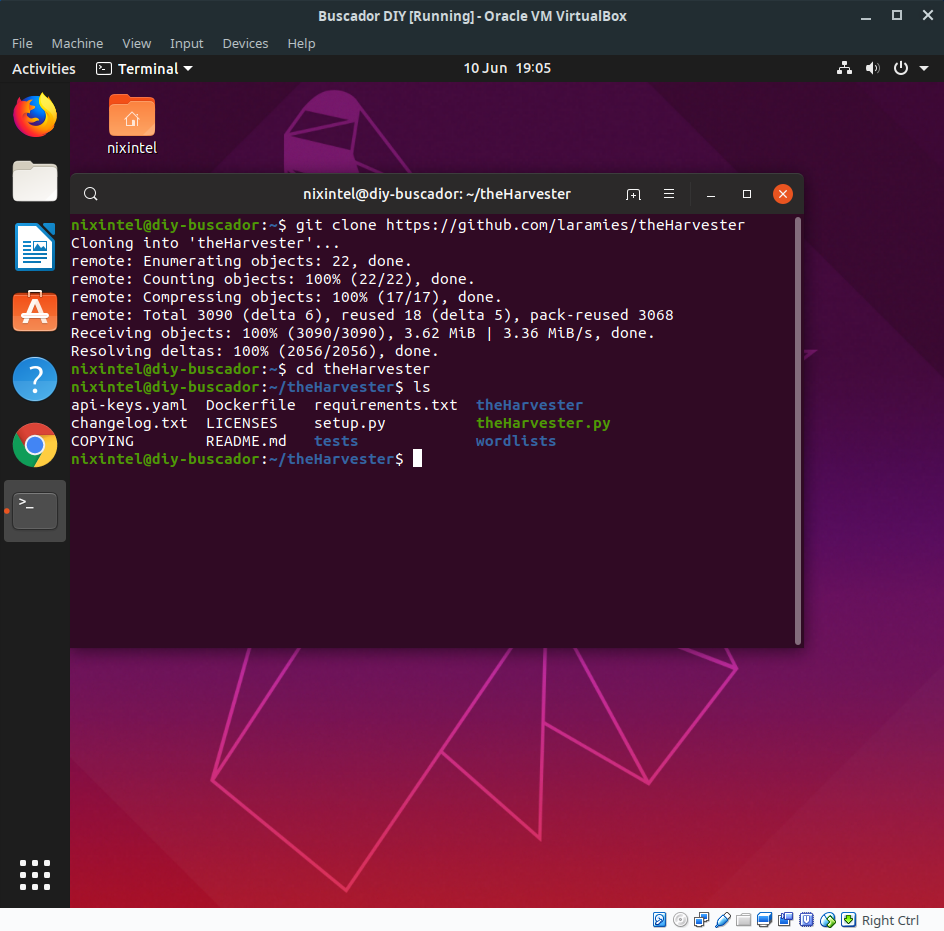
git clone https://github.com/laramies/theHarvesterNow git is cloning all those files posted on GitHub directly to a folder in your home directory called theHarvester. Once git has finished cloning, move to that directory by typing
cd theHarvester(note the terminal is case-sensitive)
cd simply means “change directory”. To list the contents of the directory, simply enter:
lsYou’ll see something like this:
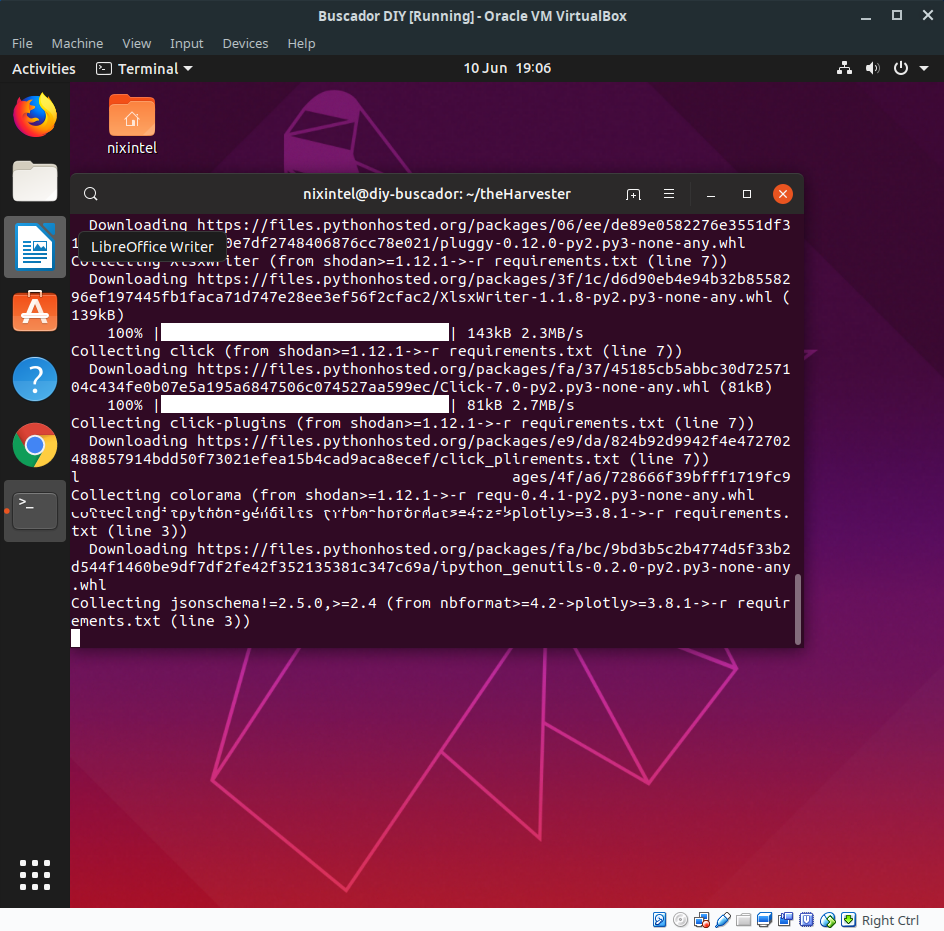
There’s a file in there called requirements.txt. Before we can run theHarvester, we need to install those Python library requirements with pip3. Enter the following in the console:
sudo pip3 install -r requirements.txtPip will then install the extra software that is needed:
Now it’s all done! To run theHarvester, stay in theHarvester directory and enter:
python3 theHarvester.py -hNotice if you’ve typed python and not python3 the program won’t run because it needs the newer version of Python. All this command is doing is telling python3 to run a script called theHarvester.py. The -h flag on the end tells the script to open the help guide for the program. If it’s working correctly you’ll see something like this:
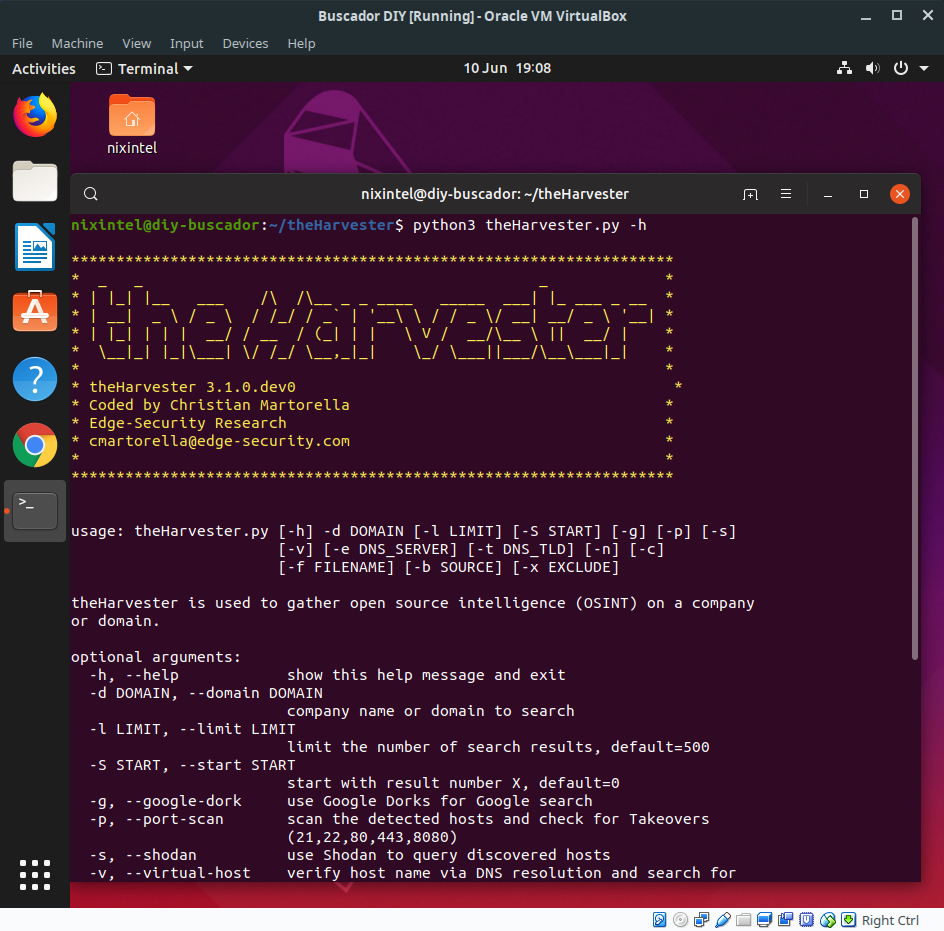
It’s beyond the scope of this article to explain how to use theHarvester, but there’s a simple introduction here and in many other places on the web.
This completes the installation of theHarvester – but there’s an customisation we can make to our OSINT build setup that will make using theHarvester just a little smoother.
theHarvester Alias Shortcut
Typing “python3 ~/theHarvester/theHarvester.py” before you start every single query gets a bit tiresome. Fortunately in Linux it is easy to customise everyting and so it’s possible to create a shortcut, known as an alias. This can be done by editing the .bashrc file that controls all your terminal settings.
Open the terminal with Ctrl+Alt+T again and enter
nano ~/.bashrcNano is just the terminal’s built-in text editor. This opens up the .bashrc file that needs to be edited. When it opens, scroll to the bottom and add the following lines:
#alias for theHarvester

alias theharvester='python3 ~/theHarvester/theHarvester.py'
Use Ctrl + X to exit, and Y when prompted to ask if you want to save the changes. Notice I made theharvester all lower case – it just makes typos less likely.

Now close the terminal, and then open a new one so the changes take effect. Now just type:
theharvester -hand theHarvester runs straight away. You can also run the command to launch queries directly e.g.
theharvester -d somerandomsite.org -b google -l 500That’s the basic formula for installing Python programs from GitHub. In the remainder of this article I’ll explain how to install a program with pip.
Installing Twint with Pip
Pip makes installing packages a lot easier, so for this example I’m going to show it can be used to install Twint. Twint is a really flexible Twitter scraper. It grabs all kinds of data from Twitter and exports it to a wide range of formats like csv or SQL. There’s a good introduction to Twint here.
The link to the Twint GitHub page is here.
Notice that unlike theHarvester, Twint can be installed with either Git or Pip, (or even by using a Python virtual environment, which is not within the scope of this guide). As per the rules of thumb I mentioned above, if given a choice between Git or Pip, always go with Pip. It’ll soon be clear just how much less complex this is.
In the terminal copy and paste the following:
sudo pip3 install --upgrade -e git+https://github.com/twintproject/twint.git@origin/master#egg=twintRemember to preface the command with sudo or you’ll have trouble running it. Once it’s completed, simply type
twint -hAnd you’ll see the program has installed correctly! It isn’t even necessary to create an alias, because Pip did this automatically during the installation. Example usage would be:
twint -u nixintel -o nixinteltweets.csv --csvThis would scrape all the Tweets from my Twitter account and save them to a csv file for further analysis.
Installing Other Python OSINT Programs
I’ve shown how to set up your custom OSINT machine for installing programs either with Git or directly with Pip. The rest of the guide will look at some other useful OSINT tools, what they do, the necessary commands to install them, and the entry needed in a .bashrc file to create an alias.
For the purposes of this article, I’ve installed all of these programs in my DIY-Buscador VM, so I’ll vouch for the fact that all of these methods currently work!
Instalooter
GitHub Page: https://github.com/althonos/InstaLooter
Scrapes content from a designated Instagram account. Requires IG login but no API key.
Git or Pip? Pip
Console command:
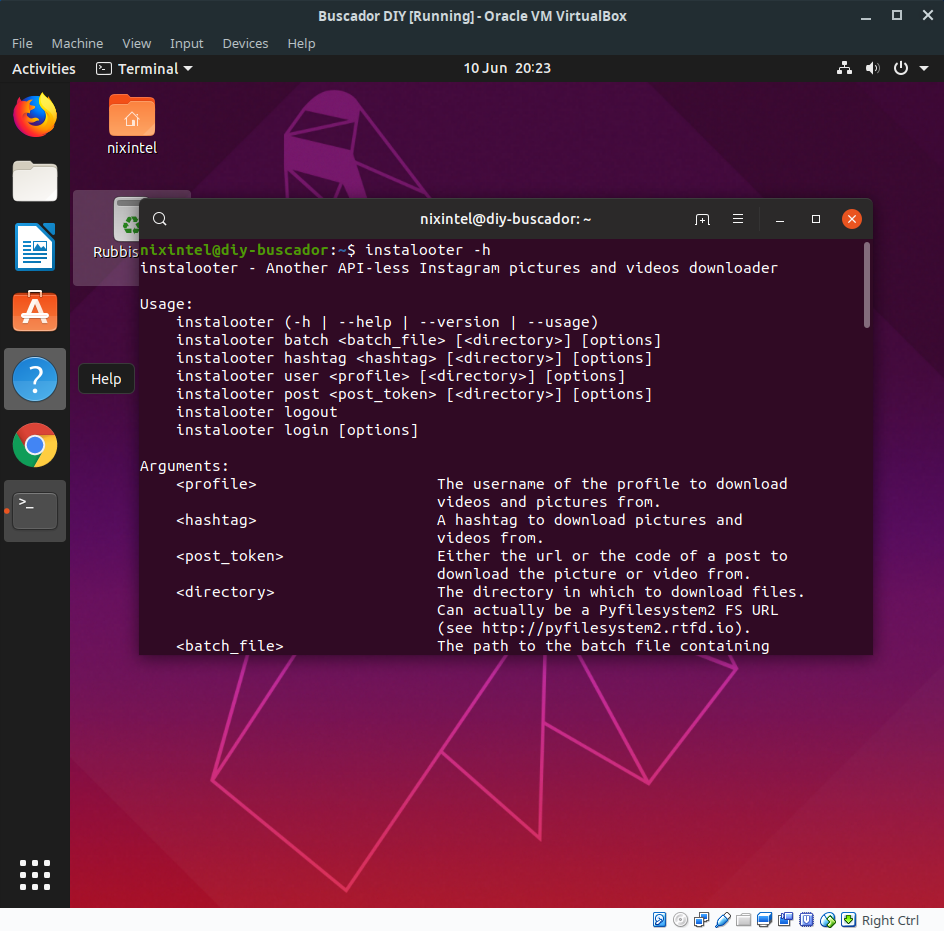
sudo pip3 install instaLooter (note upper-case L)Usage:
instalooter -h (note lower case L)Alias: Automatically instalooter by default
H8mail 2.0

GitHub Page: https://github.com/khast3x/h8mail
PyPi Page: https://pypi.org/project/h8mail/
H8mail checks e-mail addresses to see if their credentials have ever bene found in a breach. The real power of h8mail comes with its ability to query a 45GB breach compilation. This is available separately. You’ll need a lot of extra space in your VM if you want to fit this in.
Git or Pip: Pip
Console command:
sudo pip3 install h8mailUsage:
h8mail -hAlias: h8mail by default
Photon
GitHub page: https://github.com/s0md3v/Photon
Photon is a fast OSINT crawler. Point it at a domain to recover associated e-mail addresses, DNS info, subdomains, social media accounts, and other information.
Git or Pip: Git
Console commands:
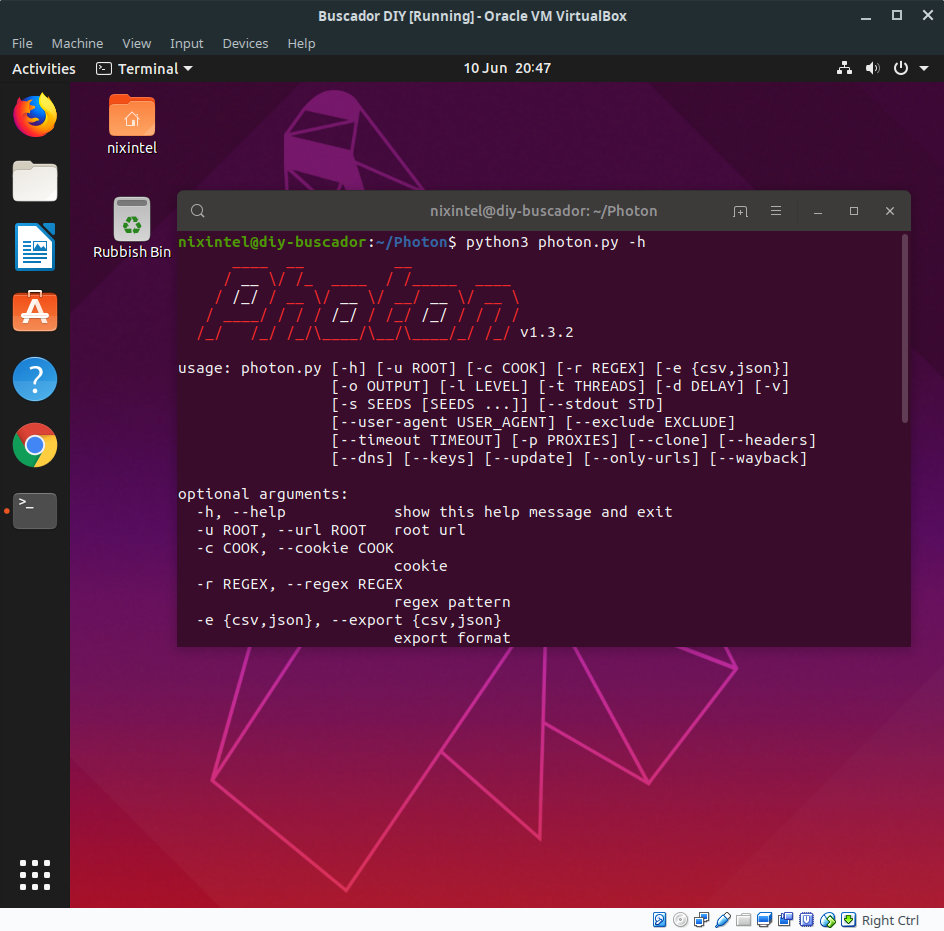
git clone https://github.com/s0md3v/Photon

cd Photon

sudo pip install -r requirements.txt

python3 photon.py -h
Alias:
alias photon='python3 ~/Photon/photon.py'Usage (with alias): photon -h
Sherlock
GitHub Page: https://github.com/sherlock-project/sherlock
Sherlock is a fast username searcher. I previously wrote a usage guide and review here.
Git or Pip? Git
Console command:
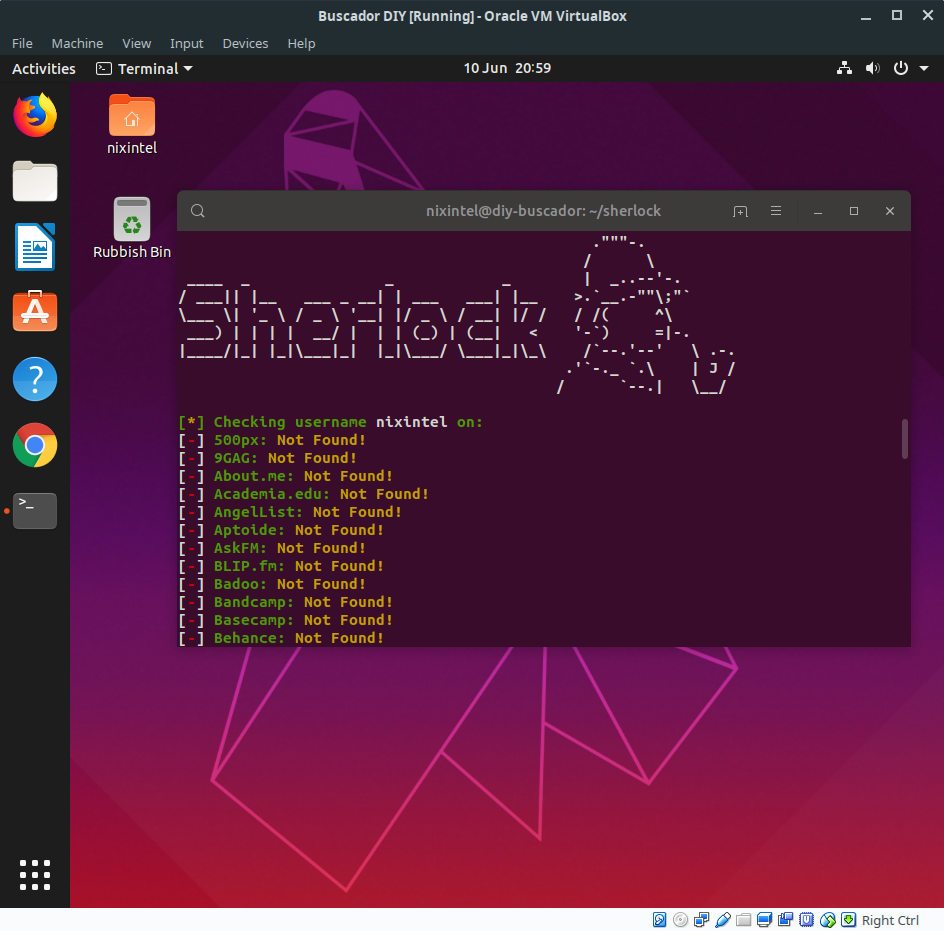
git clone https://github.com/sherlock-project/sherlock
cd sherlocksudo pip3 install -r requirements.txtpython3 sherlock.py -h
Alias:
alias sherlock='python3 ~/sherlock/sherlock.py'
Usage (with alias):
sherlock nixintel
Gasmask
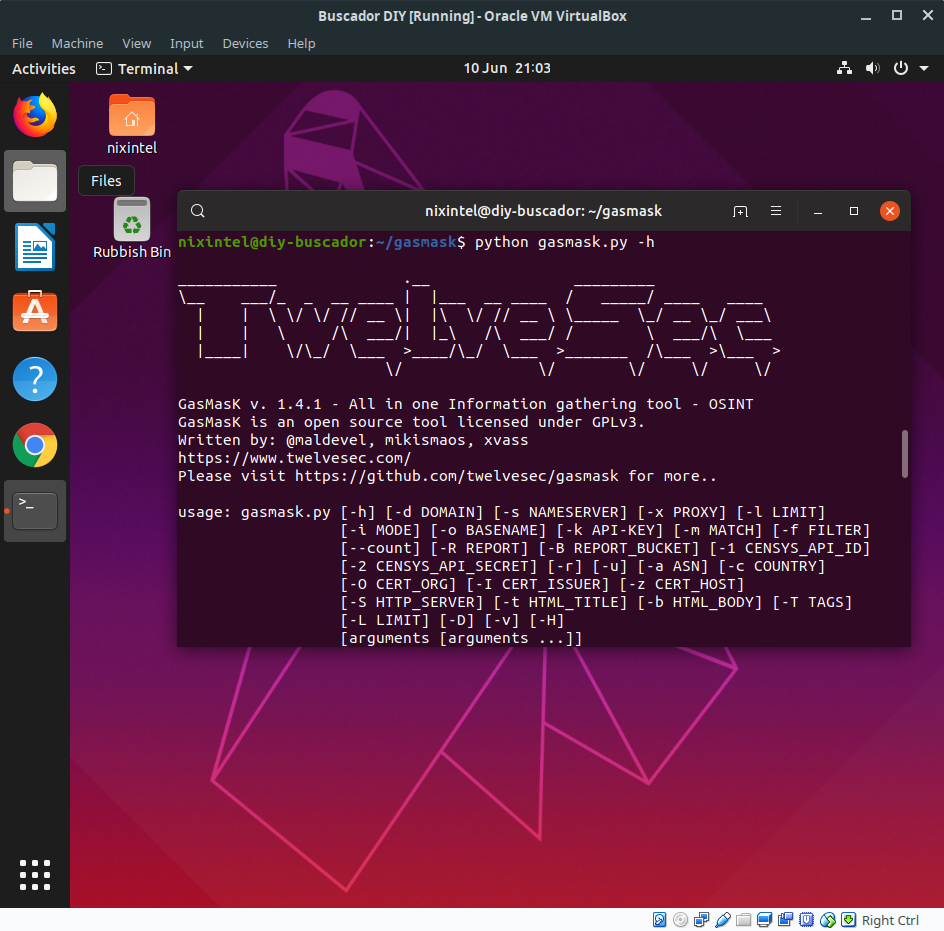
GitHub Page: https://github.com/twelvesec/gasmask
An auto reconnaissance tool similar to Photon or the Harvester. Note this program now runs with Python 3.
Git or Pip? Git
Console command:
git clone https://github.com/twelvesec/gasmask

cd gasmask

sudo pip3 install -r requirement.txt

python gasmask.py -hAlias:
alias gasmask='python3 ~/gasmask/gasmask.py'Usage (with alias):
gasmask -h
Sublist3r
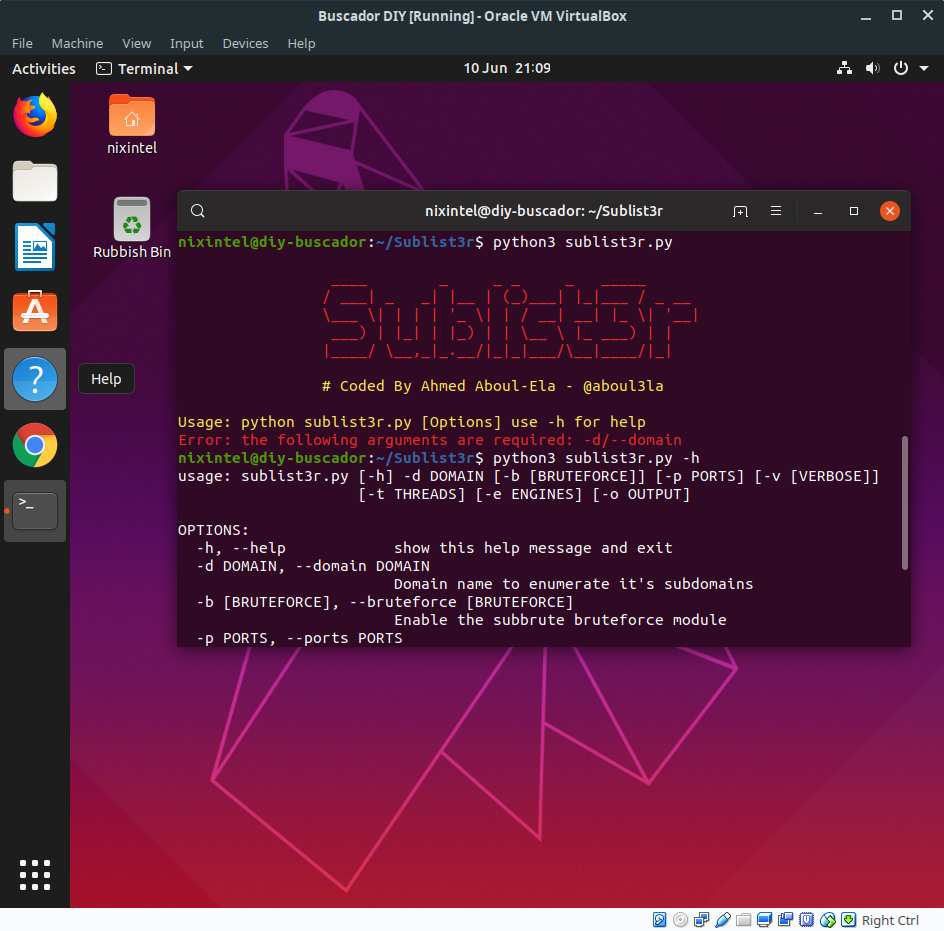
GitHub page: https://github.com/aboul3la/Sublist3r
A tool for identifying subdomains by querying the data held by search engines. Can bruteforce if necessary.
Git or Pip? Git
Console command:
git clone https://github.com/aboul3la/Sublist3r

cd Sublist3r

sudo pip3 install -r requirements.txt

python3 sublist3r.py -h
Alias:
alias sublister='python3 ~/Sublist3r/sublist3r.py'(note I dropped the 3, I made too many typos)
Usage (with alias):
sublister -h
PhoneInfoga
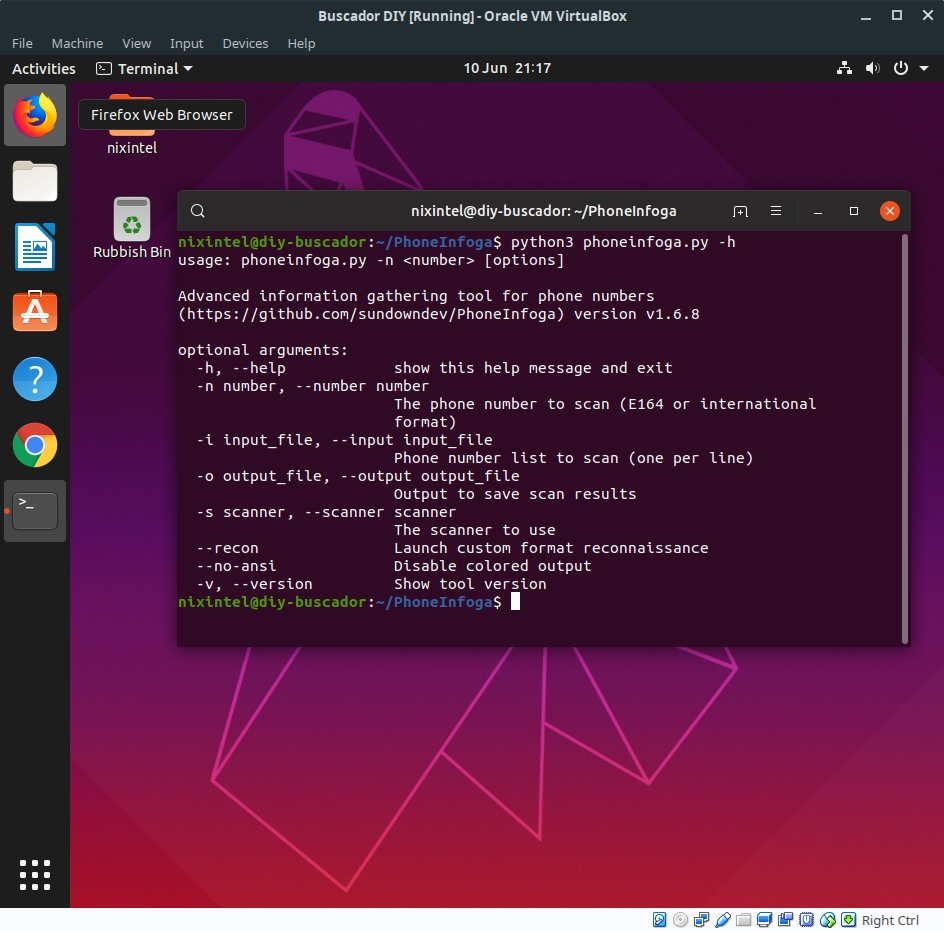
GitHub page: https://github.com/sundowndev/PhoneInfoga/
Crawls dozens of resources to conduct OSINT on a target phone number. Be sure to read the Wiki article on bypassing the Google Captcha before using it.
Git or Pip? Git
Console command:
git clone https://github.com/sundowndev/PhoneInfoga

cd PhoneInfoga

sudo pip3 install -r requirements.txt

python3 phoneinfoga.py -h
Alias: alias='python3 ~/PhoneInfoga/phoneinfoga.py'
Usage (with alias): phoneinfoga -h
That concludes this part of the guide to building your own custom OSINT Linux machine. If you had little Linux experience before and managed to get these programs installed and working then kudos to you because the command line can be an unforgiving place but as you can see it can be used to do some really powerful things.
The same method can be used to install other GitHub based tools like Skiptracer, Knock, Cloudflair, and many others. A few of these tools benefit from the addition of API keys, but that’s really for a separate post. This guide and the ones before it should make it clear just how simple it can be to create your own custom OSINT VM.
In the next post I’ll explain how to clone and backup your OSINT VM in case it breaks, how to transfer it to another computer, and how you can hash it if needed. After that I’ll also suggest some useful OSINT addons for Firefox and Chrome.
Part 5 of this series can be found here.
Hello,
The harvester is not loading, I have triple checked the Alias I get the following message
Errno 2 no such file or directory
Does this error only occur when you try to run Harvester with an alias? I.e. does it run if you run it directly from the Harvester directory itself e.g /home/user ~ $ python theHarvester.py -h ?
If it runs from the directory but not with the alias then the error is most likely because there is an issue with the file path or name. The command line is case sensitive so double check that the path in the alias is correct, including case sensitivity.
Hello,
Thanks will have a look. Just trying to sort out the geckodriver at the moment.
Thanks for the reply and the amazing website 🙂 I really want to improve and get in to OSINT. This is a create resource.
Also it says that permission is denied from access ‘docker’
docker pull sundowndev/phoneinfoga:latest
IN short I have managed to run PhoneInfoga, however after about 4 attempts of it working it is now showing the catcha (blocked).
I have installed geckodriver which seems to let me run recon scans but it believe
docker pull sundowndev/phoneinfoga:latest
will solve the issue fully.
So I managed to get back to it, and it is all working, I just started again and double checked everything.
Thanks for the help and the site.
PS glad to see your a Type O Negative fan \m/
I have version 18 of ubuntu
I have version 3.6.9 of python.
Everything else is working but everytime i try and use the code for Git or for pip3 it says command not found.
I cant access any of the programmes i need the most.
Thank you for your tutorial anyway, it is great, hopefully you can help me with this..
It sounds like you might still need to install git and pip.
To do so try:
sudo apt install git
sudo apt install python-pip (for Python 2.x)
sudo apt install python3-pip (for Python 3.x)
Try again once you’ve installed these and you should have a bit more luck.
Pingback: 如何制作自己的互联网存档 - iYouPort
Pingback: POWERFUL OSINT investigative Techniques and Tactics (2024)